33
Connection Status
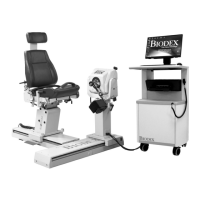
On the bottom of the Home screen, the “COM” information on the left identifies the COM port
that is talking to the hardware. The “Failed” or “Initialized” indicates the state the dynamometer
is in.
Introduction: New Software
You may be familiar with using Advantage Software 4.X on the System 4. The following are
some tips for how to use the new software, and the differences between the Biodex Advantage
BX 5.X and Advantage 4.X Software.
Tips for Using Biodex Advantage BX™ Software
1. The screens progress based on the selection (not menu-driven). The program is designed so
you can stay at a high level and enter basic information, or enter more specific patient
information for developing specific patient type normative data.
2. Activity-based, not based on test or exercise. ACTIVITY TRAINING REPORTS Utilities
a) Activity = Test or exercise using a protocol
b) Training = Biofeedback (not protocol-based)
3. Set-up videos are available via YouTube: https://www.biodex.com/videos/mjs-setup
4. Patient name is not required at the beginning; you will be asked again for the patient name
before a test can be saved.
5. When you have started an Activity, and want to create a new protocol, press
6. New Activity Quick Start provides a list of Frequent Activities that builds as the system is
used. Activities can be “pinned” so they appear at the top of the list for quick selection.
7. Look for the “Settings” button on screens, where relevant options that pertain to that
screen can be selected. Example: On the ROM Set-up screen, settings provides the choice to
always display the opportunity to weigh the limb for gravity correction. Note that even if
weigh limb is presented, it does not have to be completed. The report screen settings allow
you to select windowed or filtered data.
8. Practice reps: There is a setting to provide a choice of practice reps. When a button
displays for practice reps, if selected (4) practice reps will be provided. If no practice rep
button, then as many reps as the patient wants to complete are allowed, until no movement
is detected and the limb is in the start position.
9. Start position for all modes is always in towards position. When no movement is
detected for (3 seconds) the activity can begin. If movement is detected, countdown starts
again.