17
Stabilization Handles: Located on the side receiving tubes, these handles can be used by the
patient for added support, stabilization, and consistent hand positioning during test, exercise,
and rehabilitation sessions. These stabilization handles are also convenient for the clinician as
a means to pull or push the chair fore or aft on the T-base.
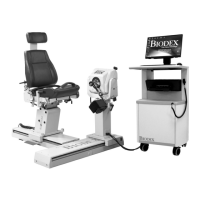
Figure 2.3. Positioning Chair Attachments:
1. T-Bar Adapter
2. Footrest
3. Limb-Support Pad
Seat Back Brace
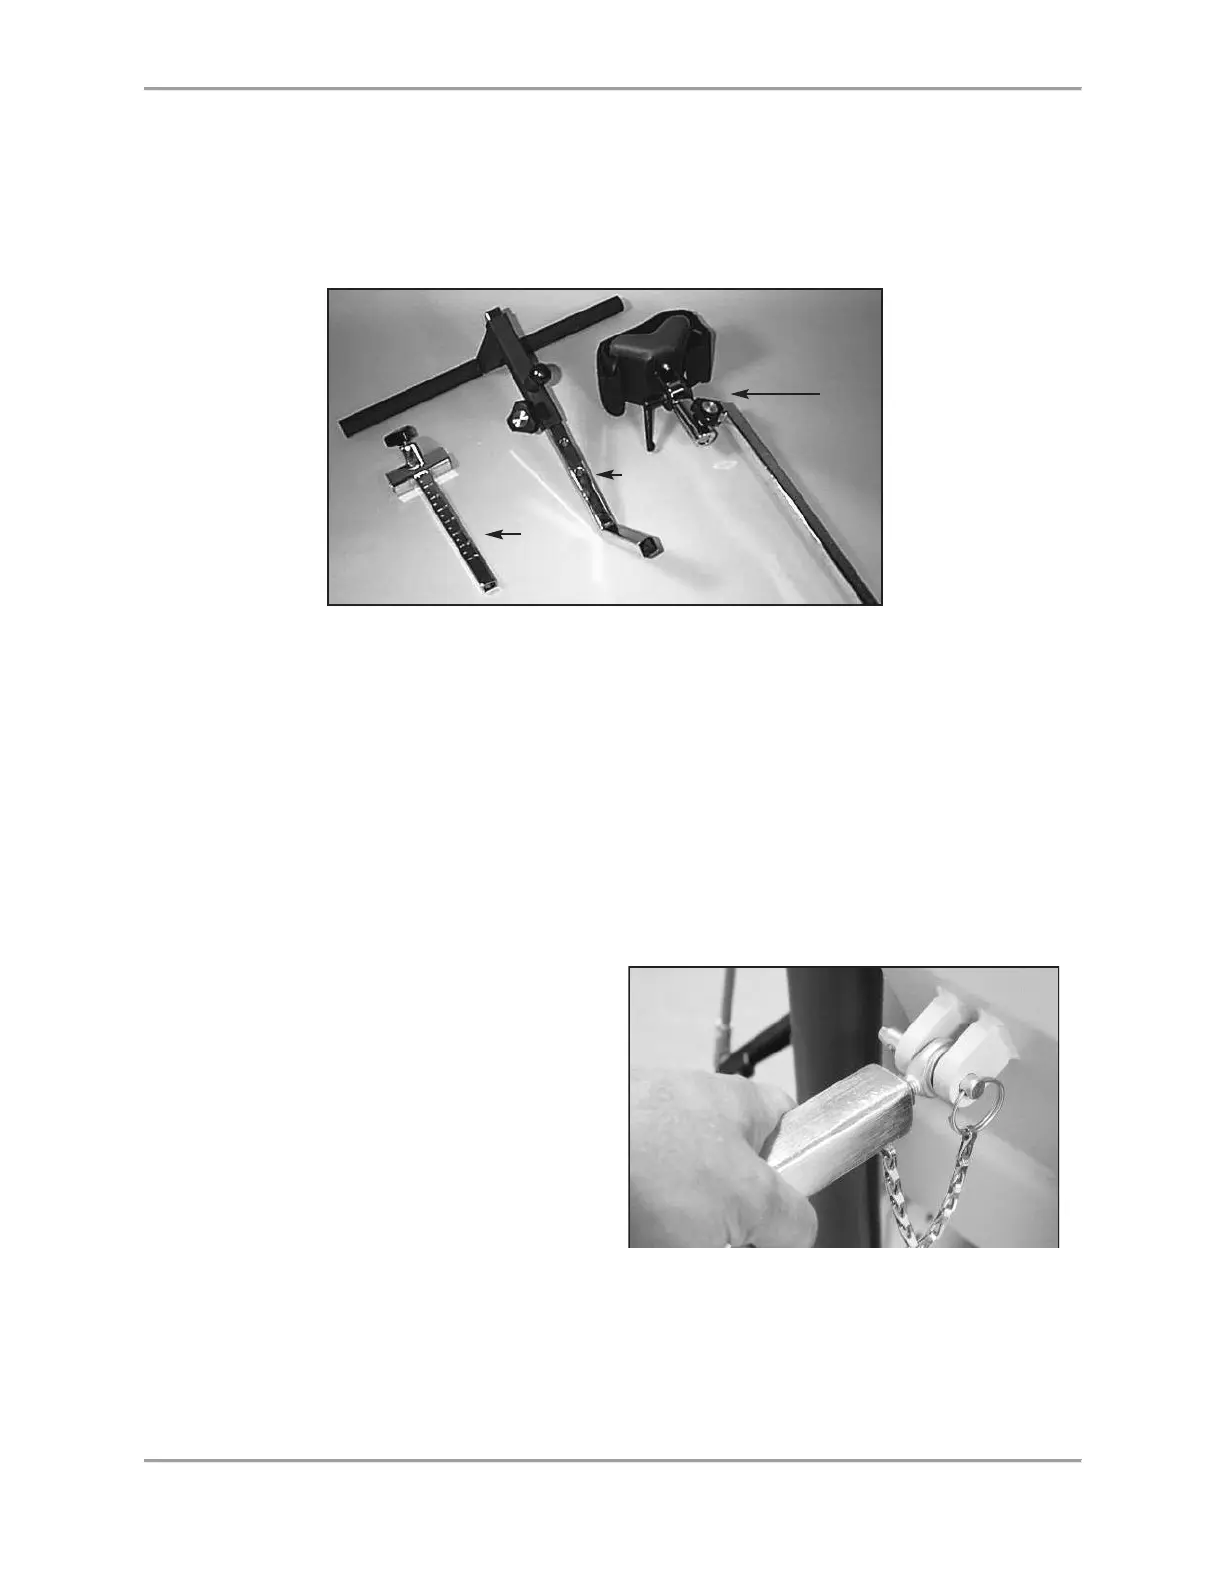
The Seat Back Brace is designed to provide added stability when the seat back is used in a
lowered position at zero degrees seat rotation for side lying, supine and prone patterns
(particularly of the hip). The Seat Back Brace is adjustable and simple to use. Once installed, set-
up takes only seconds.
1. Ensure the seat back is in the up
position. Rotate the seat to 0 degrees
on either side of the seat rotation scale.
2. Line up one rod-end swivel of the Seat
Back Brace with the clevis on the seat
back and
insert the clevis pin.
3. Release the Seat Back Handle and lower
the seat back to “10” on the seat back
tilt scale.
Figure 2.4. Attaching the Seat Back Brace to the System 4 Seat Back Clevis.