41
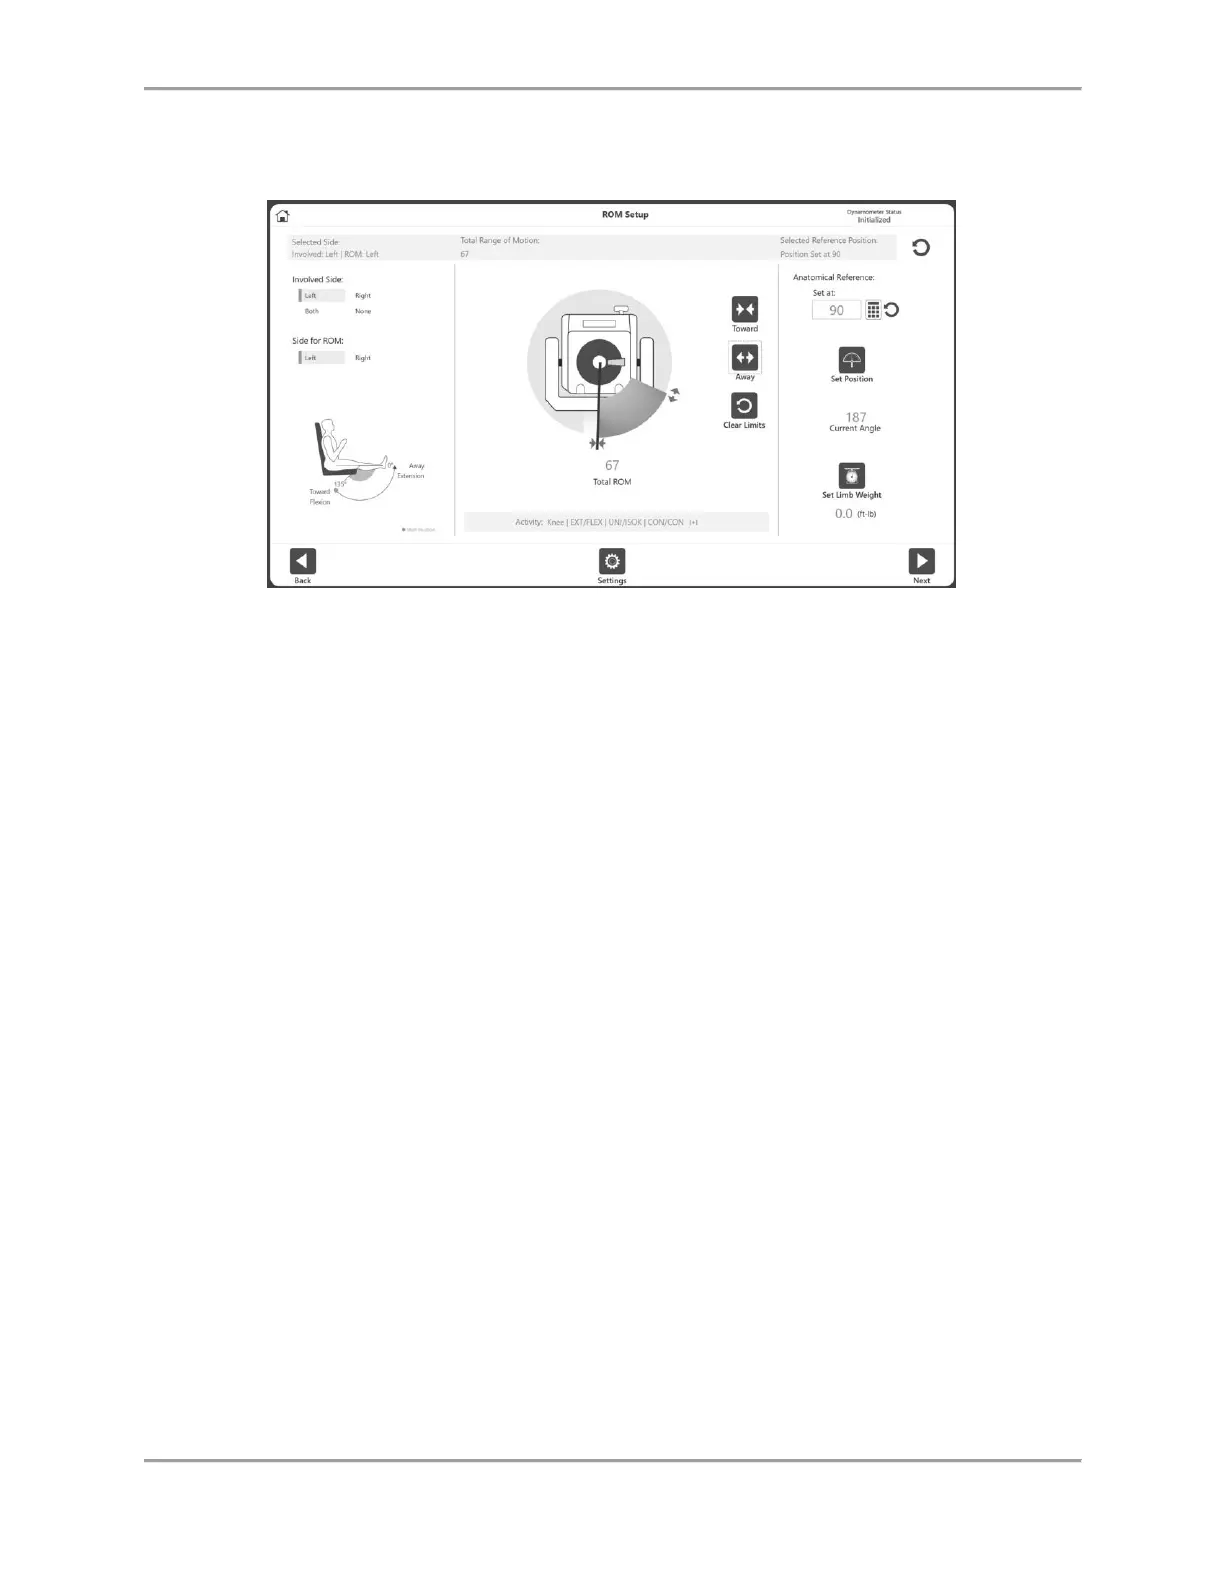
3. Position the dynamometer attachment to the Towards position and select the Toward
icon to record the position. Arrows will display at the selected Toward limit.
4. Position the dynamometer attachment to the Away position and select the Away button
to record the position. Arrows will display at the Away limit and the ROM will be shaded
in. To start over, select the Clear Limits icon.
NOTE: It is recommended to set the Toward limit first, and then the Away limit. If the
order is reversed, you will still be able to select the Set Position icon and progress to an
activity.
NOTE: You can either set the ROM limits and then set the position, or you can set the
position first (current angle) and then set the ROM limits according to the current angle.
NOTE: The Settings icon offers selections relevant to that particular screen.
5. Select the Set Position icon.
NOTE: The Anatomical Reference refers to the starting position of the joint and will
change based on the joint selected. This value can also be edited if needed.
6. Select the Next icon to begin your activity.