Fa
THE AUTOMATIC TRANSMISSION
A6832
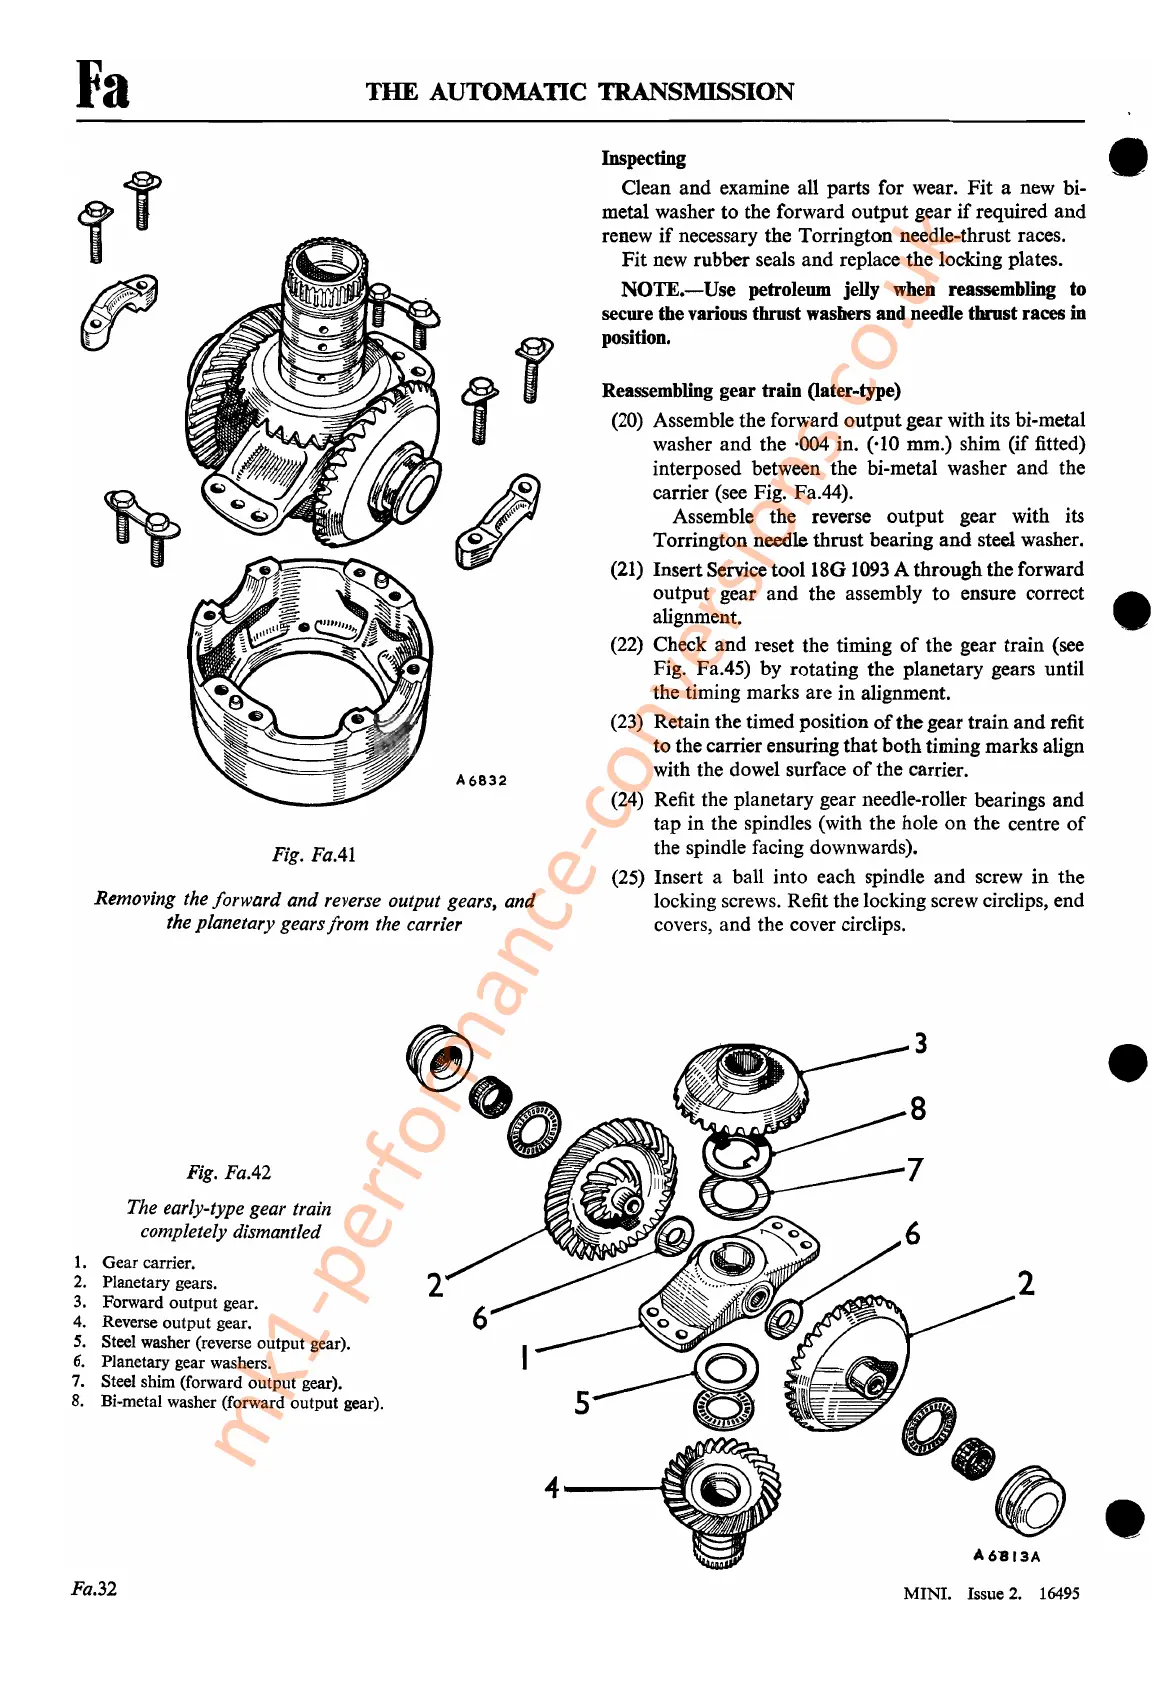
Fig.
FaAl
Removing the forward and reverse output gears, and
the planetary gears
from
the carrier
Inspecting •
Clean
and
examine all
parts
for wear.
Fit
a new bi-
metal washer
to
the
forward
output
gear
if
required
and
renew
if
necessary
the
Torrington
needle-thrust races.
Fit
new
rubber
seals
and
replace
the
locking plates.
NOTE.-Use
petroleum jelly when reassembling
to
secure the various thrust washers and needle thrust races in
position.
Reassembling gear train (later-type)
(20) Assemble the forward
output
gear with its hi-metal
washer
and
the
·004 in. (,10 mm.) shim (if fitted)
interposed between
the
bi-metal washer
and
the
carrier (see Fig. Fa.44).
Assemble
the
reverse
output
gear
with its
Torrington
needle
thrust
bearing
and
steel washer.
(21)
Insert
Service
tool18G
1093
A
through
the
forward
output
gear
and
the
assembly
to
ensure correct •
alignment. ,
(22) Check
and
reset the timing
of
the
gear
train
(see
Fig. FaA5)
by
rotating
the
planetary gears until
the
timing
marks
are
in
alignment.
(23) Retain the timed position
of
the
gear
train
and
refit
to
the
carrier ensuring
that
both
timing
marks
align
with the dowel surface
of
the
carrier.
(24) Refit the planetary gear needle-roller bearings
and
tap
in
the spindles (with the hole
on
the
centre
of
the spindle facing downwards).
(25) Insert a ball
into
each spindle
and
screw
in
the
locking screws. Refit the locking screw circlips,
end
covers,
and
the cover circ1ips.
Fig. Fa.42
The early-type gear train
completely dismantled
1.
Gear
carrier.
2. Planetary gears.
3. Forward
output
gear.
4. Reverse
output
gear.
5.
Steel washer (reverse output gear).
6. Planetary gear washers.
7. Steel shim (forward
output
gear).
8.
Bi-metal washer (forward output gear).
Fa.
32
2
4
----1,;;;:2
3
8
2
A6'813A
MINI.
Issue 2. 16495
•
•
mk1-performance-conversions.co.uk



 To Next Page