H
THE
REAR SUSPENSION
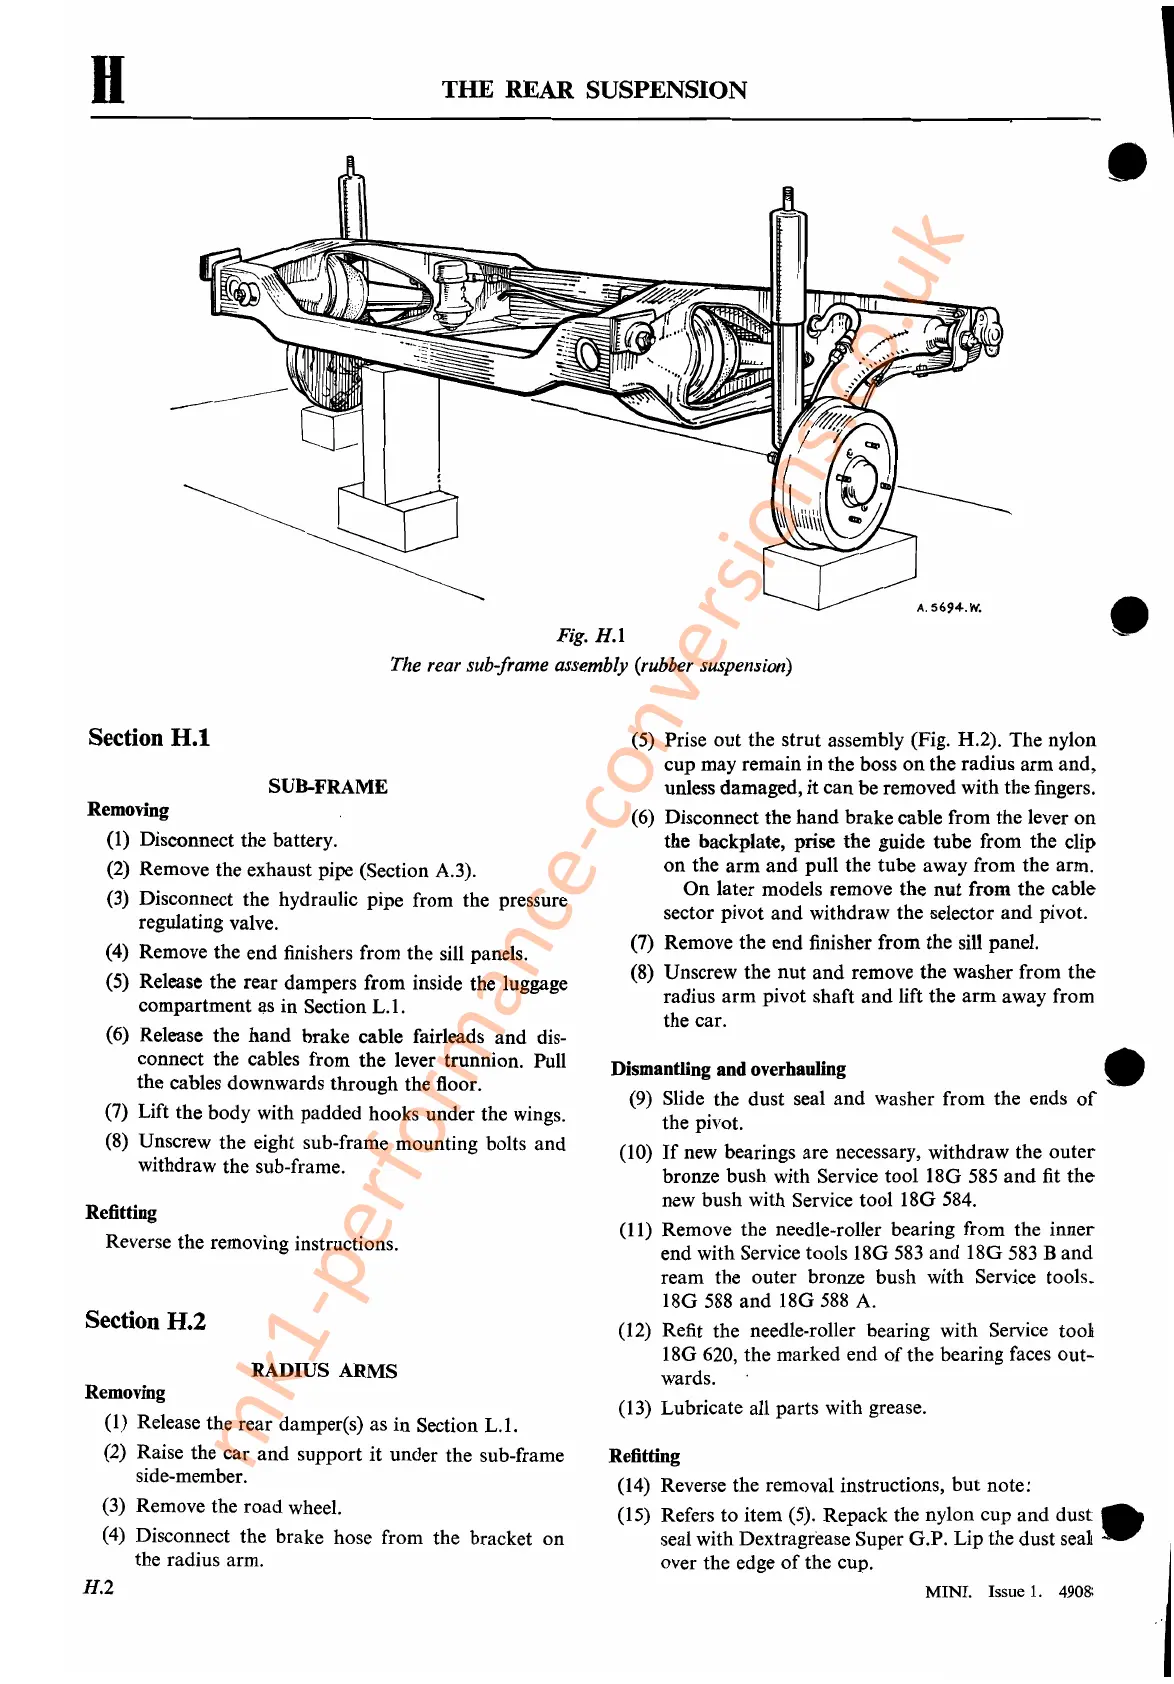
Fig.
H.l
The rear sub-frame assembly (rubber suspension)
•
•
Section
H.t
SUB-FRAME
Removing
(1)
Disconnect the battery.
(2)
Remove the exhaust pipe (Section A.3).
(3)
Disconnect the hydraulic pipe from the pressure
regulating valve.
(4)
Remove the end finishers from the sill panels.
(5) Release the rear dampers from inside the luggage
compartment
as in Section
L.l.
(6)
Release the hand brake cable fairleads and dis-
connect the cables from the lever trunnion. Pull
the cables downwards through the floor.
(7)
Lift the body with padded hooks under the wings.
(8)
Unscrew the eight sub-frame mounting bolts and
withdraw the sub-frame.
Refitting
Reverse the removing instructions.
Section
H.2
RADIUS ARMS
Removing
(1)
Release the rear damper(s) as in Section
L.t.
(2) Raise the car and support it under the sub-frame
side-member.
(3)
Remove the road wheel.
(4)
Disconnect the brake hose from the bracket on
the radius arm.
H.2
(5)
Prise
out
the strut assembly (Fig. H.2). The nylon
cup may remain in the boss on the radius arm and,
unless damaged,
it
can be removed with the fingers.
(6)
Disconnect the hand brake cable from the lever on
the backplate, prise the guide tube from the clip
on the arm and pull the tube away from the arm.
On
later models remove the
nut
from the cable
sector pivot and withdraw the selector and pivot.
(7)
Remove the end finisher from the silt panel.
(8)
Unscrew the
nut
and remove the washer from
the
radius arm pivot shaft and lift the arm away from
the car.
Dismantling and overhauling •
(9)
Slide the dust seal and washer from the ends
of
the pivot.
(10)
If
new bearings are necessary, withdraw the outer
bronze bush with Service tool 18G
585
and fit
the
new bush with Service tool 18G
584.
(11)
Remove the needle-roller bearing from the inner
end with Service tools 18G
583
and 18G
583
Band
ream the outer bronze bush with Service tools.
18G
588
and 18G
588
A.
(12)
Refit the needle-roller bearing with Service
tool
18G 620, the marked end
of
the bearing faces
out-
wards.
(13) Lubricate all parts with grease.
Refitting
(14)
Reverse the removal instructions,
but
note:
(15) Refers to item (5). Repack the
nylo~
cup and
dust.
seal with Dextragrease Super G.P. LIp the dust seal
over the edge
of
the cup.
MINI. Issue
1.
4908:
mk1-performance-conversions.co.uk
 Loading...


