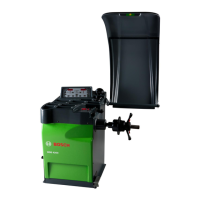
1 695 600 091 2012-11-16| Robert Bosch GmbH
40 | WBE 4200 | Menu navigationen
5. Menu navigation
We can divide the balancing machine menu in several
submenus:
$ Configuration of the use
$ Configuration of the board
$ Calibration
$ Auto-diagnosis
Access to the main menu is gained by pressing the
<MENU> key and, by keeping the <MENU> key pressed,
the various entries under the submenus are scrolled.
To confirm access to the menu, press the <USER> key
within 1.5 seconds.
5.1 Configuration of the use
Press the <MENU> key to the writing SET.
i You can access the sub-menu by releasing the
<MENU> key.
R <MENU> - SET
"Using <MENU>, you can surf the menu
"To exit press <SPLIT>.
Left display Right display Description
TOL
Current value
in grams /
ounces
Entry of balance weight value
below which the value "0" is to
be displayed.
Standard value 4.5 g (0,25 oz),
maximum value 25 g (1,25 oz)
RES 1 or 5 5 g / 0.25 oz - Standard
resolution
1 g / 0.05 oz - Fine resolution
UMB
GRA
OUN
GRA = Display in grams
OUN = Display in ounces
SND
ON
OFF
ON = An acoustic signal
sounds on storing the data
determined
OFF = No acoustic signal
sounds on storing the data
determined
CAR
ON
OFF
ON = Start of measurement
by closing wheel guard
OFF = Start of measurement
by pressing <
START> key
(with wheel guard
closed)
LAR
1)
0.50
0.25
0.50 = Entry of rim width in
0.5 inch increments
0.25 = Entry of rim width in
0.25 inch increments
ALU
P G
P 3, P 6, P12
R Positioning of adhesive
weight for ALU2, ALU3 and
PAX2:
$
Setting PG:
Attachment with Easyfit®;
$
Setting P3, P6 or
P12:
With manual vernier cali-
per or without tools:
Attachment in 12, 3 or 6
o'clock position.
R With all other programs and
for all adhesive weights the
balance weight must be
attached in the 12 o'clock
position.
ATA
ON
OFF
ON = activates the automatic
balancing program recognition
function.
OFF = does not activate the
automatic balancing program
recognition function.
1) Function only available with gauge arm for measuring rim width
fitted and activated.
NOTES FOR THE ASSISTANCE:
Here you are the settings belonging to the WBE 4200
version:
Left Display Right Display
TOL 5
RES 5
UNB GRA
SND On
CAR On
ALU PG
ATA On
Tab. 3: Settings for WBE 4200
5.2 Configuration of the board
To enter the use configuration menu, press <MENU>
until the notice TOL will appear on the left display and
after 1.5s max, press <OPERATOR>. Finally, in order
to change values use + and –. To confirm, press <RIM
DISTANCE>.
R <MENU> - SET - TOL
"Using <MENU>, you can surf the menu
"To exit press <SPLIT>.
Left display Right display Description
POT On
OFF
Turn on/off the internal
automatic gauge
ALU On
OFF
Turn on/off the gauge function
called “ALUDATA®”
FLA* On
OFF
Activate/Disactivate
measurement acquisition with
automatic calipers by pressing
the pneumatic flange pedal
PLR
1)
On
OFF
Turn on/off the width gauge

 Loading...