[]]
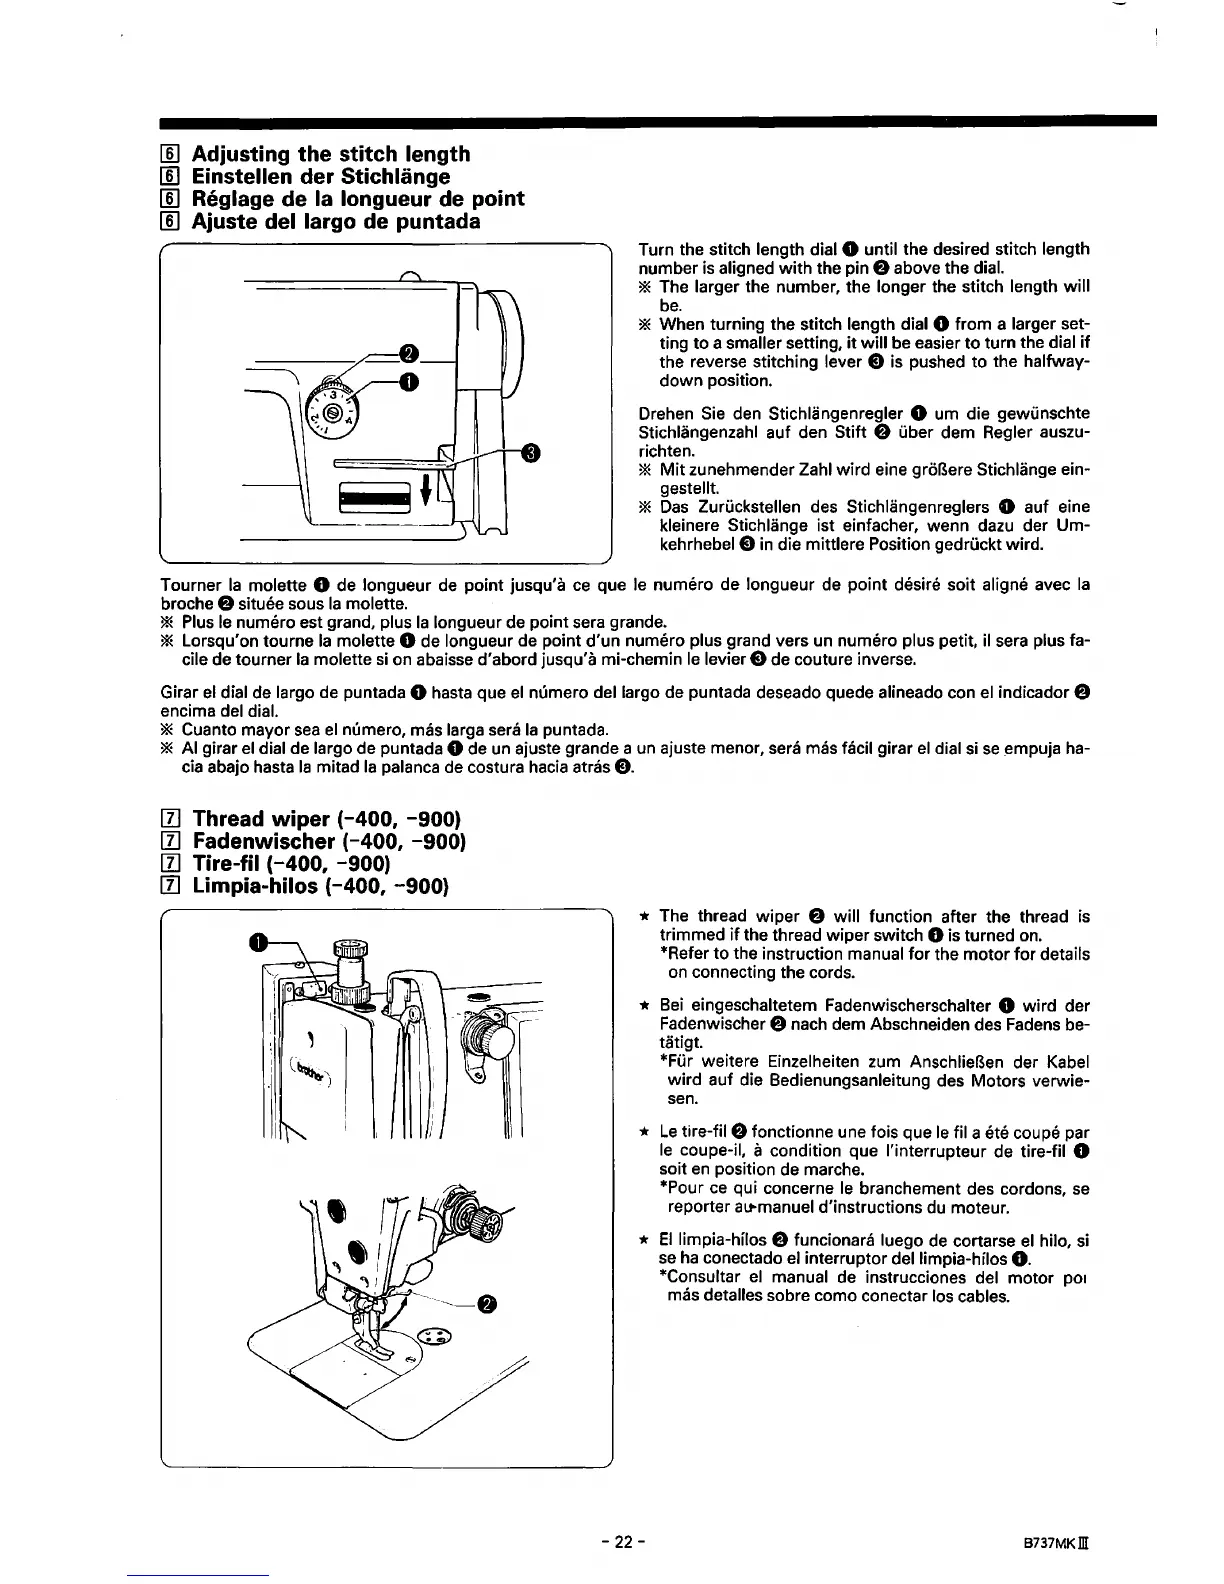
Adjusting the stitch length
[]]
Einstellen der StichUinge
[]]
Reglage de Ia longueur de point
[]]
Ajuste del largo de puntada
Turn the stitch length dial 0 until the desired stitch length
number is aligned with the
pine
above the dial.
* The larger the number, the longer the stitch length will
be.
* When turning the stitch length dial 0 from a larger set-
ting
to
a smaller setting,
it
will be easier
to
turn the dial
if
the reverse stitching lever e is pushed to the halfway-
down position.
Drehen
Sie
den Stichlangenregler 0 urn die gewunschte
Stichlangenzahl auf den Stift 8 uber dem Regier auszu-
richten.
*
Mit
zunehmender Zahl wird eine groBere Stichlange ein-
gestellt.
*
Das
Zuruckstellen des Stichlangenreglers 0 auf eine
kleinere Stichlange ist einfacher, wenn dazu der Um-
kehrhebel Q
in
die mittlere Position gedruckt wird.
Tourner
Ia
molette 0
de
longueur
de
point jusqu'a
ce
que
le
numero de longueur de point desire soit aligne avec
Ia
broche 8 situee sous
Ia
molette.
* Plus
le
numero est grand, plus
Ia
longueur de point sera grande.
* Lorsqu'on tourne
Ia
molette 0 de longueur de point d'un numero plus grand vers un numero plus petit, il sera plus fa-
cile de tourner
Ia
molette
si
on abaisse d'abord jusqu'a mi-chemin
le
levier Q de couture inverse.
Girar
el
dial de largo de puntada 0 hasta que
el
numero del largo de puntada deseado quede alineado con el indicador 8
encima del dial.
* Cuanto mayor
sea
el
numero, mas larga sera
Ia
puntada.
*
AI
girar
el
dial de largo de puntada 0 de un ajuste grande a un ajuste menor, sera mas facil girar
el
dial
si
se
_empuja
ha-
cia abajo hasta
Ia
mitad
Ia
palanca de costura hacia atras
Q.
I1J
Thread wiper (-400,
-900)
I1J
Fadenwischer
(-400,
-900)
[1]
Tire-til
(-400,
-900)
I1J
Limpia-hilos
(-400,
-900)
* The thread wiper 8 will function after the thread is
trimmed
if
the thread wiper switch 0 is turned
on.
*Refer to the instruction manual
for
the motor for details
on connecting the cords.
*
Bei
eingeschaltetem Fadenwischerschalter 0 wird der
Fadenwischer 8 nach dem Abschneiden des
Fadens
be-
tatigt.
*Fur weitere Einzelheiten zum AnschlieBen der Kabel
wird auf die Bedienungsanleitung des Motors verwie-
sen.
*
Le
tire-til 8 fonctionne une fois que
le
fil a ete coupe par
le
coupe-il, a condition que l'interrupteur de tire-fil 0
soit
en
position de marche.
*Pour
ce
qui concerne
le
branchement des cordons,
se
reporter
a~manuel
d'instructions du moteur.
*
El
limpia-hilos 8 funcionara luego
de
cortarse
el
hilo,
si
se
ha
conectado
el
interrupter dellimpia-hilos
0.
*Consultar
el
manual
de
instrucciones del motor
po1
mas detalles sabre como conectar los cables.
-22-
B737MKm
 Loading...