7-41
Confidential
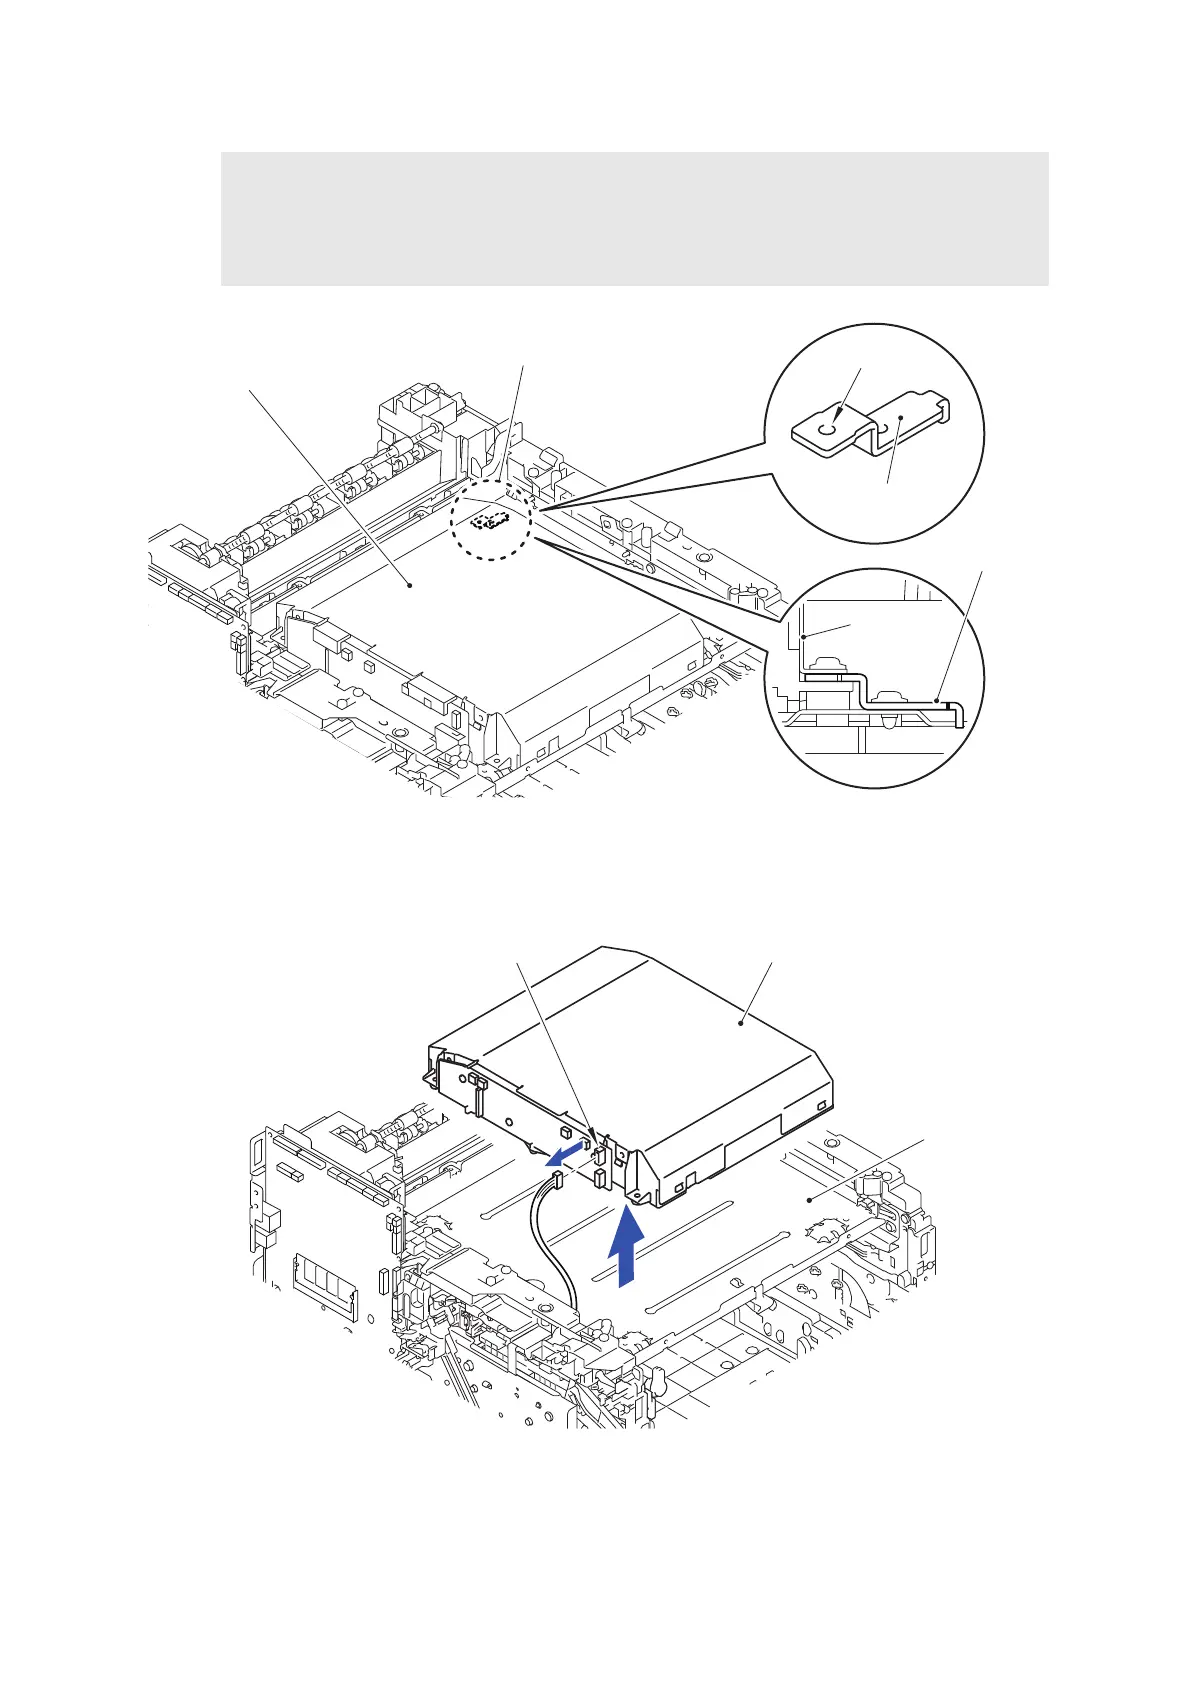
Fig. 7-75
(44) Disconnect the Connector (CN8).
(45) Remove the Laser unit from the Scanner plate.
Fig. 7-76
(46) After replacing the Laser unit, reset the counter. (Refer to “1.3.37 Reset counters for parts
(Function code 88)” in Chapter 5.)
Assembling Note:
- When assembling the Scanner holder to “A” of the Laser unit, be sure to use the Scanner
holder of which “B” is a screw and not to use other Scanner holders.
- When assembling the Scanner holder to “A” of the Laser unit, be sure that the Scanner
holder is placed as shown in the figure.
Laser unit
“A”
Scanner holder
“B”
<Front side>
Scanner holder
Laser unit
Laser unit
Scanner plate
CN8
<Front side>
 Loading...