4-13
Confidential
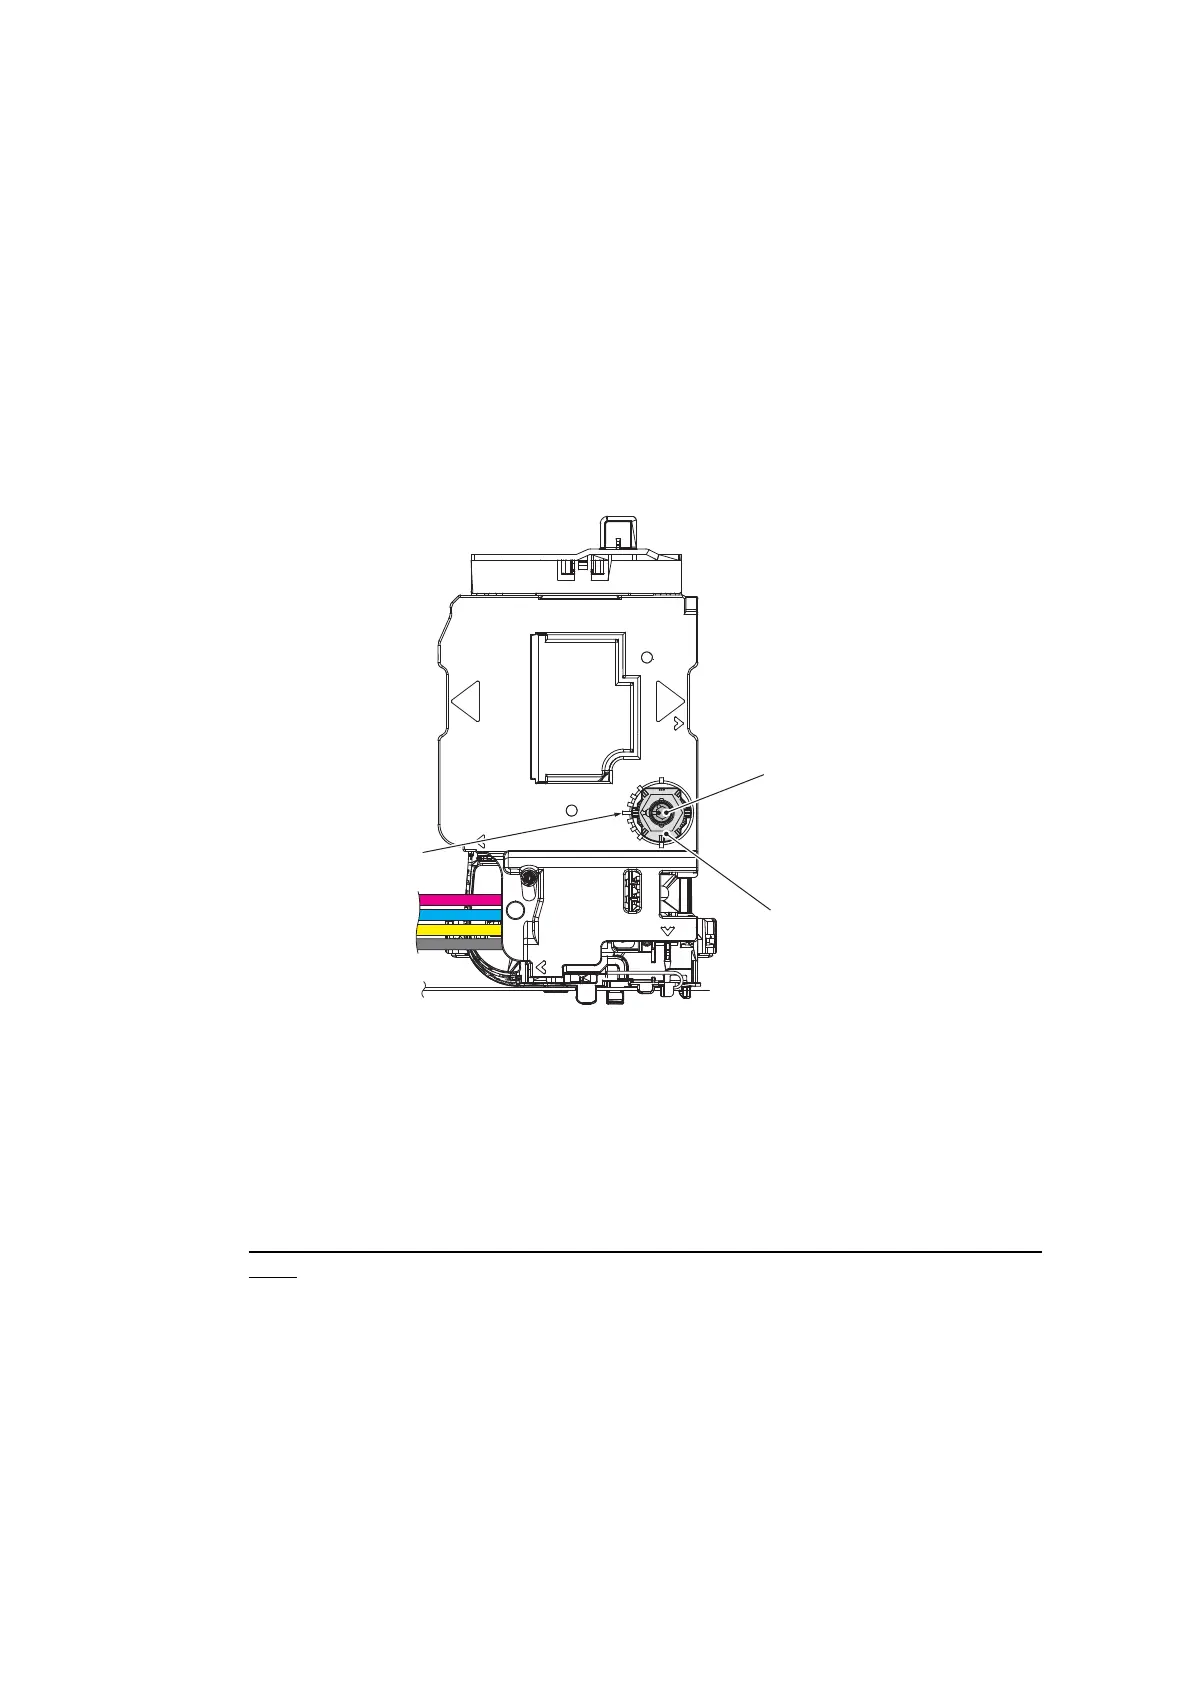
2.4 Adjust the Head/carriage Unit Inclination
Before starting the procedure below, make sure to set the recording paper in the paper tray
for printing check patterns.
(1) Perform Chapter 5 "1.4.19 Move of the Head/Carriage Unit to the Adjustment Position
(Maintenance mode 63)" to move the Head/carriage unit to an adjusted position.
(2) Open the document scanner unit.
(3) Using a spanner and an Allen wrench, place the Head/carriage unit in the center with
the external and internal inclination adjuster knob as shown in the diagram below.
Note Perform the adjustment by moving the Head/carriage unit to the left edge which
is the adjusted position. If you adjust it to another location, the CR frame may be
subjected to strain.
(4) Close the Document scanner unit.
(5) Save incline_BHmini13_low.prn to your PC.
(6) Print the test patterns on an A4 or Letter size paper by opening [Filedrgs] on your PC
and dragging & dropping the above file onto the Brother Maintenance USB Printer
driver icon.
(7) Adjust the Head/carriage unit inclination by following the steps below.
When the block number with the least uneven printing in the configuration block (top)
is "0"
Inclination adjuster knob
(internal)
Inclination adjuster knob
(external)
Center position
 Loading...