Removal
CryoProbe User Manual BRUKER 51 (107)
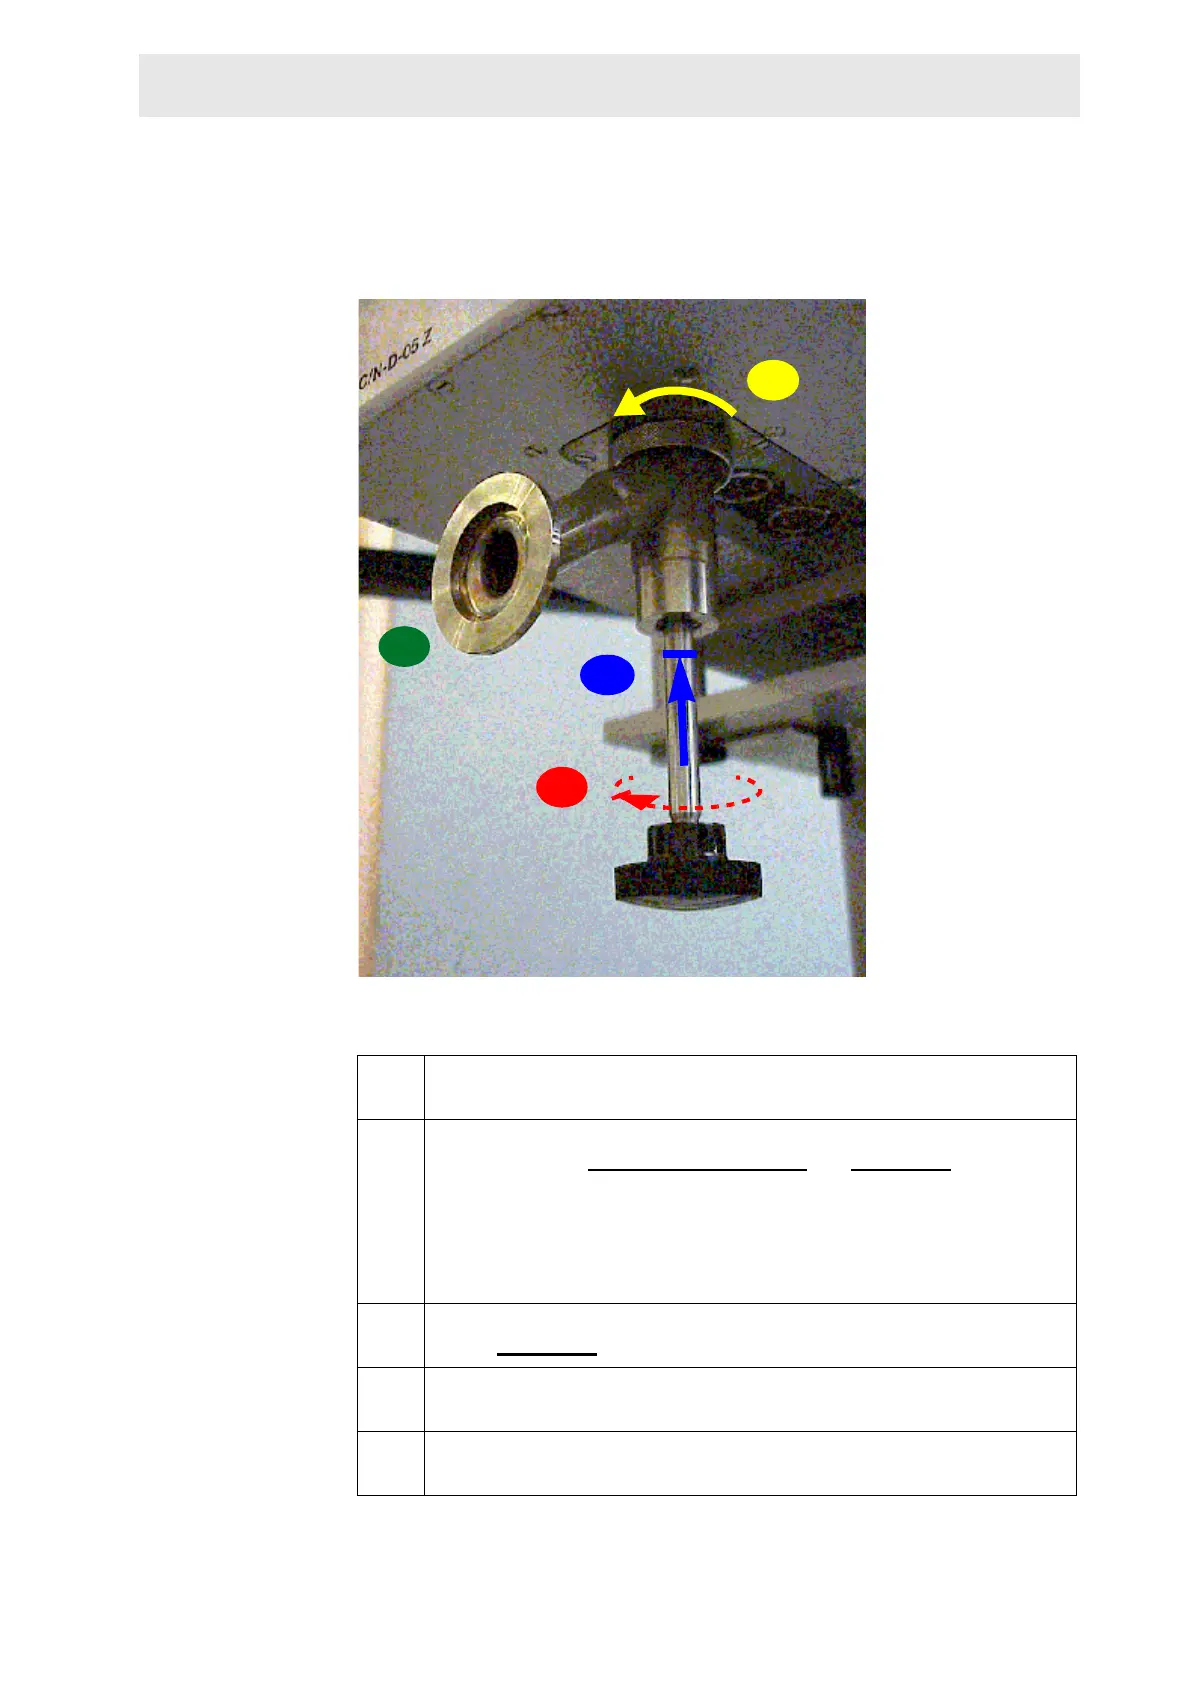
r.8 Use the special titanium open-end wrench to unlock the CryoCoupler.
Be careful not to damage any connector on the CryoProbe front.
r.9 NOTE: Use the same technique for removing the CryoCoupler as for
connecting it (cf. "Mounting" on page 28
and Figure 4.8.).
Support the He transferline at its original height while drawing the
CryoCoupler carefully out of the CryoProbe. Make sure to exert no
torque on the CryoProbe body. Do not use large forces, the suspended
magnet must not move.
r.10 Check if all 4 o-rings on the He Transferline CryoCoupler are still in
place (Figure 4.7.
).
r.11 Close both the CryoProbe and the He Transferline firmly with their spe-
cial caps.
r.12 Switch O
FF the air suspension of the magnet such that the magnet
comes down onto its stand.
Figure 4.13. Removing the vacuum connector from the CryoProbe
r.7
r.4
r.6
r.5