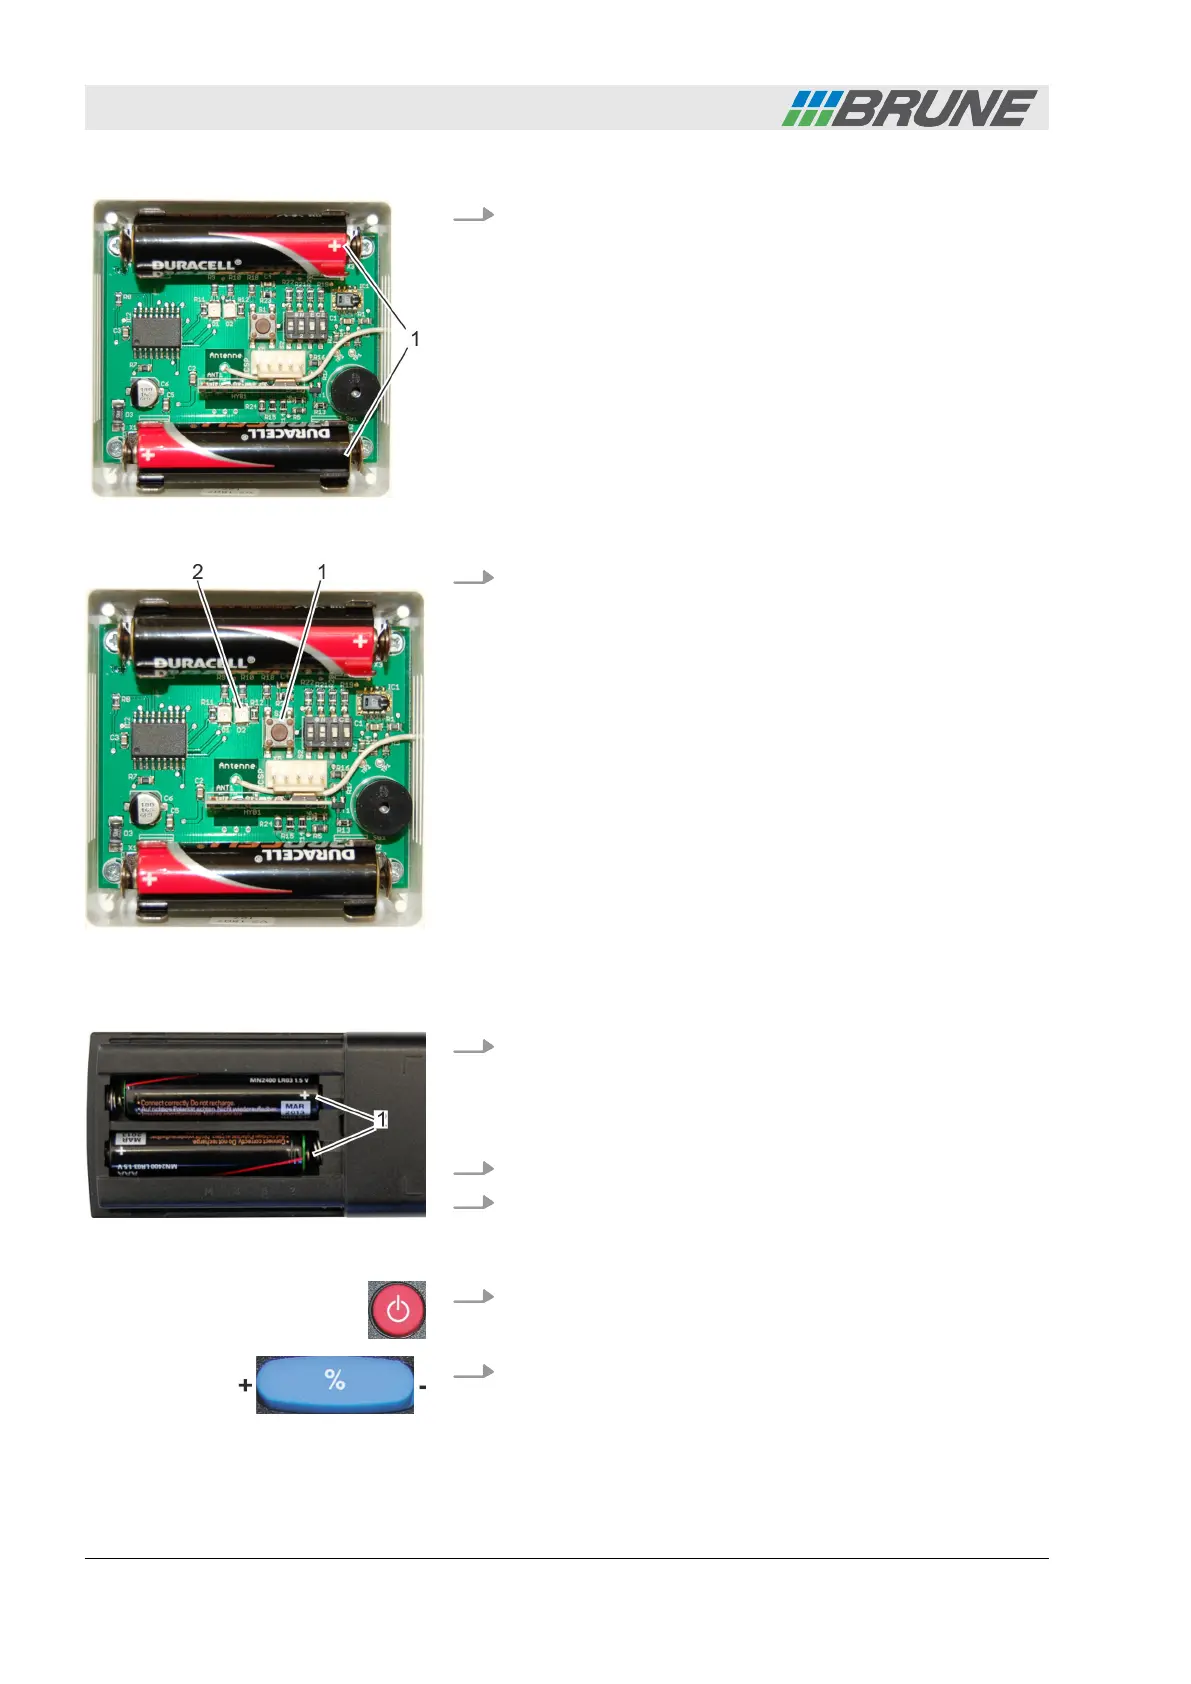
2. Insert the enclosed AA batteries according to the illustration
(Fig. 12/1). The plus and minus poles are marked on the
board as well as on the battery. The batteries are correctly
inserted if the markings match.
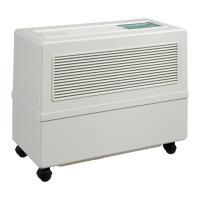
3. Check the wireless sensor system for functionality. To do so,
press the black button (Fig. 13/1).
ð
The diode (Fig. 13/2) briefly lights up; the wireless sensor
system is operational. The sound of an alarm indicates
that the batteries must be replaced.
Personnel:
n
Operator
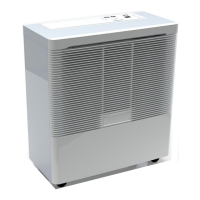
1. Insert the enclosed AAA batteries in the compartment of the
remote control (Fig. 14/1). The plus and minus poles are
marked in the compartment of the remote control as well as
on the battery. The batteries are correctly inserted if the
markings match.
2. Connect the humidifier power plug to the power supply.
3. Fill up the water tank of the humidifier using tap water. To do
so, proceed as indicated under
Ä
Chapter 5.3 “Filling the
water tank” on page 32.
4. Switch on the humidifier using the [ON/OFF] button on the
remote control.
5. Enter the desired value for the air humidity using the
[Humidity] rocker switch (
Ä
Chapter 5.4 “Setting the desired
air humidity” on page 34) on the remote control.
Fig. 12: Inserting batteries
Fig. 13: Checking functionality
Commissioning the humidifier
Fig. 14: Inserting batteries
Start-up
Evaporation Humidifier B500 Professional26