9
INSTALLATION
PREPARE AND INSTALL THE MOUNTING
PLATE
The instructions and illustrations in this manual are examples ONLY. Your installation
may vary depending on space, obstructions, and accessories. It is up to the installer
to select the most suitable solution.
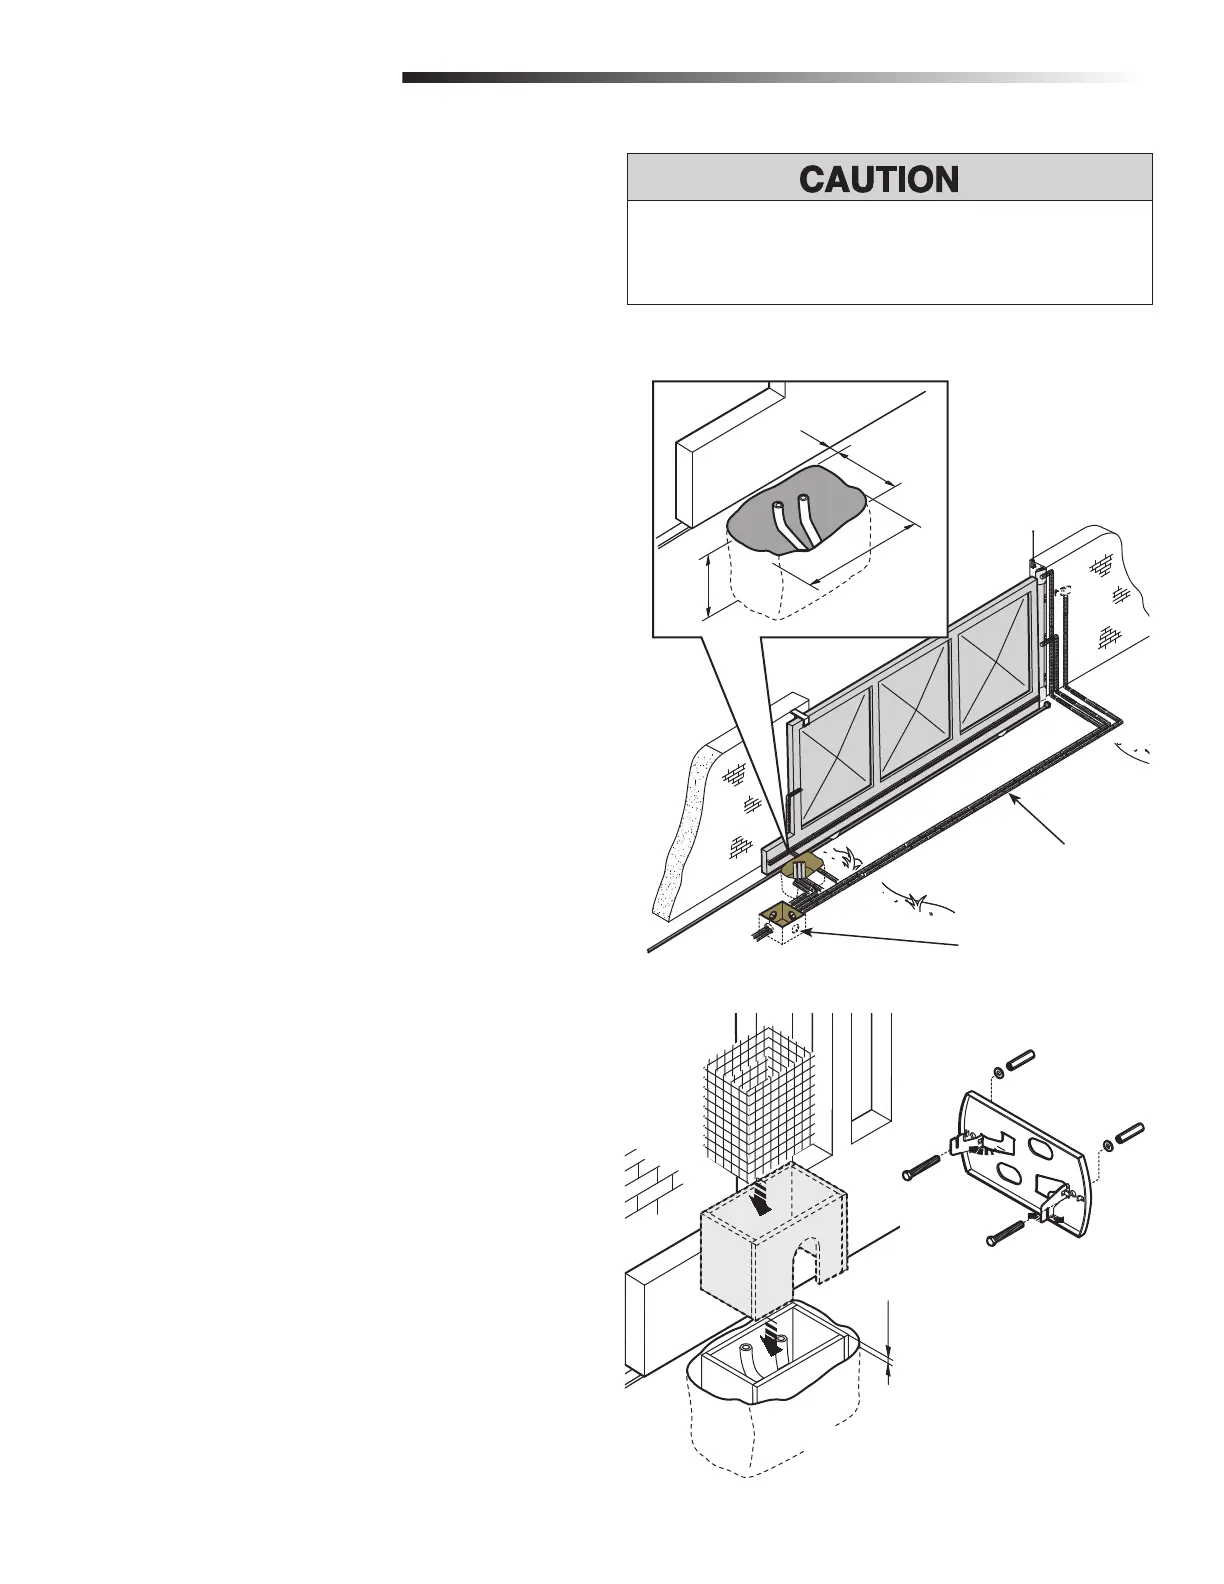
1
Dig a hole to the side of the gate (Figure 1). The concrete pad should be
deeper than the frost line. Check all national and local codes.
2
Prepare a trench and install the electrical conduit. All conduit should be 3/4"
diameter maximum.
NOTE: The number of conduits will depend on your site and the accessories to
be installed.
3
Prepare a form box larger than the mounting plate and insert the form box in
the hole (Figure 2). The form box should be 1-3/4” (50 mm) above the
ground (Figure 2).
4
Insert an iron grid inside the form to reinforce the concrete (Figure 2).
5
Insert the bolts into the holes of the mounting plate and secure with nuts and
washers supplied (Figure 3).
6
Extend the preformed tabs on the mounting plate with a screwdriver or a pair
of pliers (Figure 3).
1-3/4" (50 mm)
PREPARE AND INSTALL THE MOUNTING PLATE
FIGURE 1
1.57" (3.98 cm)
9.44"
(23.97 cm)
15.74"
(39.97 cm)
12" (30.47 cm)
Junction Box
Electrical conduit
FIGURE 2
FIGURE 3
• To AVOID damaging gas, power or other underground utility lines, contact
underground utility locating companies BEFORE digging more than 18 inches
(46 cm) deep.