Camus ProtoNode Start-up Guide
Page 33 of 87
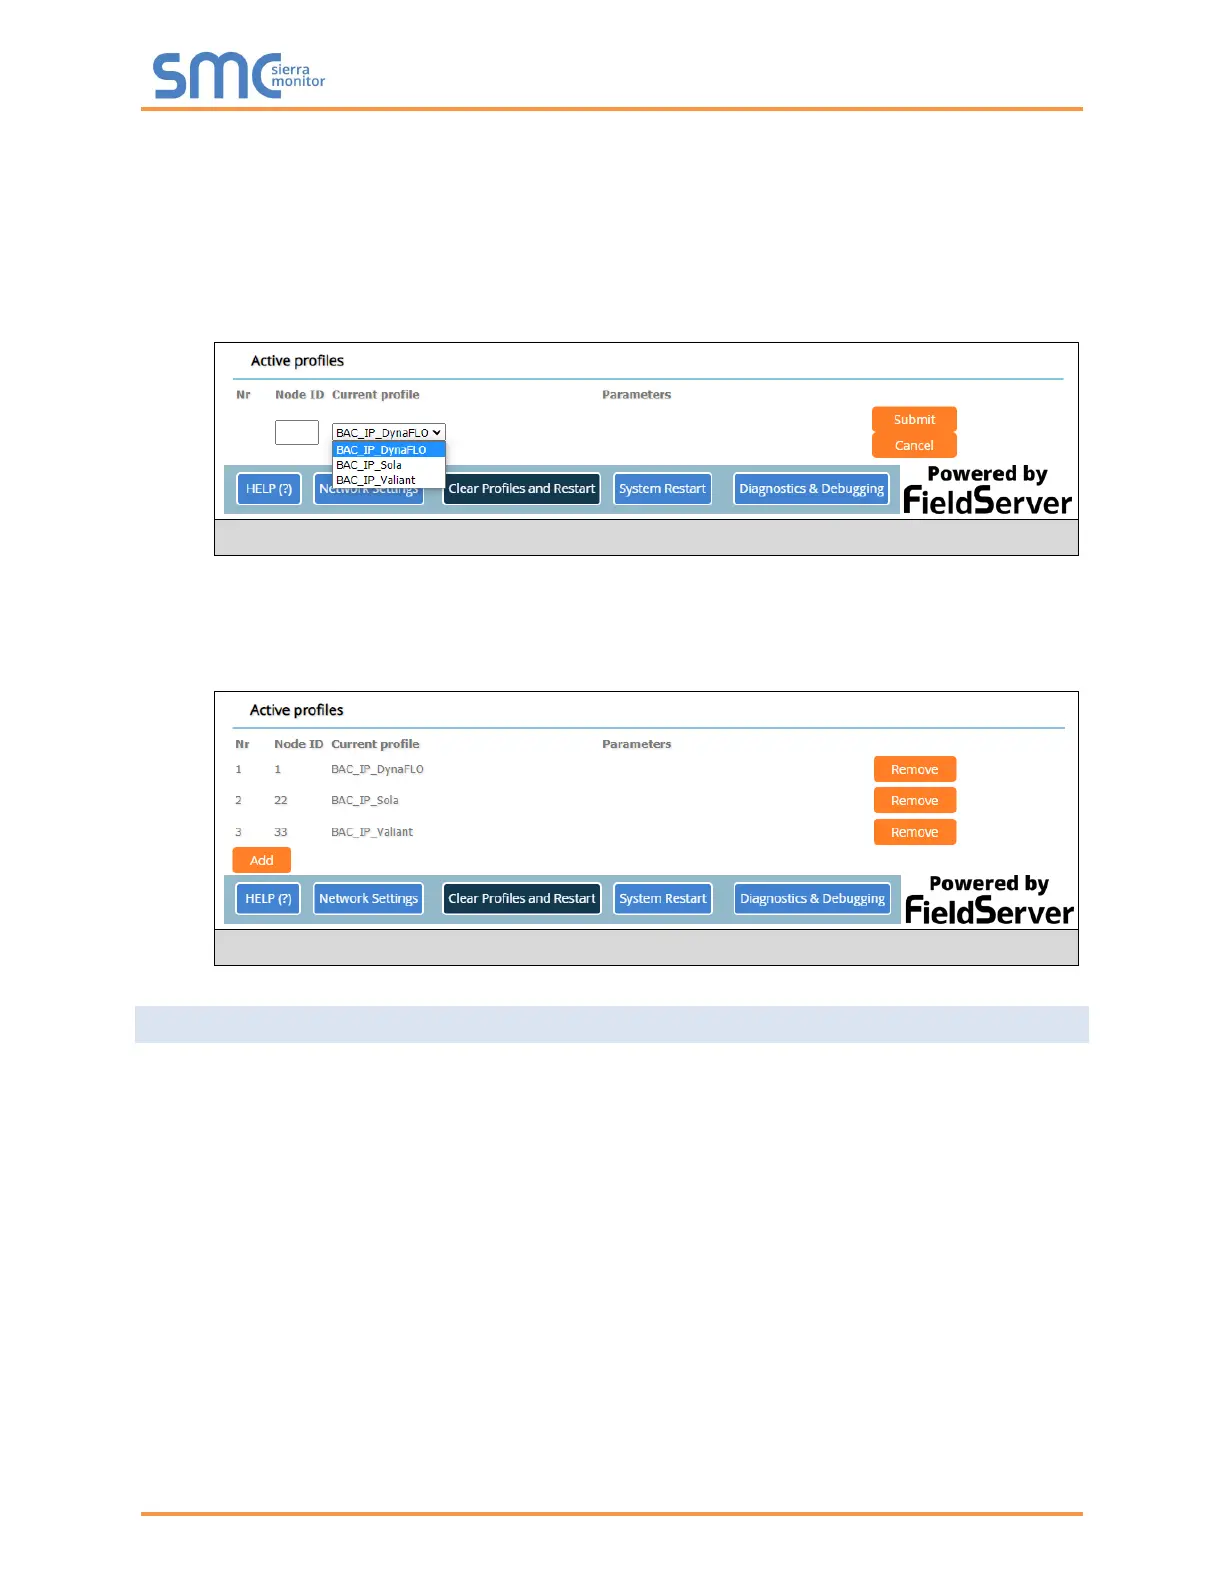
• To add an active profile to support a device, click the Add button under the Active Profiles heading.
Select a profile from the drop-down menu field that appears underneath the Current profile column.
NOTE: If multiple devices are connected to the ProtoNode, set the BACnet Virtual Server Nodes
field to “Yes”; otherwise leave the field on the default “No” setting.
• Once the Profile for the device has been selected from the drop-down list, enter the value of the
device’s Node-ID which was assigned in Section 3.3.2.
• Then press the “Submit” button to add the Profile to the list of devices to be configured.
• Repeat this process until all the devices have been added.
• Completed additions are listed under “Active profiles” as shown in Figure 21.
5.4 Verify Device Communications
• Check that TX and RX LEDs are rapidly flashing. See Appendix A.4 for information and images.
• Confirm the software shows communication without errors (Appendix A.2).
Figure 20: Web Configurator Showing Available Profile Selection
Figure 21: Web Configurator Showing Active Profile Additions
 Loading...