Chapter 4
4-17
4.3.6 Cutter
0023-5529
a) Cutter
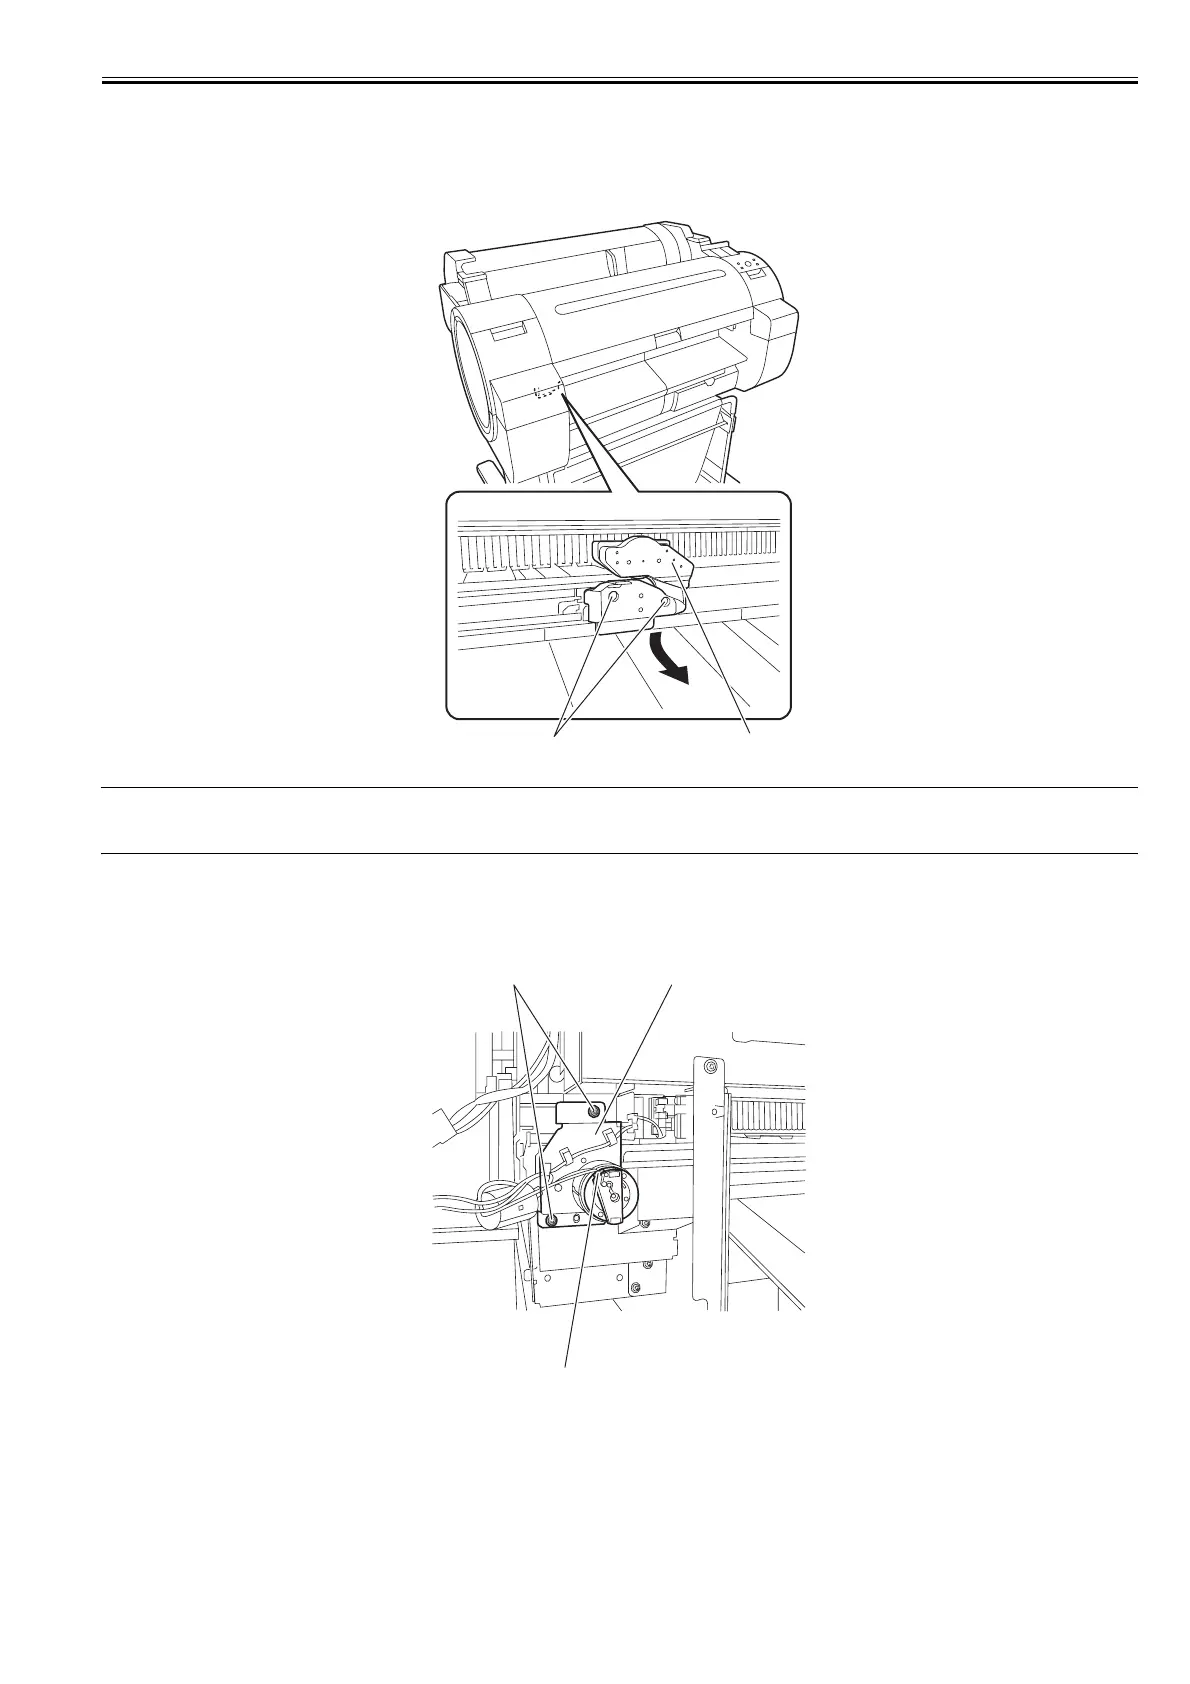
Removing the Cutter
1) Perform service mode: [SERVICE MODE] > [REPLACE] > [CUTTER] and then choose [YES] to move the cutter to the replacement place.
2) Remove two screws [1] by using the hex key wrench of 1.5mm diameter to remove the cutter [2].
F-4-34
MEMO:
After replacing the cutter, press the [OK] key to return the cutter to the home position. Then, choose [CLR COUNTER CT-1] > [YES] that displayed on the LCD
to initialize the parts counter information.
Removing the Cutter Rail Unit
1) Drain ink. Refer to "Draining Ink" in "Precautions about Disassembly/Reassembly" in "Disassembly/Reassembly".
2) To remove the cutter rail unit, remove the left/right ink tank cover, left/right ink tank unit, and mist fan.
3) Remove two screws [1] and disconnect one connector [2] and remove the cable from the cable guide, and then remove the cutter unit [3].
F-4-35
[1]
[2]
[2]
[3][1]