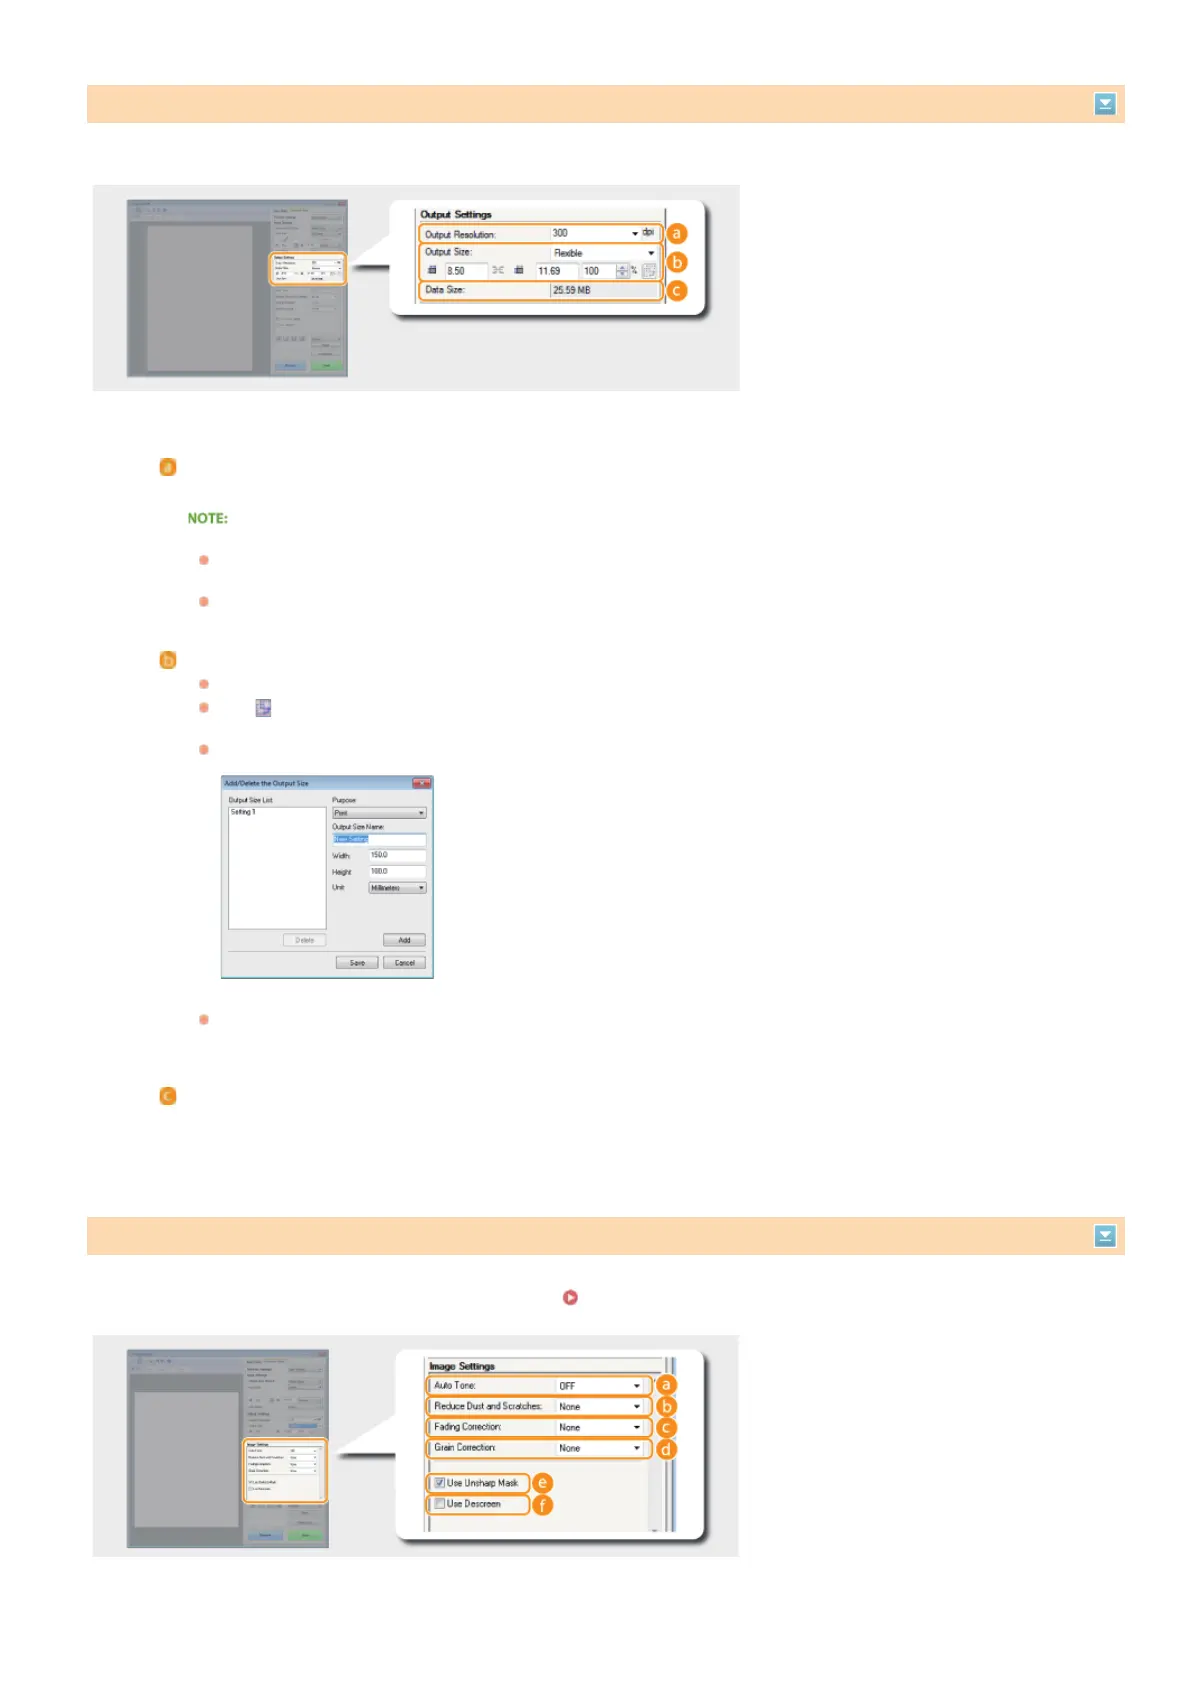
Specify the output resolution and output size.
Configure settings for improving the image quality, such as correction of scratches or faded colors on a photograph. These settings are
available if you select [Color] or [Grayscale] for [Color Mode] (
Specifying Settings for Documents and Color Mode).
Specifying Resolution and Image Size
[Output Resolution]
Select the resolution of the scanned image that suits your intended use.
About the output resolution
A resolution of 75 dpi is a rough guide for displaying the scanned image on a computer, and 300 dpi for printing or
creating a searchable PDF.
If you double the output resolution, the image file size increases by a factor of 4. If the file size is too large, a
memory shortage or other error may occur. Set the resolution to the minimum required for your intended use.
[Output Size]
Select the size of the scanned image when it is printed or displayed on a computer.
Click
to switch between the portrait and landscape orientation. This button is not available when [Flexible] is
selected.
If you select [Add/Delete], you can add new output size settings and delete the added sizes.
Select [Flexible] to change the output size and the ratio of width to height. Drag the area you want to scan on the
preview image or enter values for width and height. If you specify the magnification percentage in the [%] entry
field on the right side of the width and height entry fields, the document is enlarged or reduced for scanning.
[Data Size]
Displays the data size of the image when it is scanned with the set [Output Resolution] and [Output Size].
Adjusting Image Quality
㻝㻟㻣㻌㻛㻌㻟㻟㻢
 Loading...