12
Removing Full Cylinder Tanks (Optional)
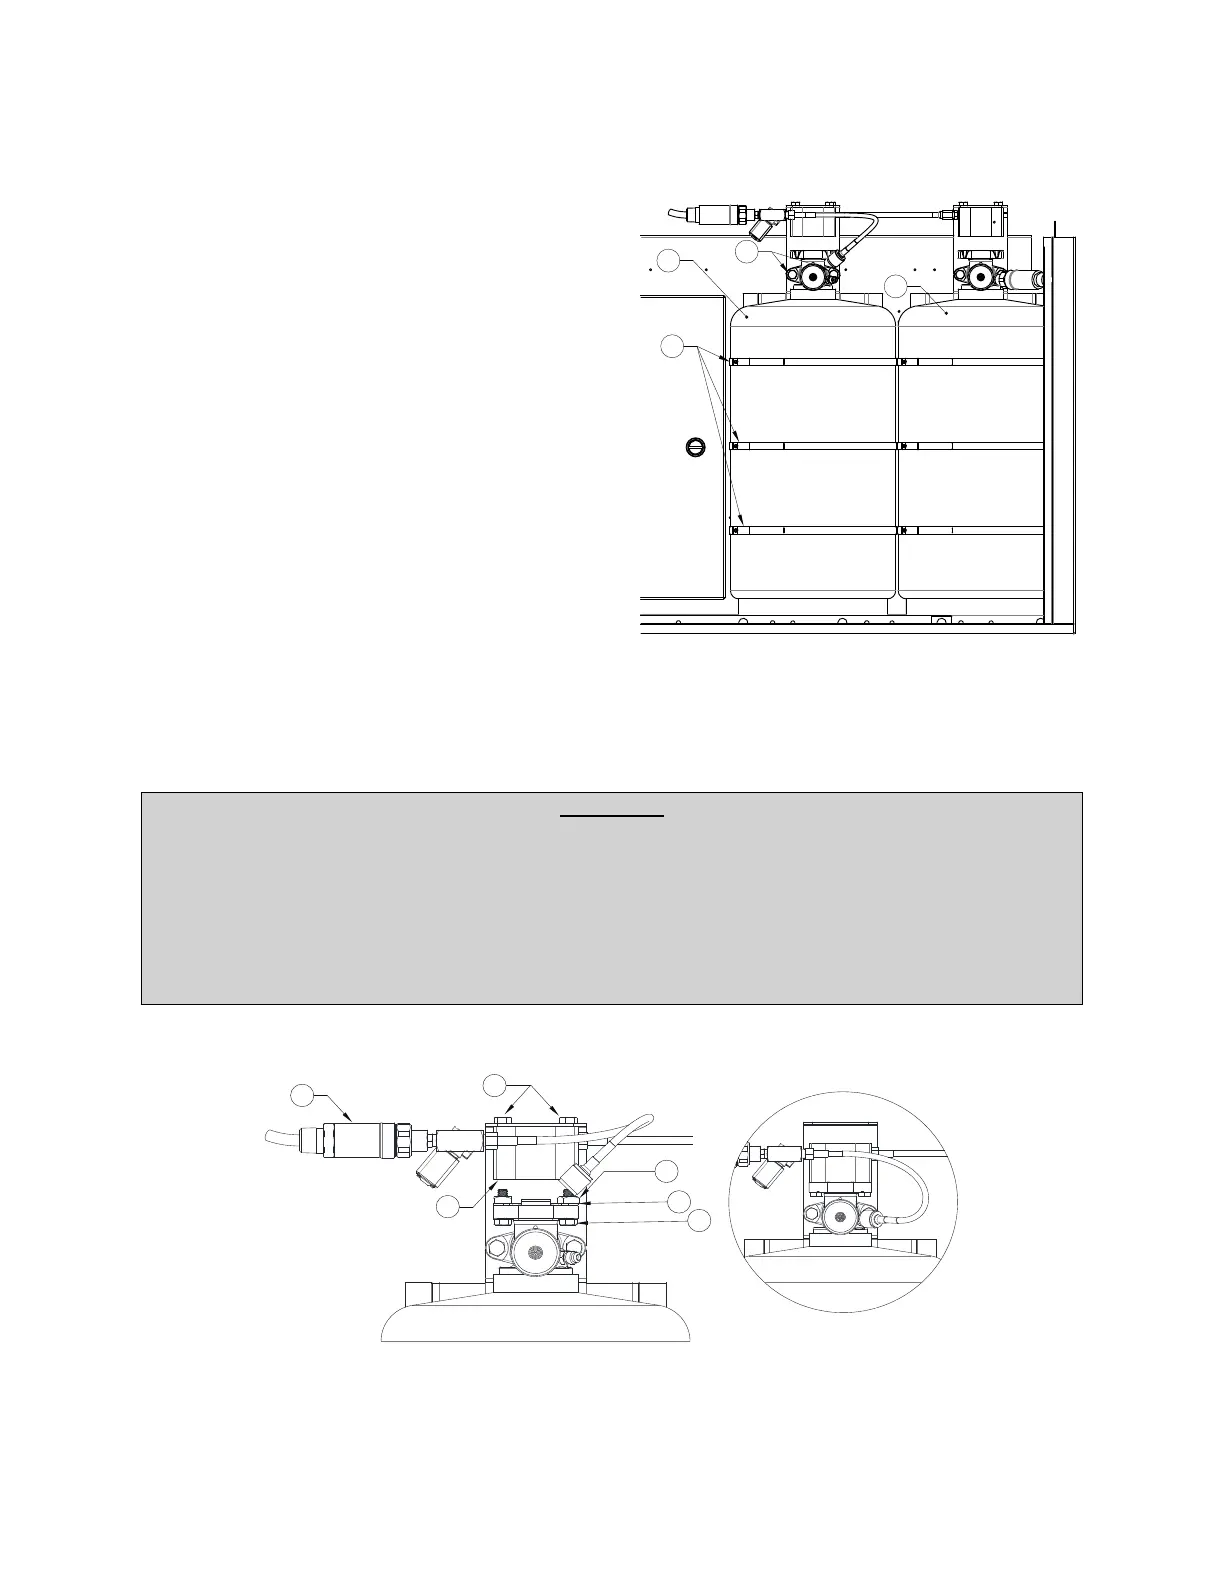
Figure 13 - Removing Full Cylinders
When installing the hood, to reduce weight, you may
remove the cylinder(s).
1. Verify the actuators are in the shipped position
(Figure 14). If the system contains multiple tanks,
check all additional actuators.
2. Use a 1/2" and 9/16" box end wrench to remove
the two mounting bolts holding the tank on the
bracket.
3. Loosen the straps.
4. Remove the tanks. Repeat for additional tanks.
5. Always reinstall tank(s) after the hood is secured.
Refer to “Install New Cylinder Tank(s)” on
page 74.
NOTE: When tightening the tank straps, use zip
ties to secure excess banding.
Primary and Secondary Actuator Installation
Figure 14 - PAK in Ship/Test and Installed Positions
WARNING!
Do not complete PAK or secondary valve actuator installation until system test and commission-
ing are complete. The cylinder bracket includes a platform for securing a primary actuator kit or
secondary valve actuator during shipping and maintenance procedures. The system actuators
must be in the ship/test position for all commissioning and test procedures. Testing with actuators
in place will result in discharge of the agent cylinders.
Refer to “START-UP/INSPECTION TEST PROCEDURE” on page 59 for the testing and commission-
ing unit.
1. Cylinder 1
2. Mounting Bolts
3. Cylinder Straps
4. Cylinder 2
(Optional)
1. Shipping Bolts
2. Nut
3. Valve Protection Plate
4. Mounting Bolts
5. Primary Actuator Kit (In Transport Position)
6. Supervisory Pressure Switch
Ship/Test Position Installed Position
 Loading...