71
Flushing Procedure with an External Water Supply
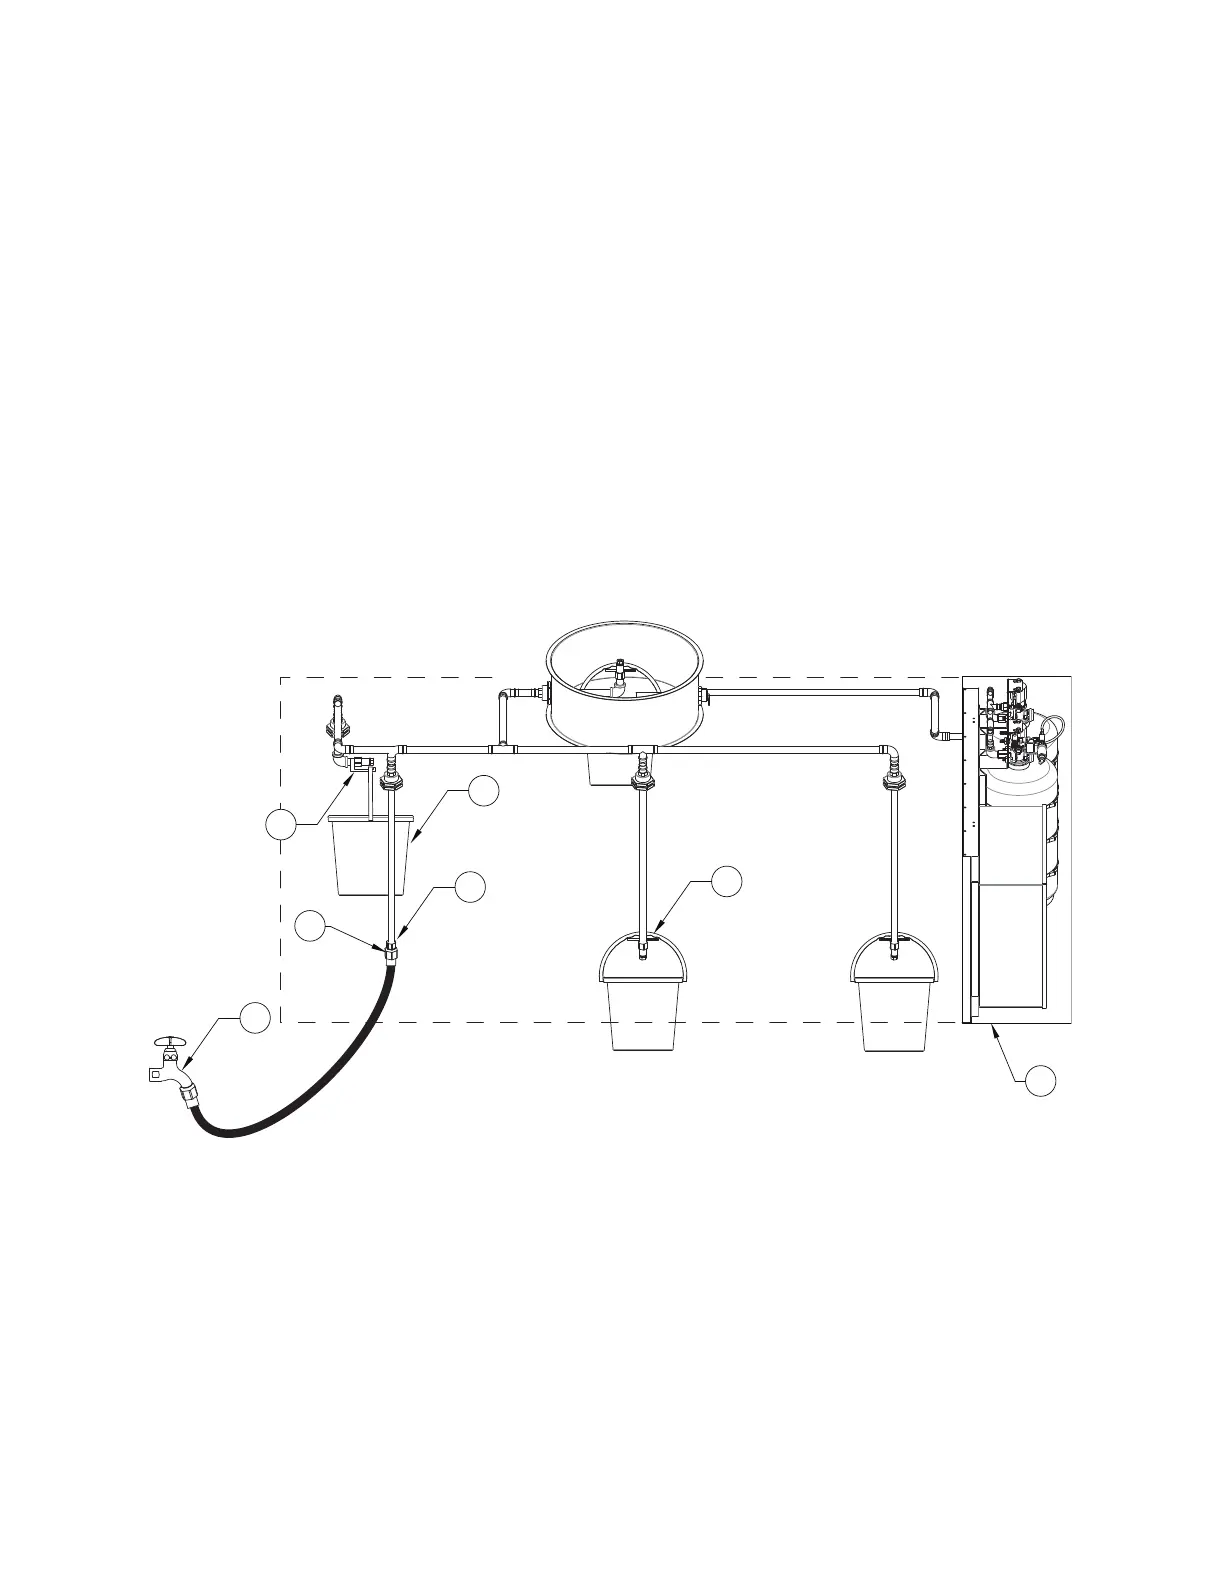
The procedure is used for flushing out the fire system piping after a fire system discharge. Tank cylin-
der(s) must be in place when flushing the system. Refer to Figure 61 for testing setup.
Parts:
Flush the System
• Remove the appliance nozzle that is furthest away from the utility cabinet.
• Use a 3/8” to 3/4” flushing adapter to attach the hose to the nozzle drop. Attach a water hose to the
flushing adapter and the other end to a water source.
• Hang the bucket support brackets and buckets on the applicable drops. If possible, connect a hose to
the grease spout and route the hose to the nearest floor drain.
• Flush with water for a minimum of one minute. Larger systems will take longer than a minute.
Figure 61 - Flushing System with External Water Supply
• Remove flushing adapter. Reinstall the nozzle and hang a bucket.
• When reinstalling nozzles, ensure that all nozzles are in the correct location and properly aimed.
• Tank Flushing Adapter
• Bucket Support Bracket
• Buckets
• Water Hose
• Nitrogen Service Kit
• Silicone Lubricant
• 1/4" SAE Tee Connector with cap and valve
core. 1/4" female knurl and 1/4" SAE male con-
nections. Used for multiple manifold systems
only.
1. Nozzle Furthest from Utility Cabinet
2. 3/8” to 3/4” Tank Flushing Adapter
3. Bucket Support Bracket
4. Buckets
5. External Water Supply
6. Utility Cabinet