1 x SL Side Window Panel FSC 1-1/4 x 30 x 54-1/8”
Wood Parts Hardware
Other Parts
2 x 1-1/2 x 2-1/4” Corner Panel Bracket
051
4 x #12 x 3/4” Pan Screw
S8
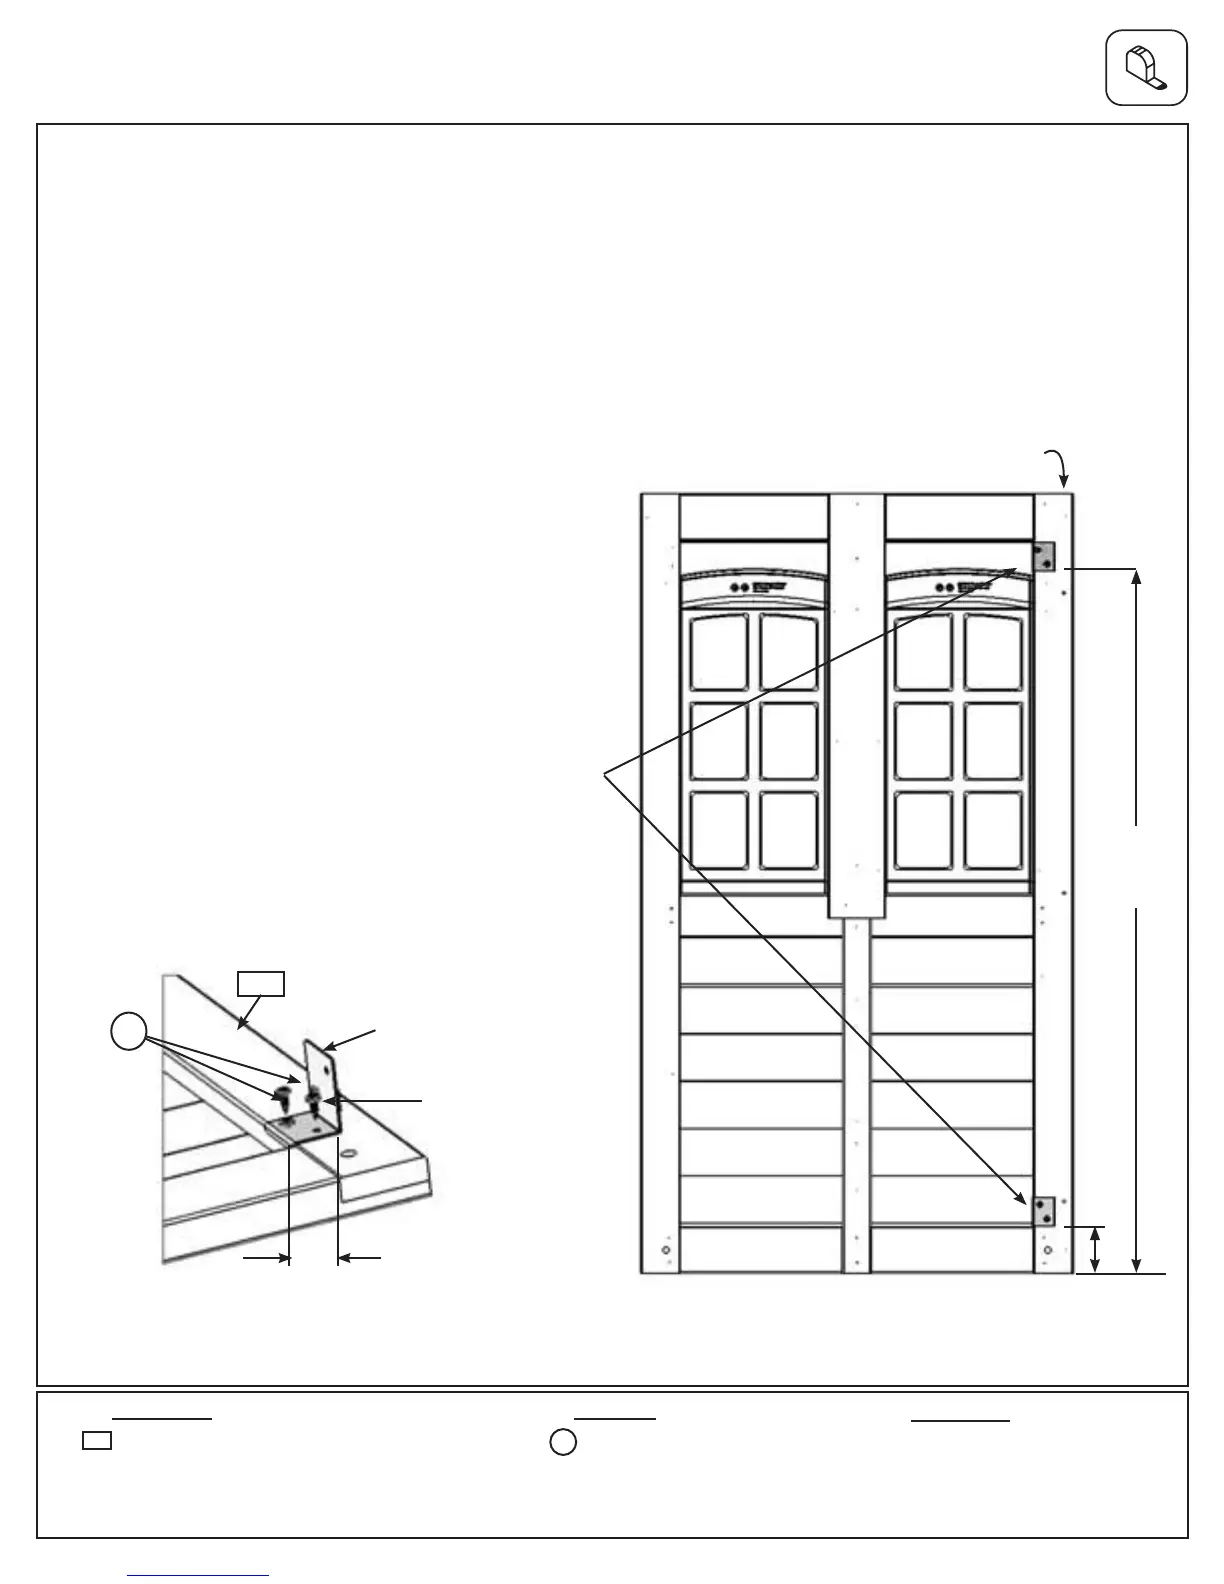
Step 5: Swing Side Panel Assembly
Part 2
C: Place 1 (051) SL Side Window Panel on the ground. Measure 3-1/4” up from the bottom of the panel on the
right side and attach a 1-1/2 x 2-1/4” Corner Panel Bracket to the panel with 2 (S8) #12 x 3/4” Pan Screws. The
at edge of the bracket must be facing up and it must be installed on the correct side. (g. 5.3 and 5.4)
D: Measure 48-3/4” from the bottom of (051) SL Side Window Panel and attach a second 1-1/2 x 2-1/4” Corner
Panel Bracket with 2 (S8) #12 x 3/4” Pan Screws. The at edge of the bracket must be facing up and it must be
installed on the correct side. (g. 5.3 and 5.4)
Note: Bottom of 1-1/2 x 2-1/4” Corner Panel Bracket must sit at 48-3/4”.
1-1/2”
Fig. 5.4
051
Fig. 5.3
S8
Flat edge up
Back View
48-3/4”
3-1/4”
Note: Corner panel brackets
must be on this side.
1-1/2 x 2-1/4”
Corner Panel
Bracket
1-1/2 x 2-1/4”
Corner Panel
Bracket
34 support@cedarsummitplay.com