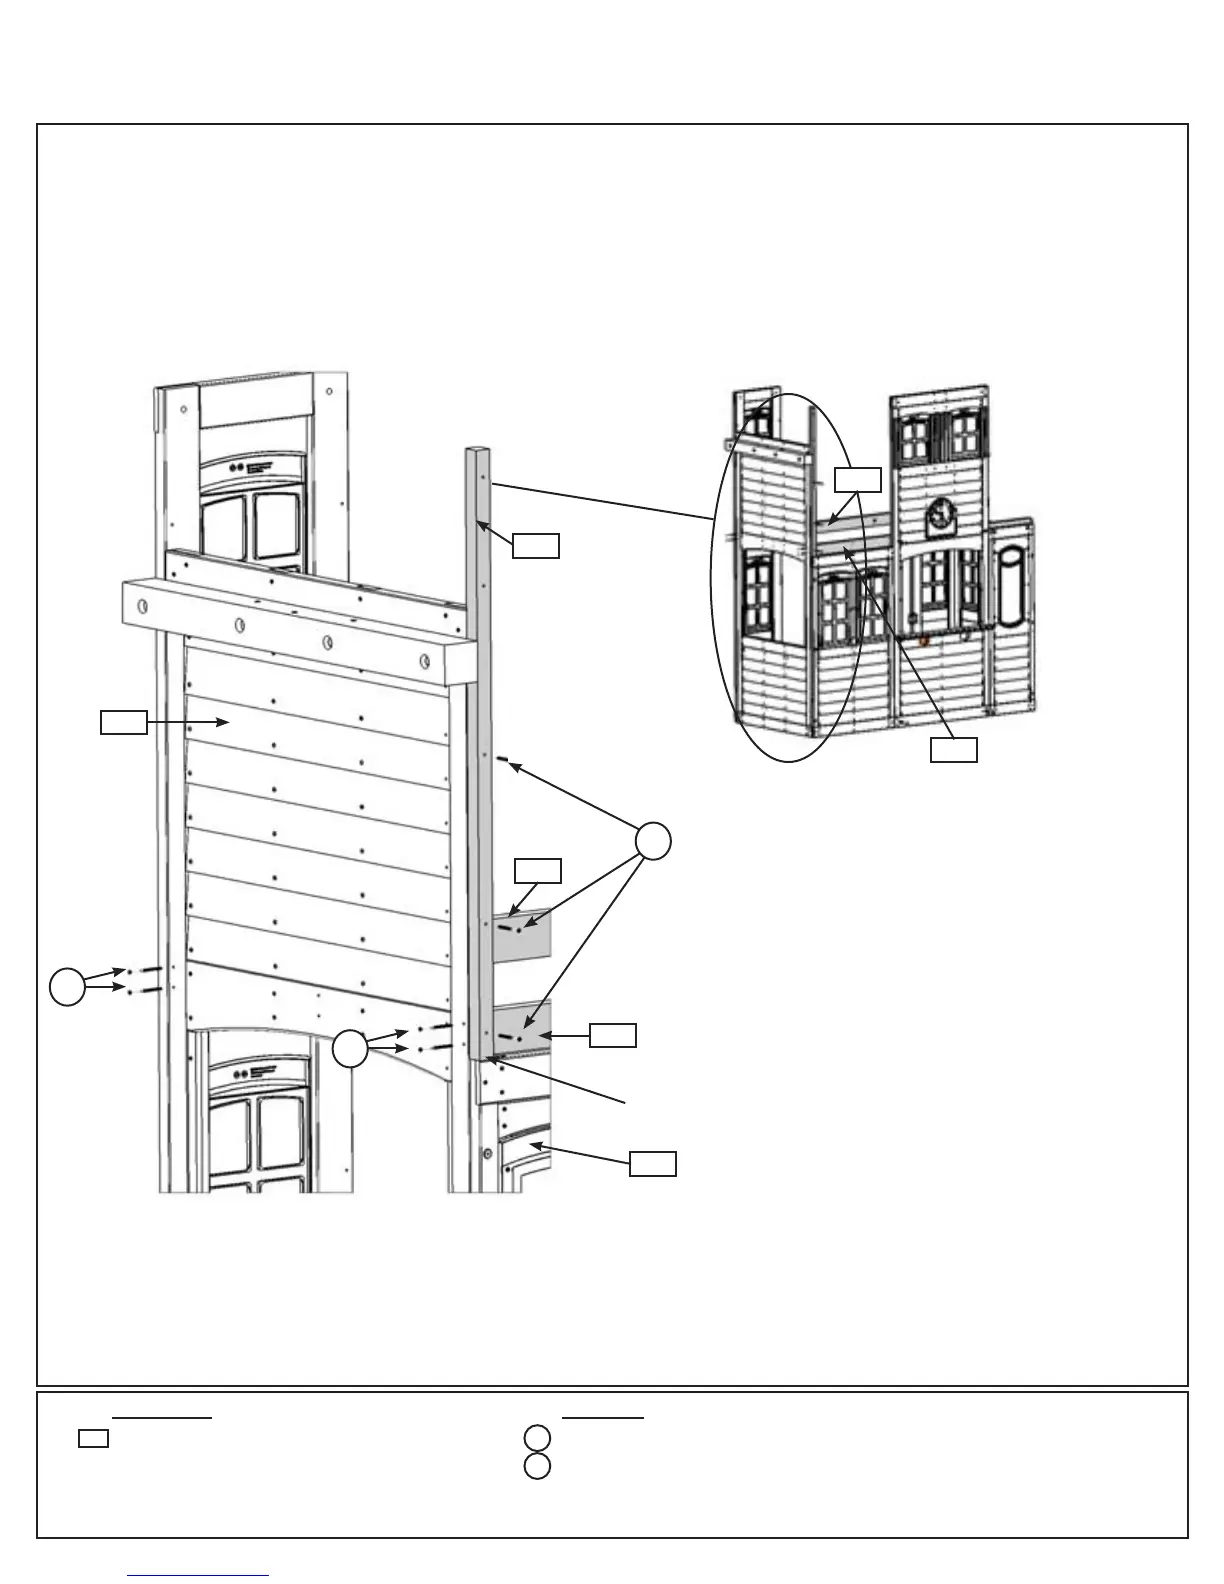
Step 8: Front Wall Assembly
Part 4
H: Attach (043) SW Side Panel to (062) Front Floor and to (064) Back Floor with 2 (S4) #8 x 3” Wood Screws
per side as shown in g. 8.8 and 8.9.
I: Tight to the top of (051) SL Side Window Panel attach (082) SL Post to (043) SW Side Panel with 3 (S3) #8 x
2-1/2” Wood Screws as shown in g. 8.8 and 8.9.
Tight
Hardware
4 x #8 x 3” Wood Screw
3 x #8 x 2-1/2” Wood Screw
S4
Fig. 8.9
062
S3
Fig. 8.8
S3
051
043
1 x SL Post FSC 1-1/4 x 1-1/4 x 44-7/8”
Wood Parts
082
082
S4
S4
064
064
062
48 support@cedarsummitplay.com