Fusion 400
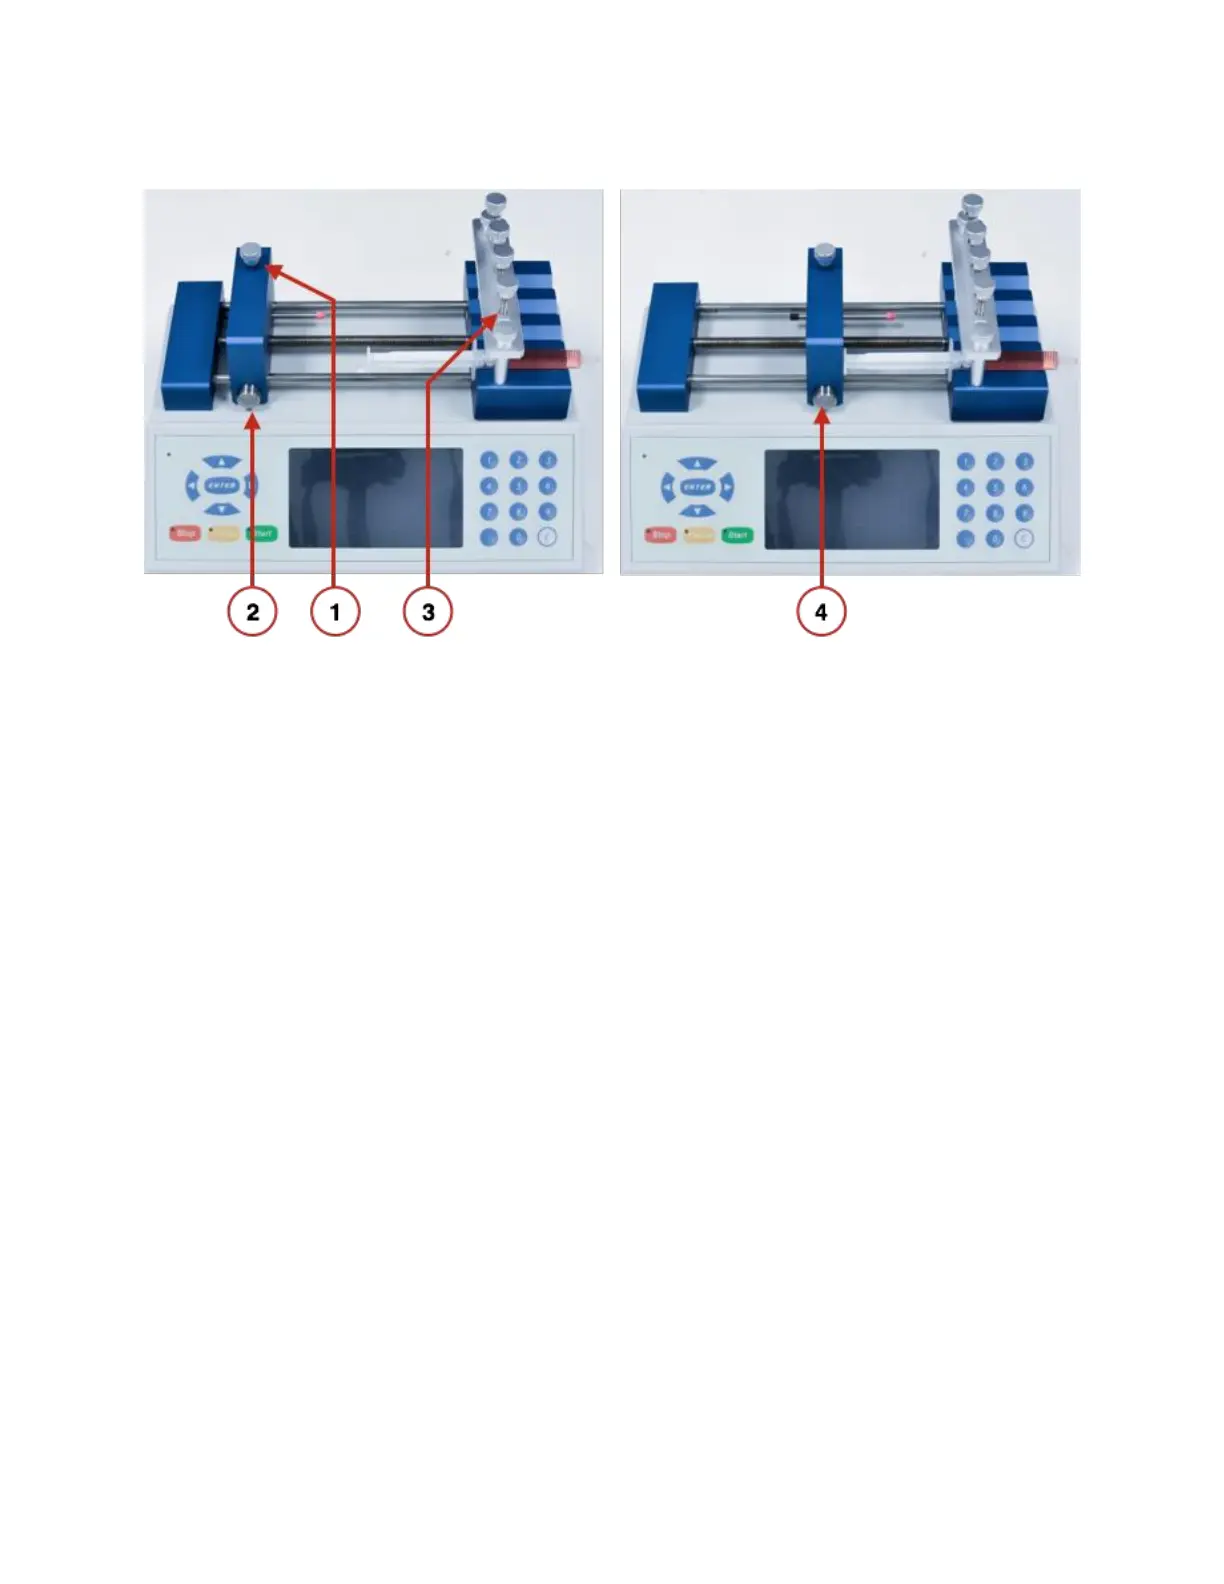
1. If necessary, move and tighten the infusion safety bar (see Adjusting the Safety Collar).
2. While pressing in the block release button, slide the pusher block all the way to the left.
3. Unscrew the clamp screw knob to raise the syringe clamp and place the syringe in one
of the channels of the holder block. Ensure that the flange of the syringe barrel is flush
against the edge of the holder block. Lower the syringe clamp by tightening the screw
knob until the syringe is secured.
4. Press the block release button and slide the pusher block to the right until it is flush
against the syringe plunger.
Adjusting the Safety Collar
The Fusion series of pumps can generate a significant amount of linear force. While this is
extremely useful for dispensing viscous fluids at higher flow rates, the higher linear force of the
Fusion series can also potentially damage the syringes in use. One source of potential damage
of a syringe may occur when the plunger of the syringe is complete depressed, and the pusher
block is still pushing against the syringe. Depending on the material of the syringe (i.e., glass or
plastic) and the thickness of the plunger, the pressure from the pusher block could bend, distort,
or just break the syringe.
To protect against this potential problem, Fusion syringe pumps use safety collars (Fusion 100
and 200) and safety bars (Fusion 400) to physically stop the pusher block before it can
completely depress the syringe plunger. When a pusher block hits the safety mechanism and
can no longer move forward, the pump will stop running, emit a long beep, and enter pump-
stalled mode.
For an example tutorial video of adjusting the safety collar/bar, please visit
www.chemyx.com/support.