5-127
Cisco 7600 Series Router Installation Guide
OL-4503-26
Chapter 5 Removal and Replacement Procedures
Installing the Air Filter Assembly on a Cisco 7609 Router and the Cisco 7609-S Router (Optional)
Step 2 Insert plastic rivet through filter assembly into ventilation holes on chassis as shown. While holding the
filter assembly and inserted rivet in place, insert the plastic fastener to the rivet.
Step 3 Fully secure the thumscrews.
Installing the Air Filter Assembly on a Cisco 7609 Router and the
Cisco 7609-S Router (Optional)
This section describes how to install the optional air filter assembly for the Cisco 7609 router and the
Cisco 7609-S router. The filter assembly is not included with the chassis or bundle configurations. The
necessary parts can be ordered at listed in
Table 5-1. The filter assembly installation requires
INTAKEPNL-09= be installed on the chassis. This intake panel can be identified by the two filter
assembly support loops extending from the bottom front of the panel and the thumbscrews of the front
left and right sides of the panel (see
Figure 5-127).
Note The use of air filter assembly provides the convenience of intake panel maintenance. The disposable
form air filter fits on the intake panel and prevents dust, dirt and other impurities from entering the panel.
You can replace the air filter when it wears out. The air filter should be used for intake panels in
environments where settling of dust particles on intake panel is high.
Note If you are replacing an air filter and not installing a new air filter assembly, see Replacing the Air Filter
on a Cisco 7609 Router and the Cisco 7609-S Router (Optional), page 5-131.
Ta b l e 5-1 Air Filter Part Numbers
Perform these steps to install the new filter assembly. If INTAKEPNL-09= is already installed, skip to
Step
3.
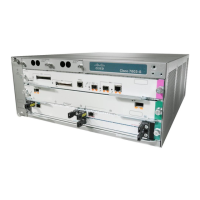
Step 1 Remove the intake panel by unscrewing four thumbscrews (see Figure 5-126).
1 Filter 3 Plastic rivets
2 Thumbscrews 4 Plastic fastener
Part Number Description
INTAKEPNL-09= Replacement Intake Panel
FLTRASSM-09= Filter Cage Assembly, no filter inserts included
FLTRINSERTS-09= Set of five replacement air filter inserts for
FLTRASSM-09=
 Loading...
