5 Copyright © 2024 Cisco Systems, Inc. All rights reserved.D15519.02 | 2024 JANUARY | Cisco Room Kit EQX Installation Guide
SCREWS AND TOOLS
Recommended
tools and equipment
• Stepladder
• Drill
• Torx T20 bit
• Hex 4 mm bit
• Appropriate drill bits for your wall
material
• Appropriate wall fasteners/anchors
for your wall construction
• Laser level and/or spirit level
• Measuring tape
• Pencil
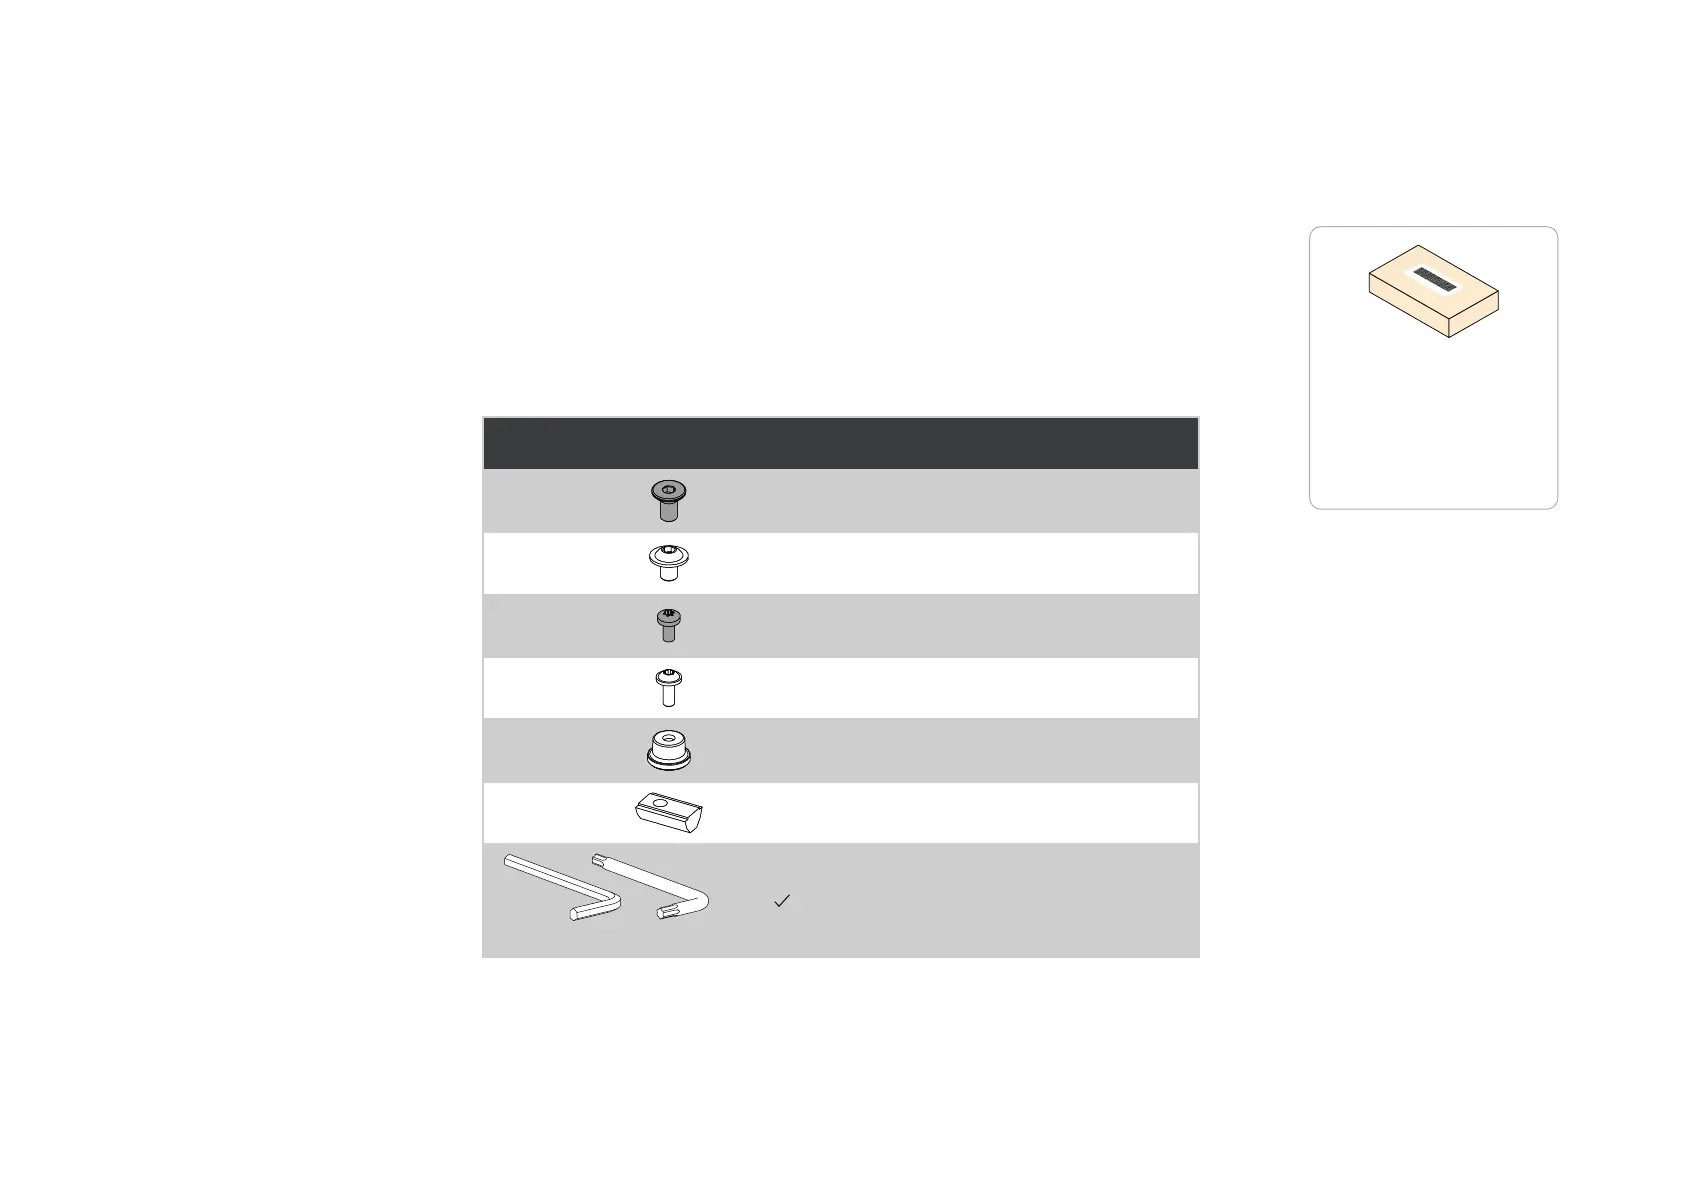
Screws, nuts, spacers, and tools
Screws, nuts, spacers, and tools are in small cardboard boxes inside the bigger boxes A,
Center kit (placed inside B), and D; and in a paper bag in Acc 2.
We recommend: When you open one of the bigger boxes, first look for the screw box and place
it where you can easily find it when you need the screws.
Each step throughout this guide has an inventory list with all required parts for that step. These
lists also include the number and type of screws, and in which box you find them.
A
(1 box)
Center kit
(1 box)
D
(2 boxes)
Acc 2
(1 paper bag)
M6x12, Hex 4 m m
48x
M6x8, Hex 4 mm
16x 8x 8x
M4x8, Torx T20
21x 4x
M4x10, Torx T20
12x 70x
Plastic washer
66x
Sliding nut
12x
Hex 4 mm Tor x T20
In addition:
The installer must bring the number and type of screws required to safely fasten the wall stand
frame to the wall (step 3).
The screw boxes are small,
and with a white bar-code
sticker.
• Width: 115 mm (4.5 in.)
• Depth: 65 mm (2.6 in.)
• Height: 27 mm (1.1 in.)