15 Copyright © 2024 Cisco Systems, Inc. All rights reserved.D15519.02 | 2024 JANUARY | Cisco Room Kit EQX Installation Guide
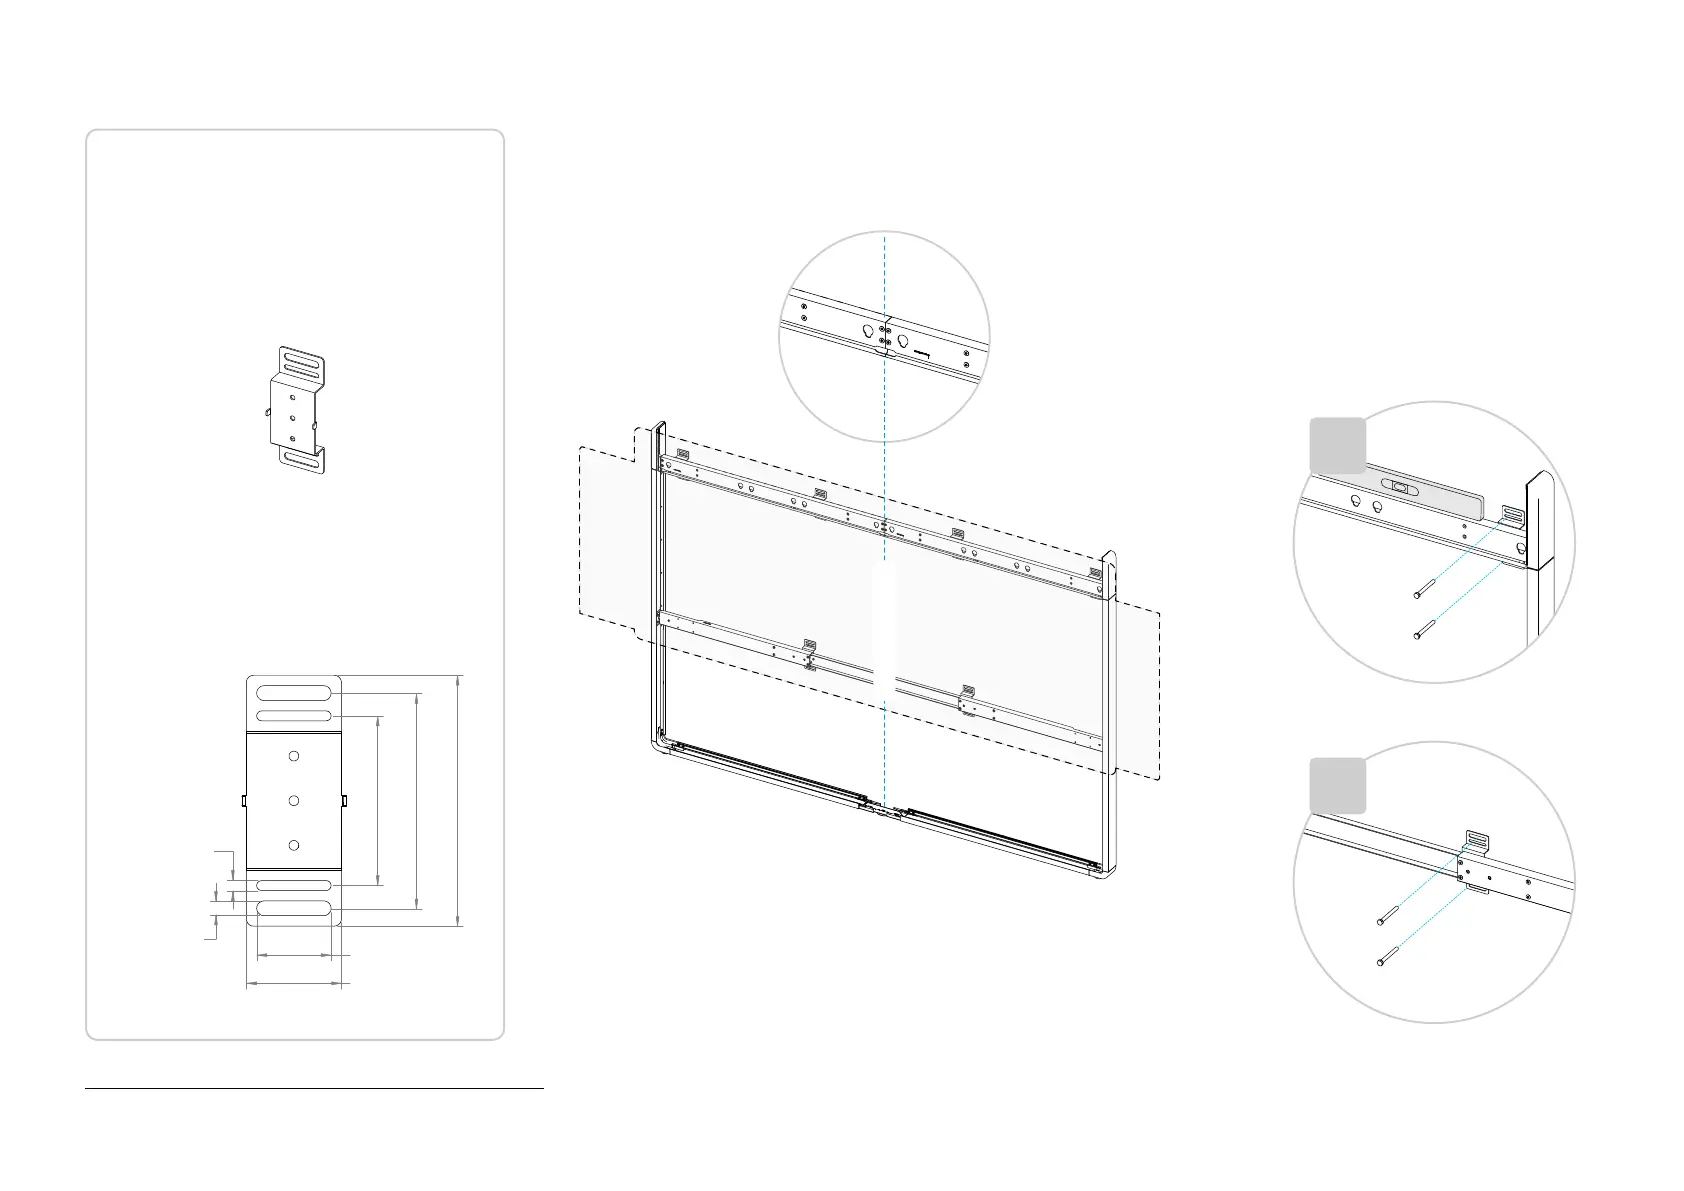
3. Fasten the frame to the wall
*
Maximum weight allowed per screen is 50 kg (110 lb).
Read before you continue:
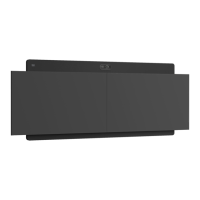
We provide 6 wall brackets to support the system:
4 for the carrier beam and 2 for the lower bar.
The brackets can slide on the beam so that you
can place them where it suits best, for example
where there are studs in the wall.
You can use the holes that fit best to attach the
bracket to the wall.
The installer must provide screws and fasteners
that suites your type of wall.
The installer must decide where to place the
brackets to safely support the system (weight up
to 235 kg (518 lb) including screens
*
).
Wall bracket dimensions:
114 mm
(4.5 in)
145 mm
(5.7 in)
169 mm
(6.6 in)
10 mm
(0.4 in)
7 mm
(0.3 in)
50 mm
(2.0 in)
1. Place the complete wall-stand frame close to the wall.
Be aware that the screens are wider than the frame;
how much depends on the size of your screens.
2. Make sure that the beam is level when the
stand rests on the floor.
If not, you must add shims under the stand
bumpers until level, or add spacers between
the bumpers and frame (shims or spacers
are not included).
3. Then, fasten all the 6 brackets to the wall.
You can use any of the horizontal slots in the
bracket.
The installer must provide screws and
fasteners that suites your type of wall.
System center line
×2
×4