66 Copyright © 2024 Cisco Systems, Inc. All rights reserved.D15519.02 | 2024 JANUARY | Cisco Room Kit EQX Installation Guide
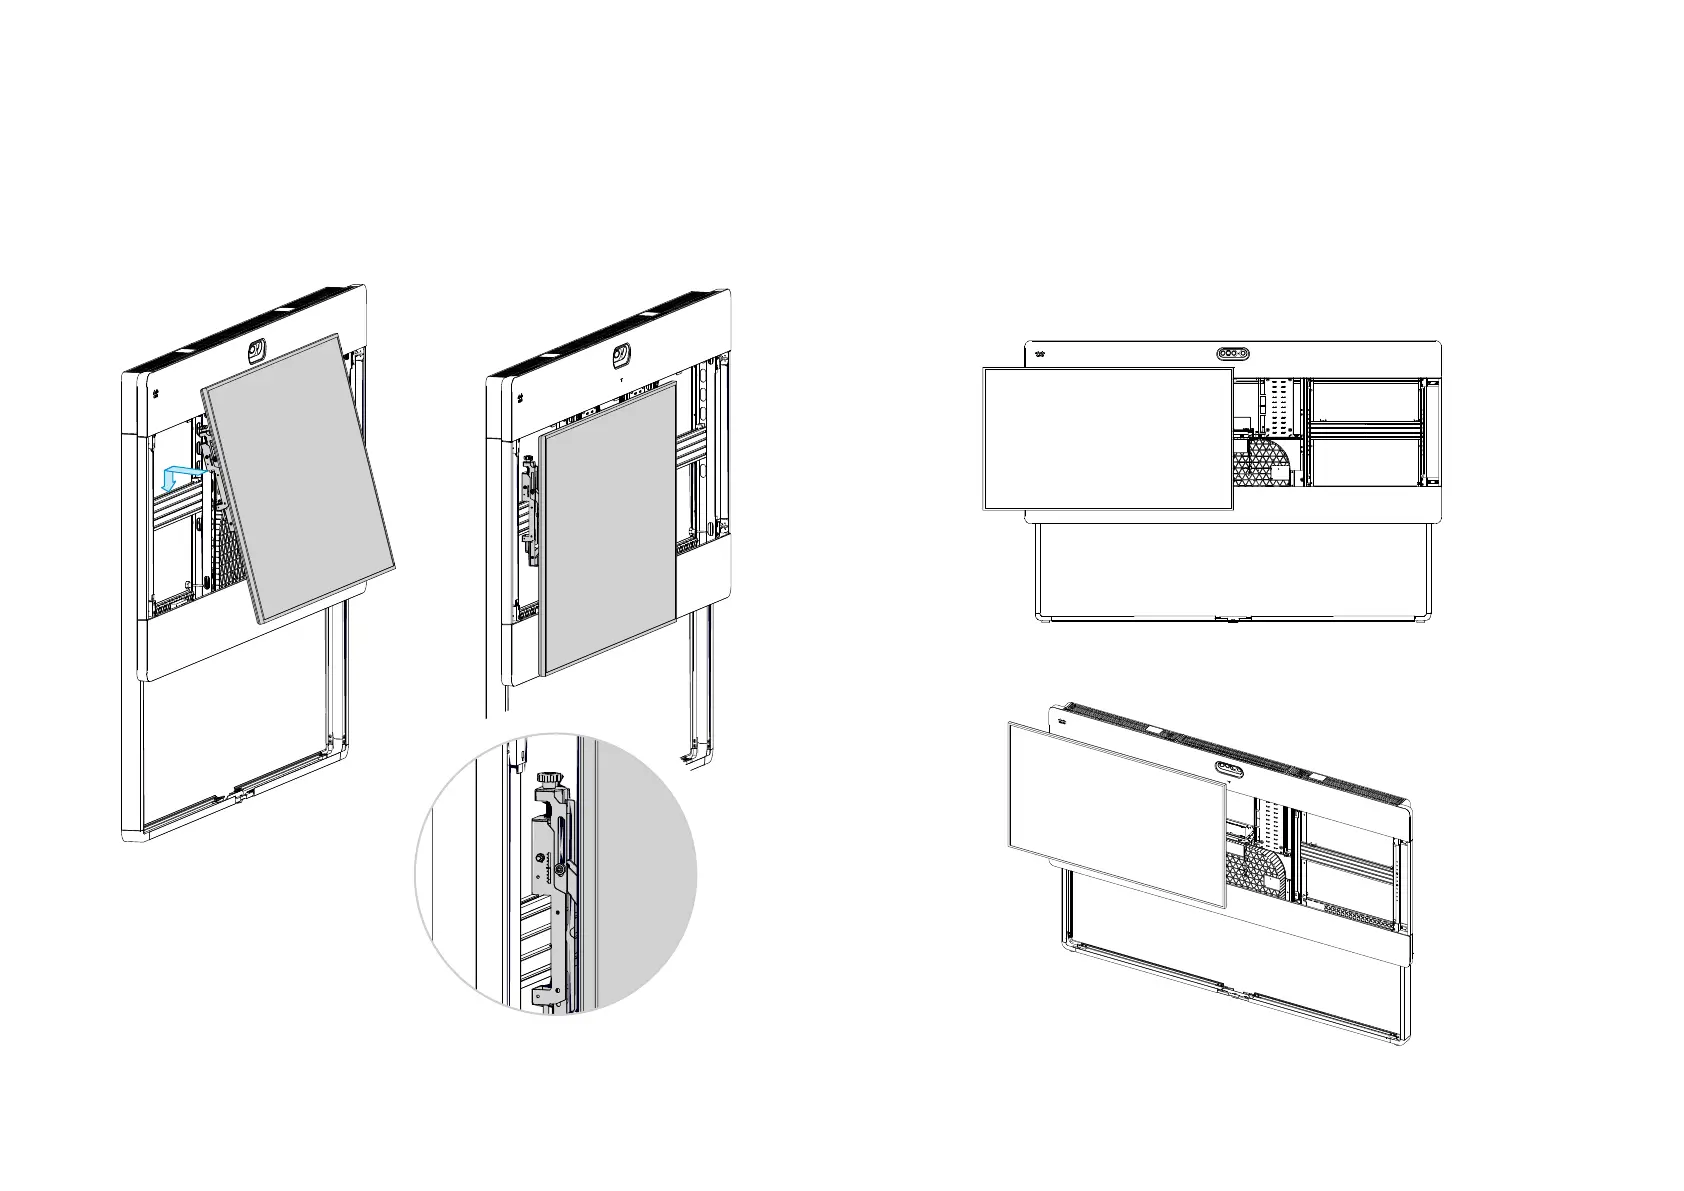
1. Push both interface arms firmly, to put them in pop-out mode. They pop out quickly, so
mind your fingers!
2. Hang the left screen onto the VESA rail so that its right interface arm touches the screen
bracket stopper.
Make sure it hooks into the groove as shown in the close-up.
3. Push the screen gently, so that the screen stays popped in.
Now, the upper right corner of the screen should match the T-mark on the grille. If it’s off
horizontally, move the screen bracket stopper until it matches (refer to step 23.2).
If it’s off vertically more than +/- 20 mm (0.79 in.), you have to go back to step 23.3 and adjust
the VESA rail position.
You will fine-adjust the height and depth of both screens in step 26.
24. Mount the left screen
The interface arms
hooks into the groove
on top of the rail.