Repair procedures, tests, and adjustments
84 Manpack Transceiver 2110 series Repair Guide
To test the sealing in the transceiver:
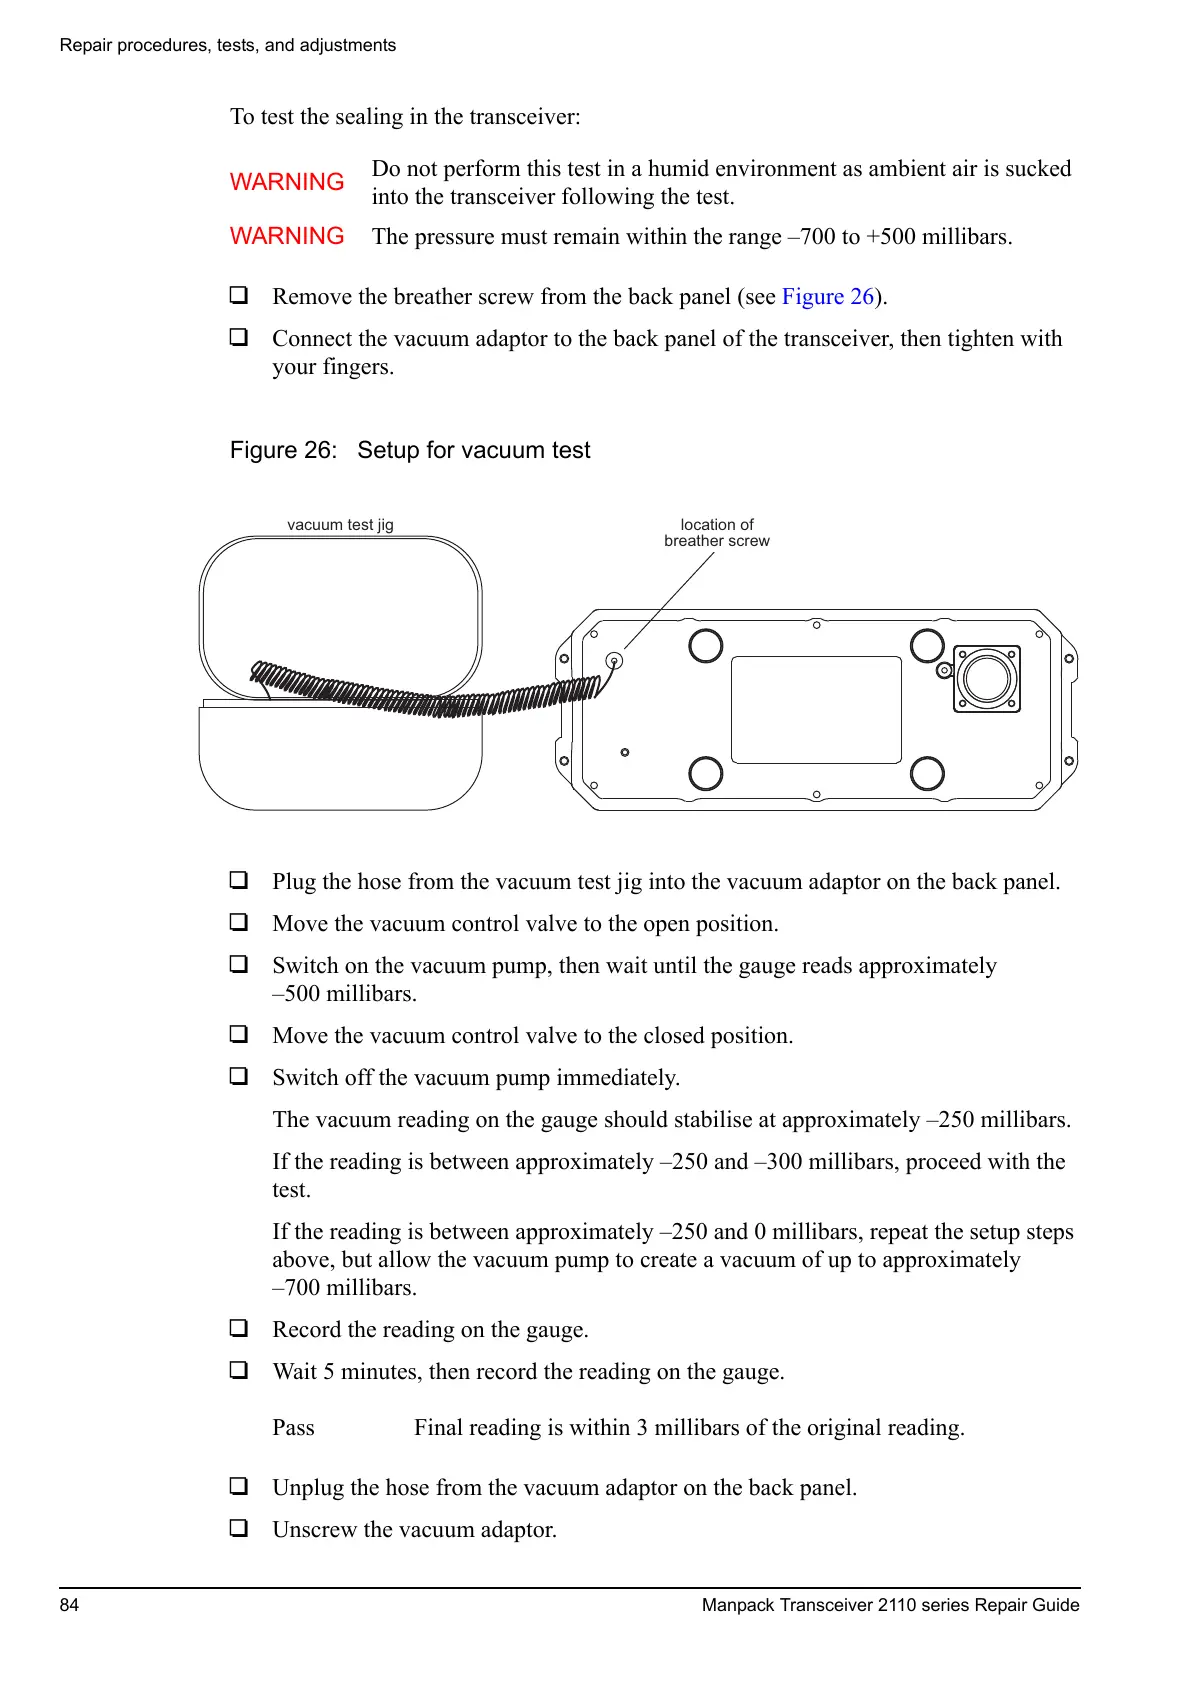
1 Remove the breather screw from the back panel (see Figure 26).
1 Connect the vacuum adaptor to the back panel of the transceiver, then tighten with
your fingers.
Figure 26: Setup for vacuum test
1 Plug the hose from the vacuum test jig into the vacuum adaptor on the back panel.
1 Move the vacuum control valve to the open position.
1 Switch on the vacuum pump, then wait until the gauge reads approximately
–500 millibars.
1 Move the vacuum control valve to the closed position.
1 Switch off the vacuum pump immediately.
The vacuum reading on the gauge should stabilise at approximately –250 millibars.
If the reading is between approximately –250 and –300 millibars, proceed with the
test.
If the reading is between approximately –250 and 0 millibars, repeat the setup steps
above, but allow the vacuum pump to create a vacuum of up to approximately
–700 millibars.
1 Record the reading on the gauge.
1 Wait 5 minutes, then record the reading on the gauge.
1 Unplug the hose from the vacuum adaptor on the back panel.
1 Unscrew the vacuum adaptor.
WARNING
Do not perform this test in a humid environment as ambient air is sucked
into the transceiver following the test.
WARNING The pressure must remain within the range –700 to +500 millibars.
Pass Final reading is within 3 millibars of the original reading.
 Loading...


