EasyManua.ls Logo

ComAp InteliLite AMF25 User Manual

ComAp InteliLite AMF25
774 pages
To Next Page IconTo Next Page
To Previous Page IconTo Previous Page
Page #157 background imageLoading...
Page #157 background image
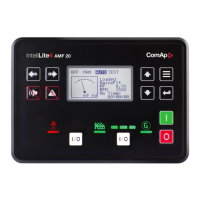
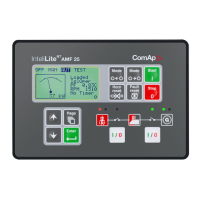
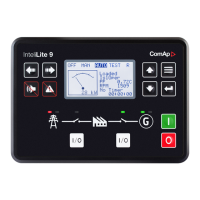
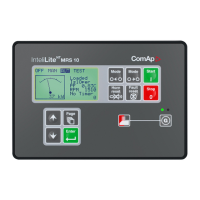
InteliLite Global Guide
157
SMS
Event SMS
The InteliLite controller equipped with the CM-GPRS or CM-4G-GPS communication module is able to send
Event SMS according to the setting of setpoint:
Event Message (page 398)
Note: Firstly setpoint Telephone Number 1 (page 392) has to be adjusted.
The following events can be received by mobile phone:
Engine Start/Stop
Manual Start/Stop
Remote Start/Stop
AMF Start/Stop (as Automatic Mains Failure Start/Stop)
Test Start/Stop Gen-set
Mains Fail
Mains Returned
Load on Mains
Load on Gen-set
Test On Load
Message structure:
Genset Name (hh:mm:ss dd.mm.yyyy)
hh:mm:ss Mains Fail
hh:mm:ss AMF Start
hh:mm:ss Load on Genset
hh:mm:ss Mains Returned
hh:mm:ss Load on Mains
hh:mm:ss AMF Stop
Alarm SMS
The InteliLite controller equipped with the CM-GPRS or CM-4G-GPS communication module is able to send
Alarm SMS according to the setting of setpoints:
Wrn Message (page 399)
Sd Messages (page 399)
BOC Message (page 399)
Note: Firstly setpoint Telephone Number 1 (page 392) has to be adjusted.
Message structure:
Gen-set Name
AL=(Alarm 1, Alarm 2, Alarm x)
Note: Asterisk means that alarm is unconfirmed and exclamation mark means that alarm is active.

Table of Contents

Question and Answer IconNeed help?

Do you have a question about the ComAp InteliLite AMF25 and is the answer not in the manual?

ComAp InteliLite AMF25 Specifications

General IconGeneral
Inputs8 binary inputs
Outputs8 binary outputs
Power Supply8-36 V DC
CommunicationRS232, RS485
Operating Temperature-20°C to +70°C
Supported GeneratorsDiesel, gas
Controller TypeAutomatic Mains Failure Controller
ProtectionIP65

Summary

1 Document information

1.4 General warnings

Provides crucial safety warnings and precautions for operating and maintaining the controller.

2 System overview

2.4.1 InteliConfig

Describes InteliConfig software for controller configuration, firmware upgrades, and value reading.

3 Applications overview

4 Installation and wiring

4.2 Controller installation

Provides instructions for installing the controller, including physical dimensions.

4.2.2 Mounting

Explains the procedure for mounting the controller onto a switchboard door using screw holders.

4.3 Terminal Diagram

Illustrates the terminal layout for generator current, voltage, binary inputs, CAN, analog inputs, binary outputs, and power supply.

4.4 Recommended wiring

Provides guidance on recommended wiring practices for controller connections.

4.4.1 General

Offers general recommendations for proper function, including grounding and cable usage.

4.4.2 Grounding

Details proper grounding procedures for controller safety and function.

4.4.3 Power supply

Explains power supply requirements and protection measures for the controller.

4.4.4 Measurement wiring

Covers wiring instructions for voltage and current measurement for proper operation.

4.4.6 Binary inputs

Provides wiring guidelines for binary inputs, emphasizing cable usage and configuration.

4.4.7 Binary Outputs

Details wiring for binary outputs, including relay usage and current limitations.

4.4.8 Emergency stop

Explains two methods for implementing the Emergency Stop function, software and hard-wired.

4.4.9 Analog inputs

Describes how to connect analog inputs for resistive sensors like VDO or DATCON.

4.4.10 CAN bus and RS485 wiring

Covers wiring rules and parameters for CAN bus communication.

4.5 Plug-in module installation

Guides the user through the process of installing plug-in modules into the controller.

4.5.1 Installation

Provides step-by-step instructions for physically installing a plug-in module.

4.6 Maintenance

Covers essential maintenance procedures for the controller and its components.

5 Controller setup

5.2 Controller configuration and PC tools connection

Introduces configuring the controller and connecting to PC tools for management.

5.3 Operator Guide

Provides guidance on operating the controller via its front panel interface.

5.3.4 Password

Details the process of entering and changing controller passwords for security.

5.4.2 IL3-RD Firmware installation

Details the process of installing the IL3-RD firmware using InteliConfig.

5.4.3 Wiring

Explains wiring requirements for connecting the IL3-RD remote display via RS232/RS485.

5.4.6 Connection troubleshooting

Provides common reasons and solutions for remote display connection failures.

5.5 Functions

Lists and describes various functions available in the controller.

5.5.1 Start-stop sequence

Details the state transitions and actions involved in the engine's start-stop sequence.

5.5.2 Operating Modes

Explains how to select and manage operating modes (OFF, MAN, AUTO) via front panel or setpoints.

5.5.3 Engine start

Describes the engine start process for both diesel and gas engines, including sequence and parameters.

5.5.7 Dual Operation

Explains the dual operation MRS function involving two gen-sets and communication setup.

5.5.9 Alarm management

Covers the controller's alarm evaluation, levels (yellow/red), and assignment to inputs.

6 Communication

6.1 PC

Details PC-based communication methods for connecting to the controller.

6.1.1 Direct communication

Explains direct cable connections via RS232, USB, RS485, or Ethernet.

6.1.2 Remote communication

Explains how to connect remotely via CM-GPRS or CM-Ethernet plug-in modules.

6.2.2 MODBUS-RTU, MODBUS/TCP

Explains MODBUS protocol for integration into building management systems or remote monitoring.

7 Technical data

8 Appendix

Related product manuals