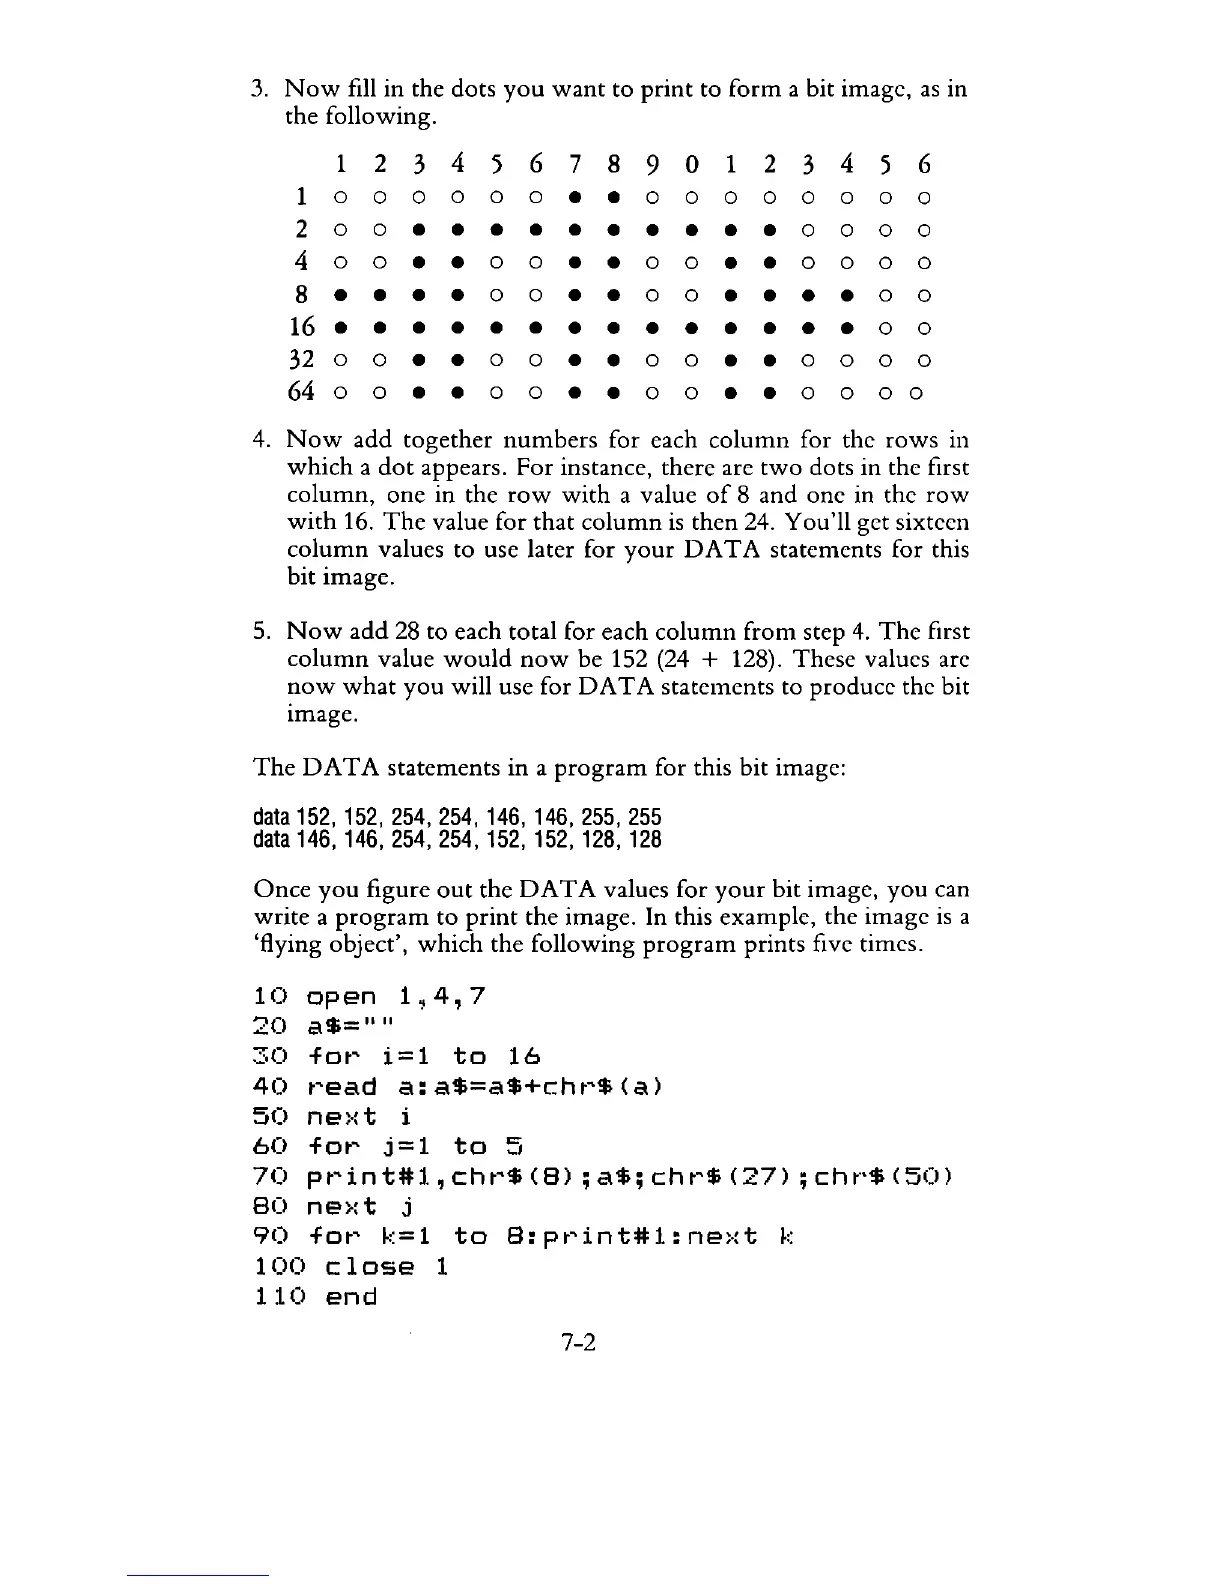
3.
Now
fill in the dots
you
want
to
print
to
form
a bit image,
as
in
the following.
1
234
5 6 7 8
901
234
5 6
1 0 0 0 0 0 0 • • 0 0 0
000
0 0
2 0 0 • • • • • • • • • • 0 0 0 0
400
• • 0 0 •
.00
• •
000
0
8 • • • • 0 0 •
.00
• • • • 0 0
16
••••••••••••••
0 0
32
0 0 • • 0 0 • • 0 0 • • 0 0 0 0
6400
••
00
••
00
••
0000
4.
Now
add
together
numbers
for each
column
for the
rows
in
which
a
dot
appears. For instance, there are
two
dots in the first
column,
one
in
the
row
with
a value
of
8 and one in the
row
with
16.
The
value for
that
column
is
then 24. You'll get sixteen
column
values to use later for
your
D A T A statements for this
bit
image.
5.
Now
add
28 to each total for each
column
from step
4.
The
first
column
value
would
now
be
152 (24 + 128). These values are
now
what
you
will use for
DATA
statements to produce the bit
image.
The
DATA
statements
in
a
program
for this bit image:
data
152,152,254,254,146,146,255,255
data
146,146,254,254,152,152,128,128
Once
you
figure
out
the
DATA
values for
your
bit image,
you
can
write
a
program
to
print
the image. In this example, the image
is
a
'flying object',
which
the following
program
prints five times.
10
open
1~4,7
20
a$=""
30
for
i=1
to
16
40
read
a:a$=a$+chr$(a)
50
ne)·:t
i
60
for
j=1
to
5
70
print#1,chr$(B);a$;chr$(27);chr$(50)
80
ne>:t
j
90
for
k=1
to
B:print#l:next
k
100
close
1
110
end
7-2