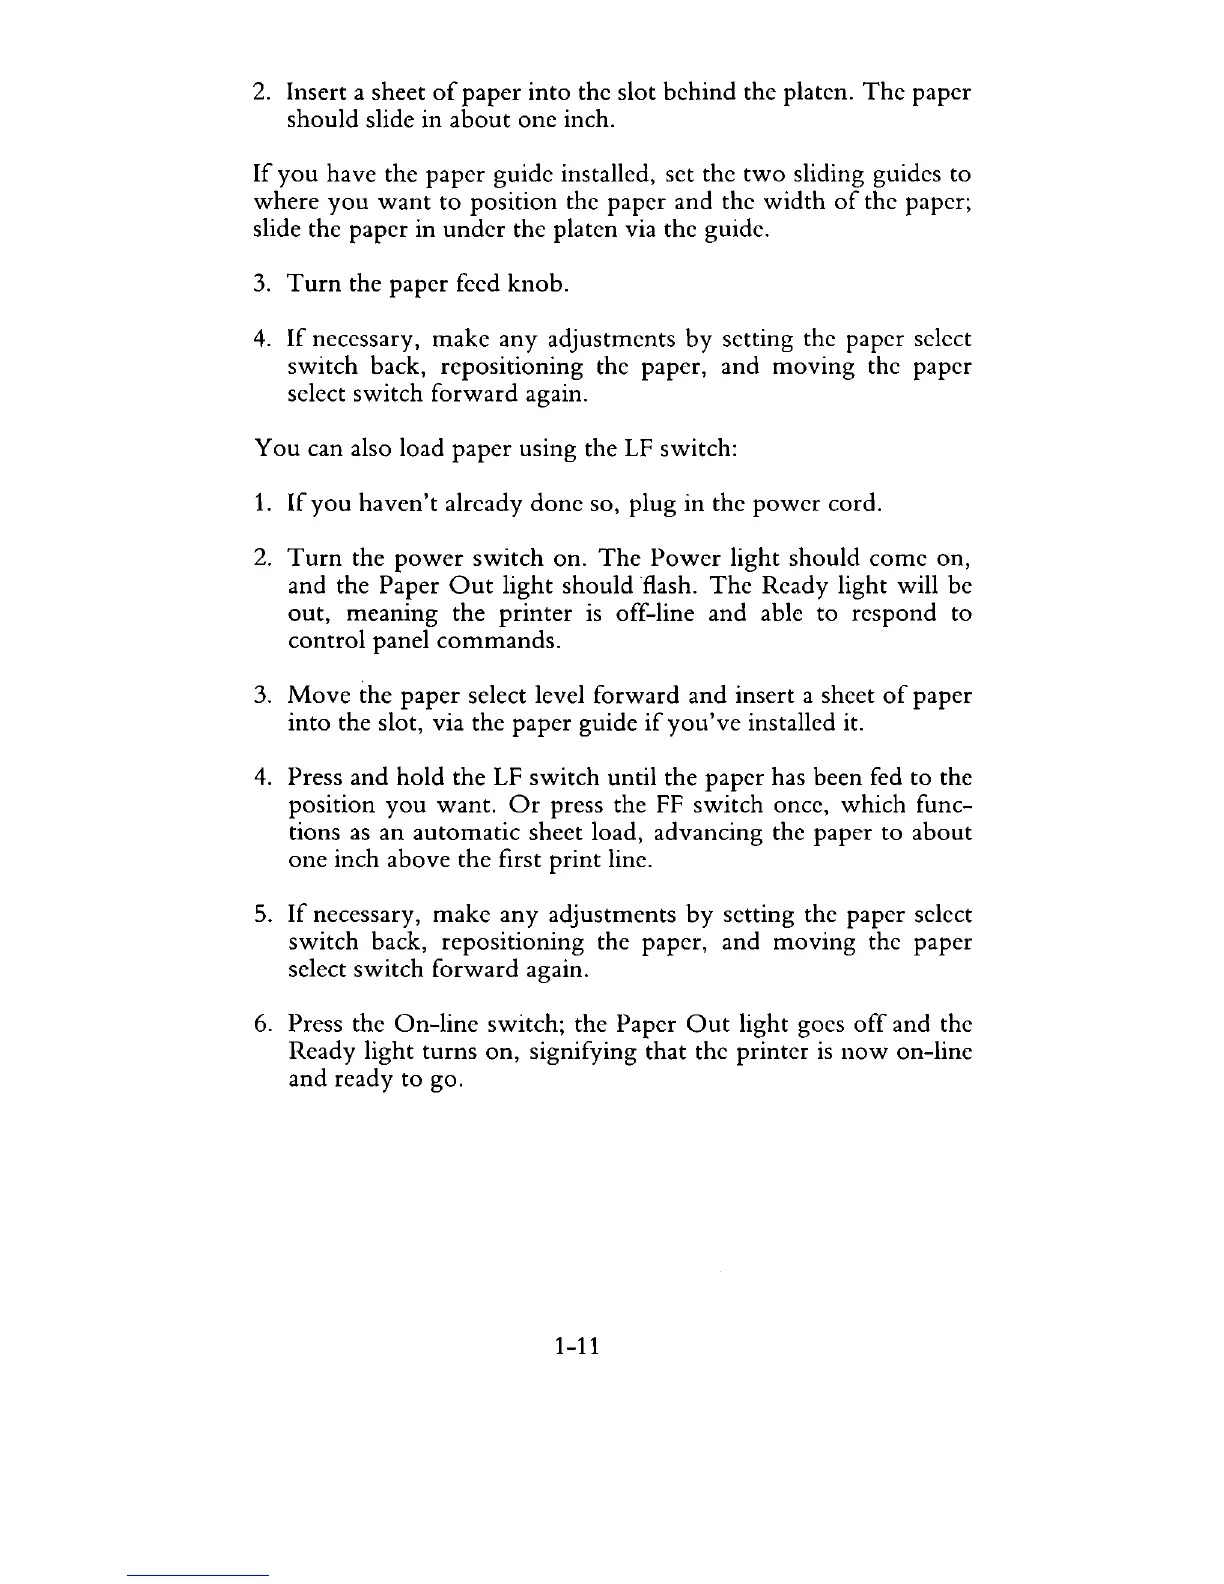
2.
Insert a sheet
of
paper
into the slot
behind
the platen.
The
paper
should
slide
in
about
one inch.
If
you
have the
paper
guide installed, set the
two
sliding guides to
where
you
want
to
position the paper and the
width
of
the paper;
slide the paper in
under
the platen via the guide.
3.
Turn
the paper feed
knob.
4.
If
necessary,
make
any
adjustments
by
setting the paper select
switch
back, repositioning the paper,
and
moving
the paper
select switch
forward
again.
You
can also load
paper
using the
LF
switch:
1.
If
you
haven't
already
done
so, plug in the
power
cord.
2.
Turn
the
power
switch
on.
The
Power
light should
come
on,
and the Paper
Out
light
should flash.
The
Ready light will be
out,
meaning
the
printer
is
off-line and able to respond to
control
panel
commands.
3.
Move
the
paper
select level
forward
and
insert a sheet
of
paper
into
the slot, via the paper guide
if
you've
installed it.
4.
Press and
hold
the LF
switch
until the paper has been fed to the
position
you
want.
Or
press the FF switch once, which func-
tions as
an
automatic
sheet load, advancing the paper to
about
one
inch above the first
print
line.
5.
If
necessary,
make
any
adjustments
by
setting the paper select
switch
back, repositioning the paper, and
moving
the paper
select switch
forward
again.
6. Press the
On-line
switch; the Paper
Out
light goes
off
and the
Ready light
turns
on,
signifying
that
the printer
is
now
on-line
and
ready to go.
1-11