EasyManuals Logo

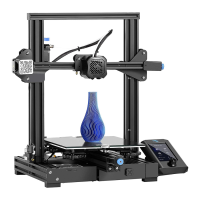
Creality ENDER-3 V2 User Manual

Creality ENDER-3 V2
41 pages
To Next Page IconTo Next Page
To Previous Page IconTo Previous Page
Page #13 background imageLoading...
Page #13 background image
12
4. Install Nozzle Assembly, Z-axis Roller Bracket Assembly
3
3
Nozzle Assembly x 1
32
32
Hexagon Socket
Flat Round Head
Spring Washer
Combination
4
4
Z-axis Roller Bracket
Assembly
● Make sure the drive belt is in the profile slot and slide the Nozzle assembly onto the profile
as shown above.
● Attach the Z-Axis Roller Bracket Assembly to the profile, aligning the bolt head into the
hole on the profile and using the M4x16 screw into the threaded hole in the profile.
Back View

Questions and Answers:

Question and Answer IconNeed help?

Do you have a question about the Creality ENDER-3 V2 and is the answer not in the manual?

Creality ENDER-3 V2 Specifications

General IconGeneral
Build Volume220 x 220 x 250 mm
Layer Resolution0.1-0.4 mm
Filament Diameter1.75 mm
Nozzle Diameter0.4 mm
Bed LevelingManual
Extruder TypeBowden
Power SupplyMeanWell 350W
Build SurfaceCarborundum Glass
Printing TechnologyFDM (Fused Deposition Modeling)
Max. Nozzle Temperature255°C
Max. Bed Temperature100°C
Machine Dimensions475 x 470 x 620 mm
Machine Weight7.8 kg
ConnectivityUSB, SD Card
Supported MaterialsPLA, ABS, TPU, PETG
Display Screen4.3-inch Color LCD
Print Speed180 mm/s

Related product manuals