13
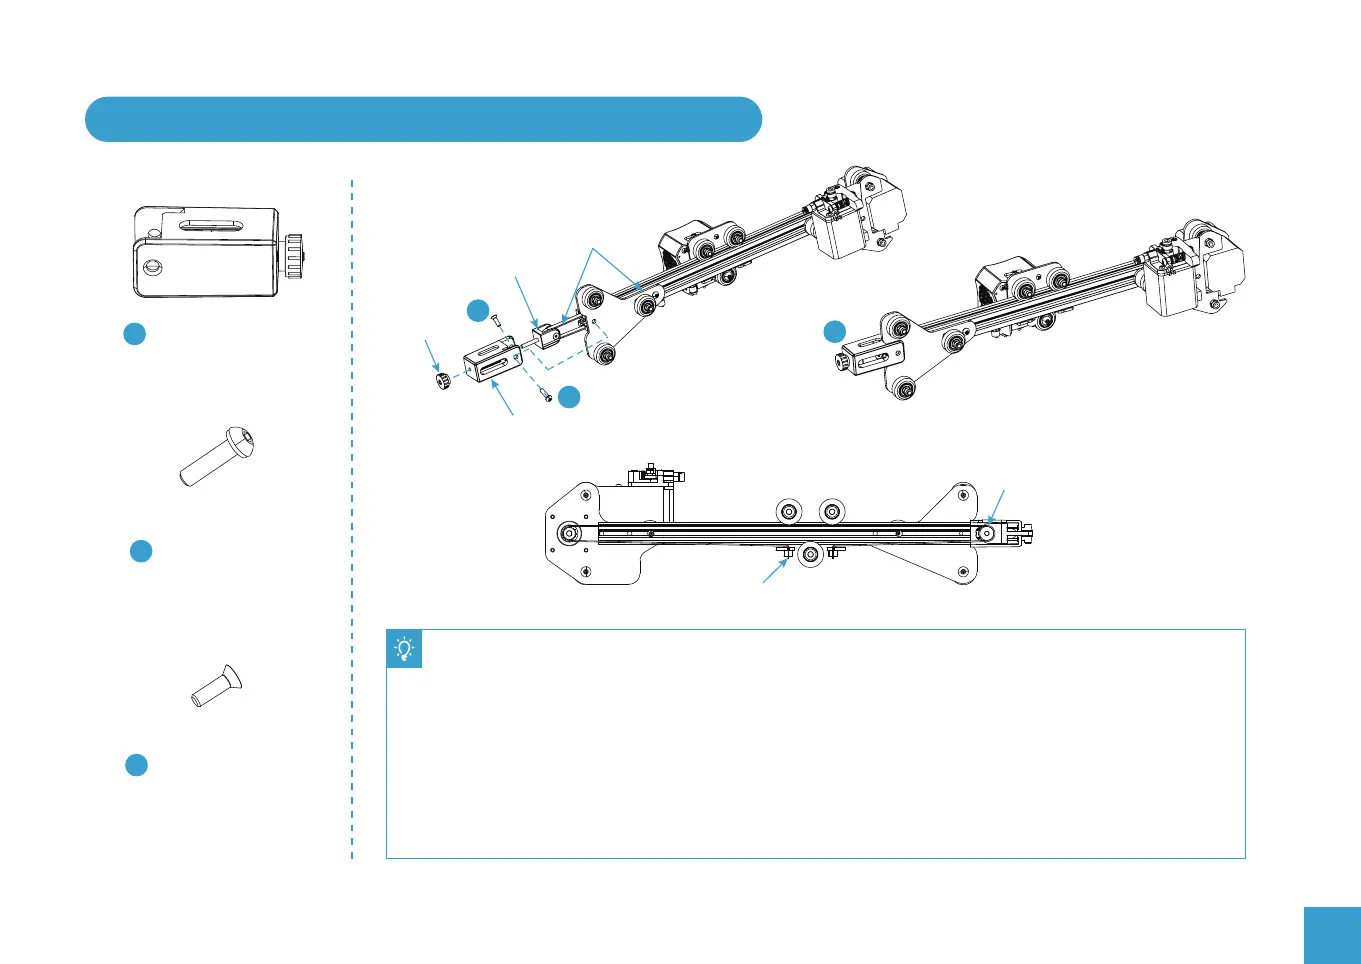
5. Install X-axis Tensioner and Connect the Drive Belt
35
35
Hexagon Socket
Countersunk Head
Screw (black)
M4X14 x 1
32
32
Hexagon Socket
Flat Round Head
Spring Washer
Combination
5
5
X-axis Tensioner x 1
Drive Belt
copper sleeve
Installation Illustration Completed installation
Tensioner
block
Tensioner block
X-axis tensioner base
Tensioning
Knob
Back View
● Undo the tensioning knob and remove the tensioner block.
● Thread the drive belt around the pulley making sure it has not twisted and push the pulley back into the
tensioner base making the alignment is as shown in the picture above.
● Screw the tensioning knob back into place by couple of turns.
● Attach the Tensioner base to the profile Z Axis Roller Bracket assembly with a M4X16 screw on one side
and the countersunk screw (in the Tensioner block bag) on the other, both these screws use the same
threaded hole in the profile.
● Secure the ends of the drive belt by sliding the belt into the slots in the Nozzle assembly as in the picture
above.