EasyManuals Logo

Creality ENDER-3 V2 User Manual

Creality ENDER-3 V2
41 pages
To Next Page IconTo Next Page
To Previous Page IconTo Previous Page
Page #16 background imageLoading...
Page #16 background image
15
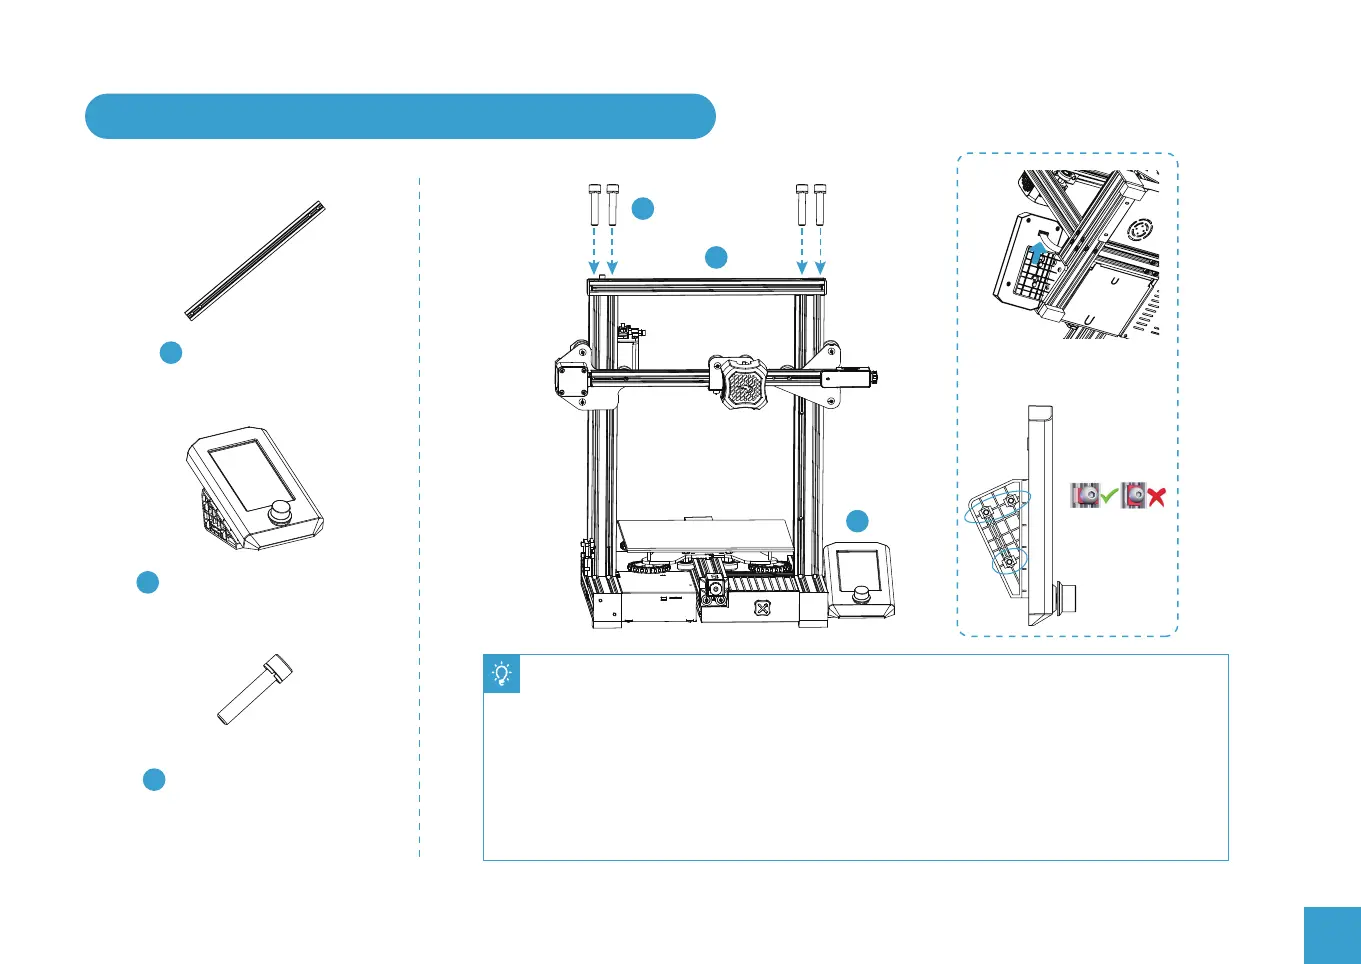
7. Install the Gantry Profile and Display Assembly
● Secure the Gantry profile onto the upper end of the gantry with four hexagon socket head
cap screws M5x25 and tighten securely:
● Unclip the display from the bracket, slacken the screws pre-installed on the bracket and
insert the T nuts into the base profile.
● Tighten the bolts making sure the T nuts are turning to engage with the base profile.
● The display can be moved forwards and backwards to suit your preference then tighten
the bolts.
● Connect the ribbon cable to the display screen and clip it back onto the bracket.
2
2
Display Assembly x 1
11
11
29
29
Hexagon Socket
Head Spring Washer
Combination Screw
Gantry Profile x 1
Connect the display
screen Assembly

Questions and Answers:

Question and Answer IconNeed help?

Do you have a question about the Creality ENDER-3 V2 and is the answer not in the manual?

Creality ENDER-3 V2 Specifications

General IconGeneral
Build Volume220 x 220 x 250 mm
Layer Resolution0.1-0.4 mm
Filament Diameter1.75 mm
Nozzle Diameter0.4 mm
Bed LevelingManual
Extruder TypeBowden
Power SupplyMeanWell 350W
Build SurfaceCarborundum Glass
Printing TechnologyFDM (Fused Deposition Modeling)
Max. Nozzle Temperature255°C
Max. Bed Temperature100°C
Machine Dimensions475 x 470 x 620 mm
Machine Weight7.8 kg
ConnectivityUSB, SD Card
Supported MaterialsPLA, ABS, TPU, PETG
Display Screen4.3-inch Color LCD
Print Speed180 mm/s

Related product manuals