25
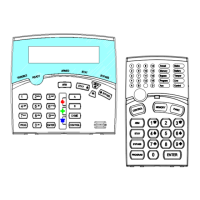
How to Add or Change the User Code (Using LCD Keypad)
While in CLIENT mode, press <PROGRAM>/ then 1E and the User number (2 to 100)
you want to add or change, then press <ENTER>/
. If there is an existing code already in
the system for that user, it will be displayed on the LCD Screen. Use the numeric keypad buttons
to enter the new code for that user, then press <ENTER>/
to save your new code. The
new code will now be displayed be LCD Screen along with three short beeps. A code can be any
combination of 1 to 6 digits. Entering the new code deletes the old code from the system.
Repeat the procedure for all users.
Press <PROG>/
and <ENTER>/ to exit Local Program mode.
How to Delete the User Code (Using LCD Keypad)
In client mode, press <PROGRAM>/ then <1> <ENTER>/ and the User number (2
to 100) you intend to delete, press <ENTER>/
. The existing code will be displayed on the
LCD Screen. (In this next step, you will need to press Two Buttons TOGETHER), Press
<CONTROL>/
and the Digit ‘0’ Together to delete User code.
Press <ENTER>/
to save the change.
Press <PROG>/
and <ENTER>/ to exit program mode.
Adding/Changing Telephone Numbers (Using LCD Keypad)
Your panel accepts up to Eight phone numbers with a total of 16 digits each. Your panel can be
programmed to dial all or any of these depending on the event which has occurred. (The eight
phone numbers are at program address P181E 1-8E).
While in CLIENT mode, key in the following sequence <PROGRAM>/
< P181E 1E > (The
address for telephone number 1), the existing number will be displayed on the LCD Screen. Now
enter <NEW TELEPHONE #> <ENTER>/
. The new numbers will be displayed on the LCD
Screen along with the three confirmation acceptance beeps.
At any time, you can enter in the address for the telephone number just to view the currently
programmed value then press the <PROGRAM>/
button to move on to the next address for
the second phone number, etc.
For example, P181E 1E= PH # 1, P181E 2E = PH# 2, P181E 6E = PH# 6.
How to set Time and Date
The alarm system has an internal clock that may be used to automatically Arm or Disarm the
alarm or turn Outputs On or off. It is also used to identify when events occurred in memory via
the LCD keypad. If you need to change the Time & Date it must be done from the CLIENT
mode. To change the Time & Date press
Press <PROGRAM>/
<26> <ENTER>/ <2> <ENTER>/ <1-7> <ENTER>/
Where 1-7 = the current day (1=Sun, 2 = Mon to 7 = Sat)
Press <PROGRAM>/
<26> <ENTER>/ <1> <ENTER>/ <HHMM> <ENTER>/
.
Where HH = Hour in 24 Hour Format and MM = Minutes
Press <PROGRAM>/
<26> <ENTER>/ <3> <ENTER>/ <DDMMYY>
<ENTER>/
.
Where DD =1-31 current date, MM= months 1-12, YY = year 00-99