7 | Unit installation
Installer reference guide
86
ERLA11~16D + EBBH/X11+16D
Daikin Altherma 3 R W
4P643603-1B – 2022.05
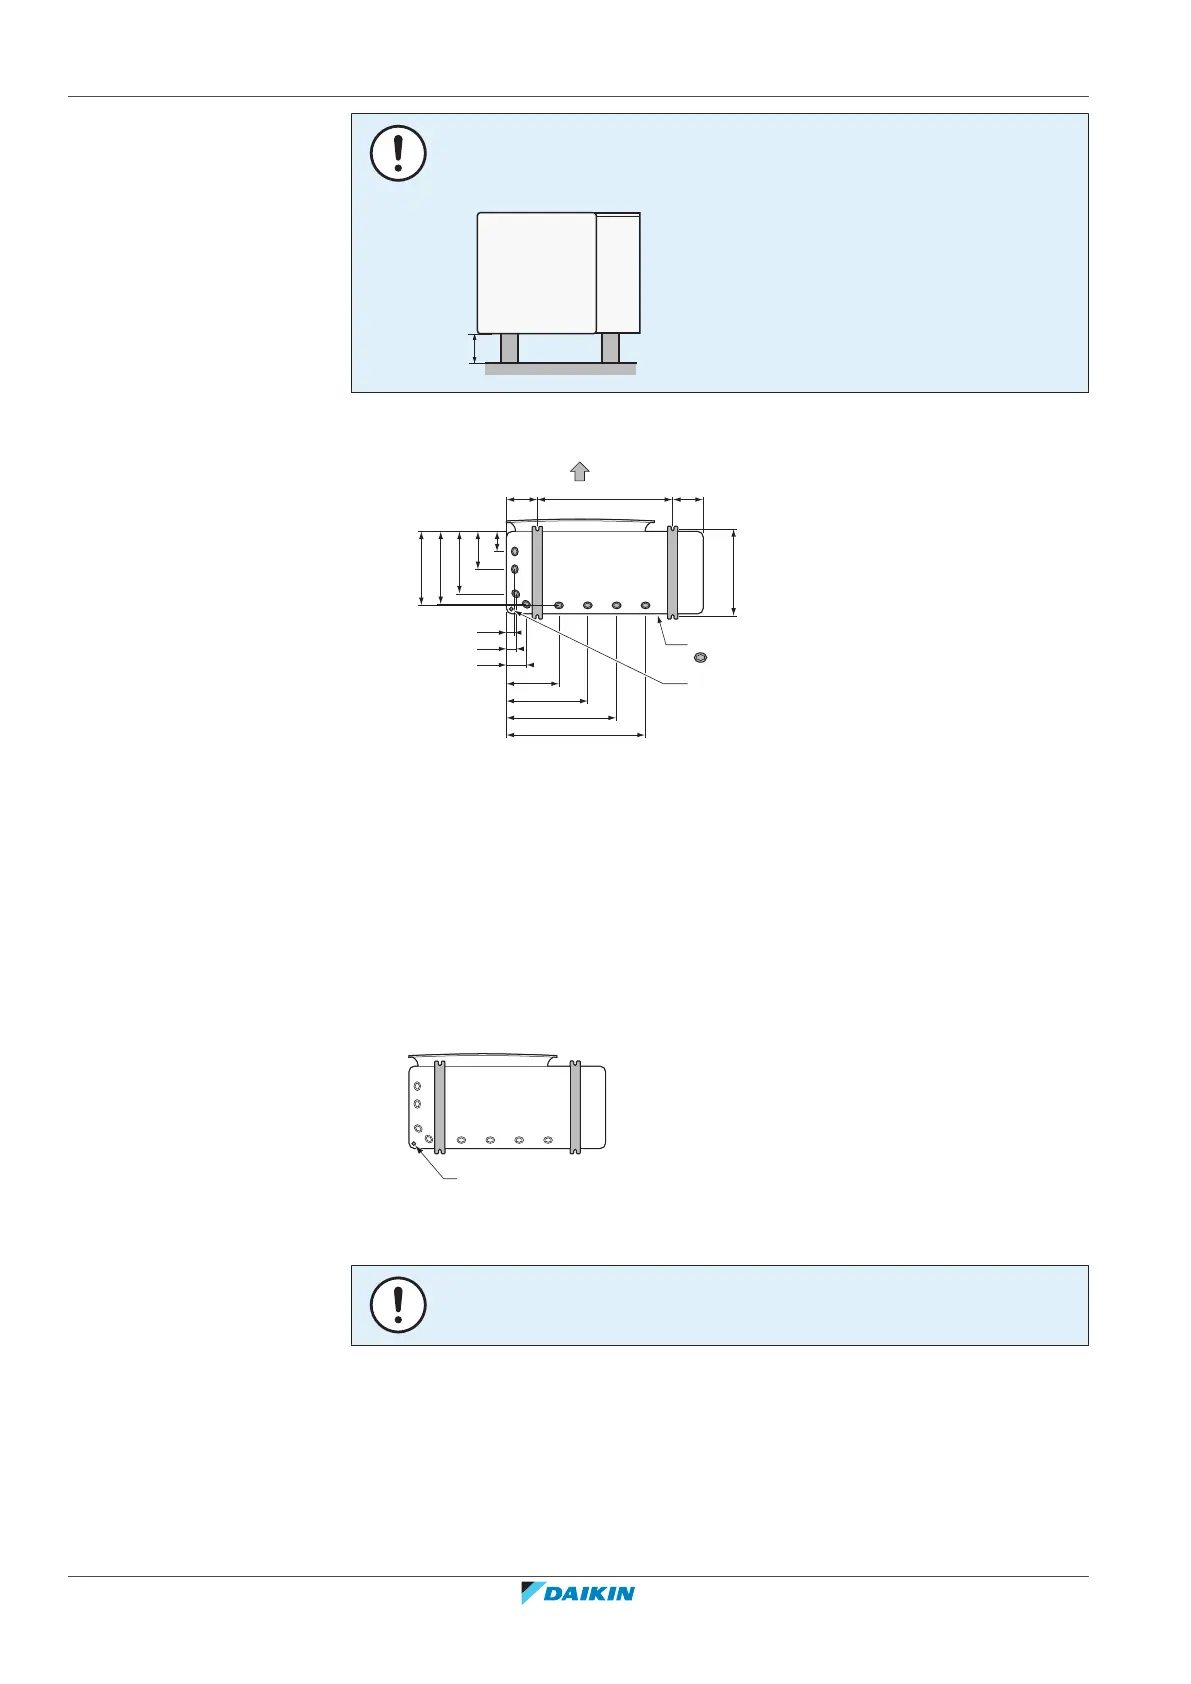
NOTICE
If drain holes of the outdoor unit are covered by a mounting base or by floor surface,
raise the unit to provide a free space of more than 150mm under the outdoor unit.
Drain holes (dimensions in mm)
A
171 206758
43
48
288
451
613
776
408
414
349
214
111
480~490
107
B
B
C
E
D
=
A Discharge side
B Distance between anchor points
C Bottom frame
D Drain holes
E Knockout hole for snow
Snow
In regions with snowfall, snow might build up and freeze between the heat
exchanger and the casing of the unit. This might decrease the operating efficiency.
To prevent this:
1 Remove the knockout hole (a) by tapping on the attachment points with a flat
head screwdriver and a hammer.
2 Remove the burrs, and paint the edges and areas around the edges using
repair paint to prevent rusting.
NOTICE
When making knockout holes, do NOT damage the casing and underlying piping.
7.3.6 To install the discharge grille
1 Insert the hooks. To prevent breaking the hooks:
▪ First insert the bottom hooks (2×).
▪ Then insert the top hooks (2×).
2 Insert and fix the screws (4×)(delivered as accessory).

 Loading...