Installation Manual 3P291714-7H
DCM601B51 intelligent Touch Manager
37English
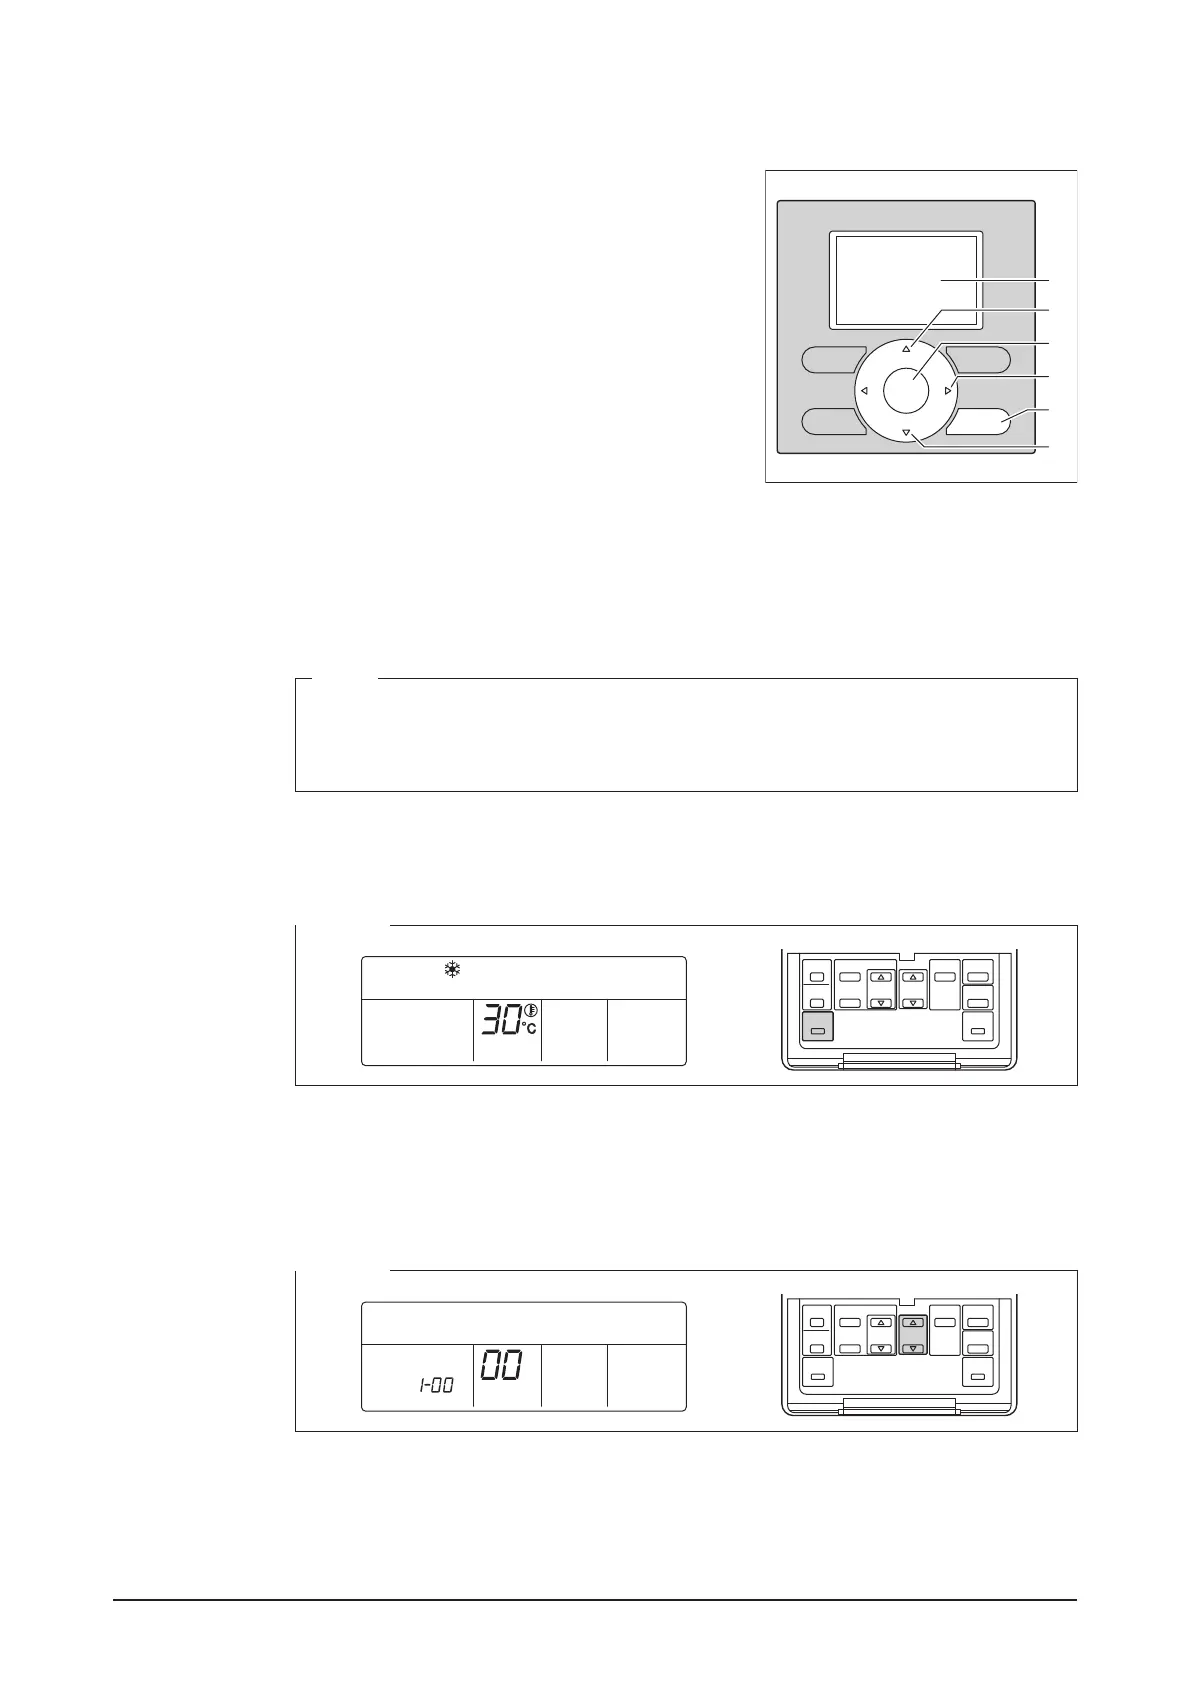
The names of buttons and areas of a navigation remote controller used in this section are
shown below.
<Navigation Remote controller>
A Display
B Up button
C Menu / Enter button
D Right button
E Cancel button
F Down button
A
B
F
C
D
E
4.8.2 Procedure for a wired remote controller
The following describes how to assign a DIII-NET address when a wired remote controller
is installed.
NOTE
After power-on, the controller shows the symbol “
88” for about 1 minute after displaying
all information on its display. During this period, it may not accept your operation. If so,
try operating the remote controller again after “88” disappears.
1. Press and hold the Inspection/Test Operation button for 4 seconds or more.
“SETTING” appears in the center of remote controller display.
<Step 1>
HH
2. Using the Temperature Setting buttons, change the value shown in the parameter num-
ber display area to “00”.
In the address display area, the current address setting is displayed. (This area will
show “–” if no address is set.)
<Step 2>
SETTING
GROUP