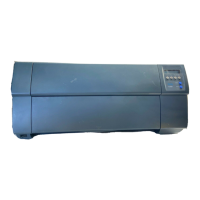
Tally Dascom 1330
61
4. At this stage:
If 【Load/Eject】key is pressed, an asterisk “*” is appended to “Yes” and you should
repeat the procedures for form length measurement as mentioned. Or,
If you input “Exit”, the printer saves the measurement value and proceeds with the next
customized setting.
6.3 Customize Cut Sheet Bottom Margin
1. After you follow through all the steps in 6.2 or you input “Next” twice in step 3 in 6.1, the
printer prompts:
Bottom Margin
2. The remaining operations are nearly the same as described in section 6.2. The only
difference is to input +/- 1/72” till you get the desirable bottom margin.
6.4 Customize Cut Sheet Left Margin
1. After you follow through all the steps in 6.3 or you input “Next” three times in step 3 in
6.1, the printer prompts:
Left Margin
2. The remaining operations are nearly the same as described in section 6.2. The only
difference is to input +/- 1/72” till you get the desirable left margin.
6.5 Customize Fanfold Page Formatting Parameters
The customizations of the form length, TOF, bottom and left margins for fanfold are exactly
the same as describe. All you need is to bypass the Single Sheet menu under Customize
Form. Follow step 1 in section 6.1:
Customize Form
[LF]=Next, [TOP]=Back, [LOAD/EJECT]=OK, [ONLINE]=Exit, [ONLINE]+[LOAD/EJECT]=
Save and restart the printer.
Single sheet
Then hit “Next” instead to get into the fanfold parameter menus:
[Tractor Paper]
Form Length
Refer section 6.1 to 6.4 for details on customizing the form length, TOF, bottom margin, and
left margin for fanfold.