Tally Dascom 1330
6
9. Lower the Head Gap Lever to the right scale according to the paper thickness.
10. Close the Front Flap to reduce printing noise and prevent dust going into the printer.
Open it only for ribbon installation and adjustment.
Notes on Ribbon Cartridge Removal:
1) Clear the paper in the printer.
2) Turn off the printer power.
3) Set the Gap Lever to the top most position, labeled “ ”.
4) Open the Front Falp.
5) Let the Print Head cool down, if necessary. Move the carriage to the middle.
6) Pull out the blue Ribbon Guide from the Print Head.
7) Hold the handle bar on the Ribbon Cartridge and pull the cartridge towards
you to unlatch it. Some force may be needed to unlatch the cartridge.
8) Remove the ribbon fabric from the Print Head carefully without entangling it.
2.2 Install the Sheet Feeder
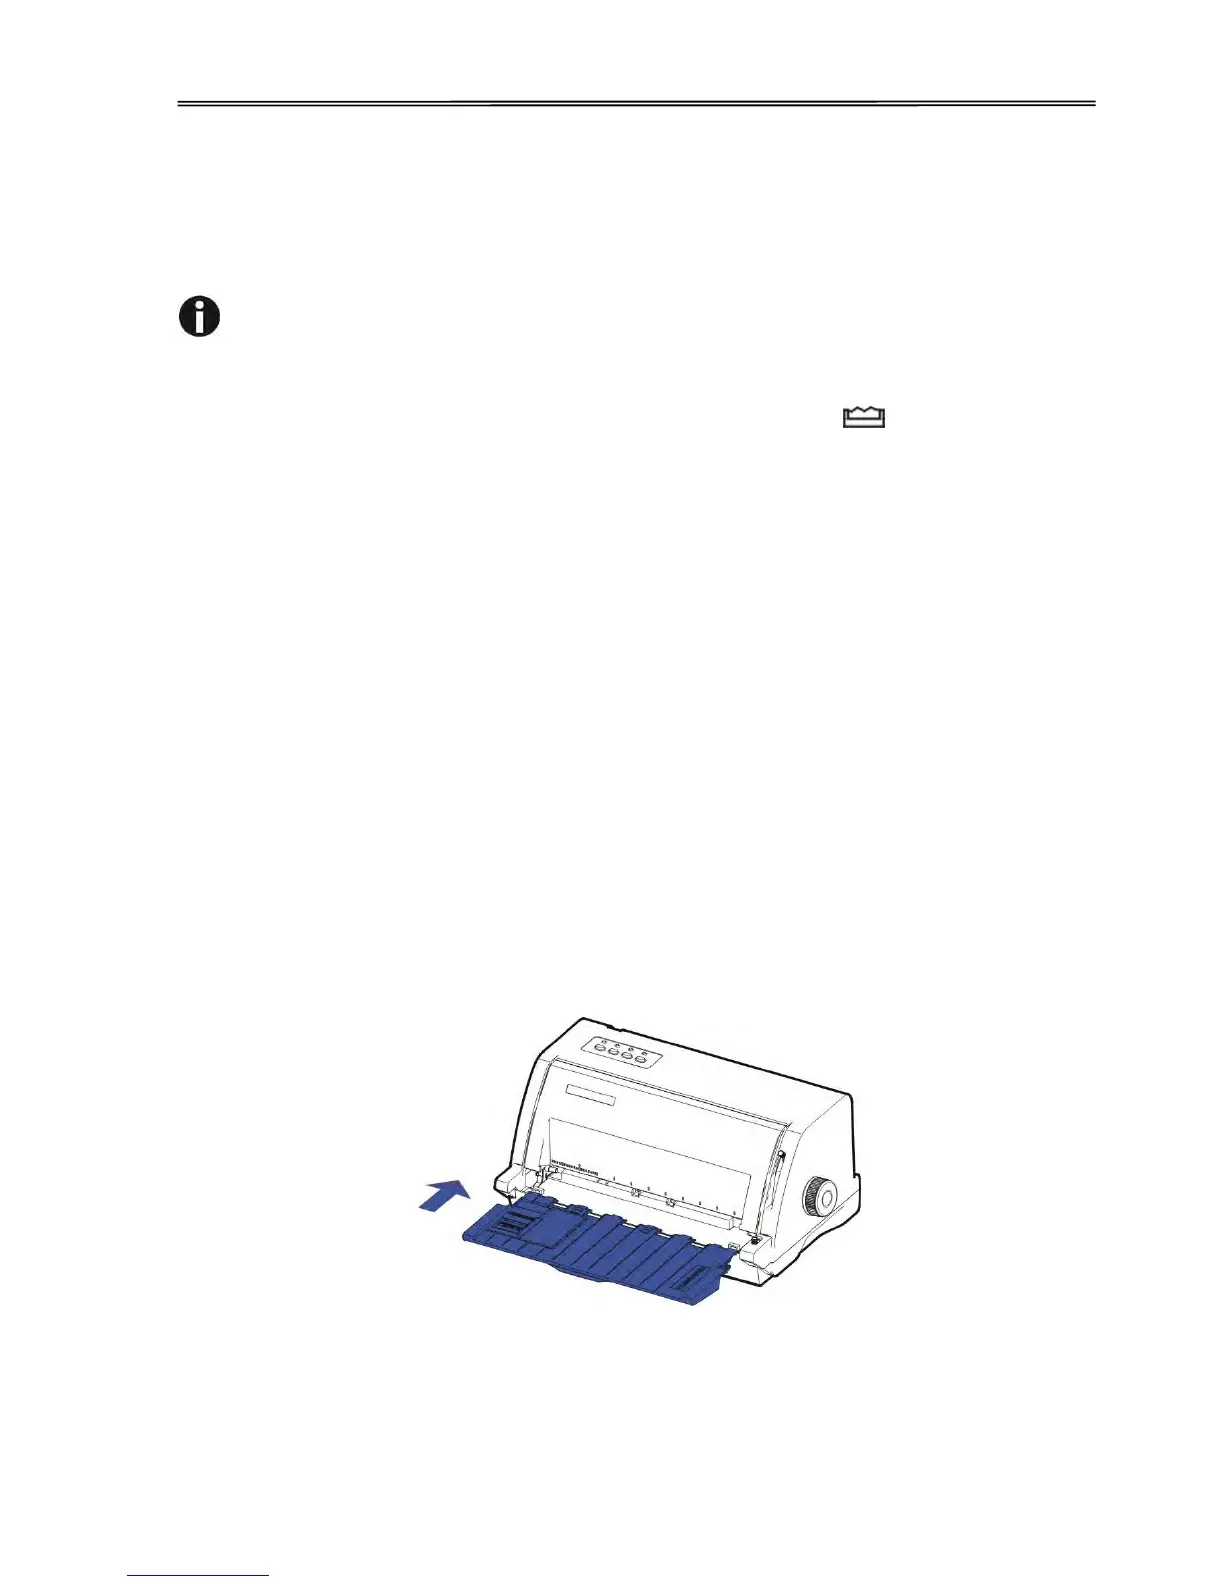
As shown in the picture, ensure the Sheet Feeder fingers fit into the slots of the printer. Push in
the Sheet Feeder until its sides latch on the fixed bolts in the printer. The Sheet Feeder is now
installed successfully.
To remove the Sheet Feeder, use one hand to hold the printer and the other hand to pull and
unlatch the Sheet Feeder.