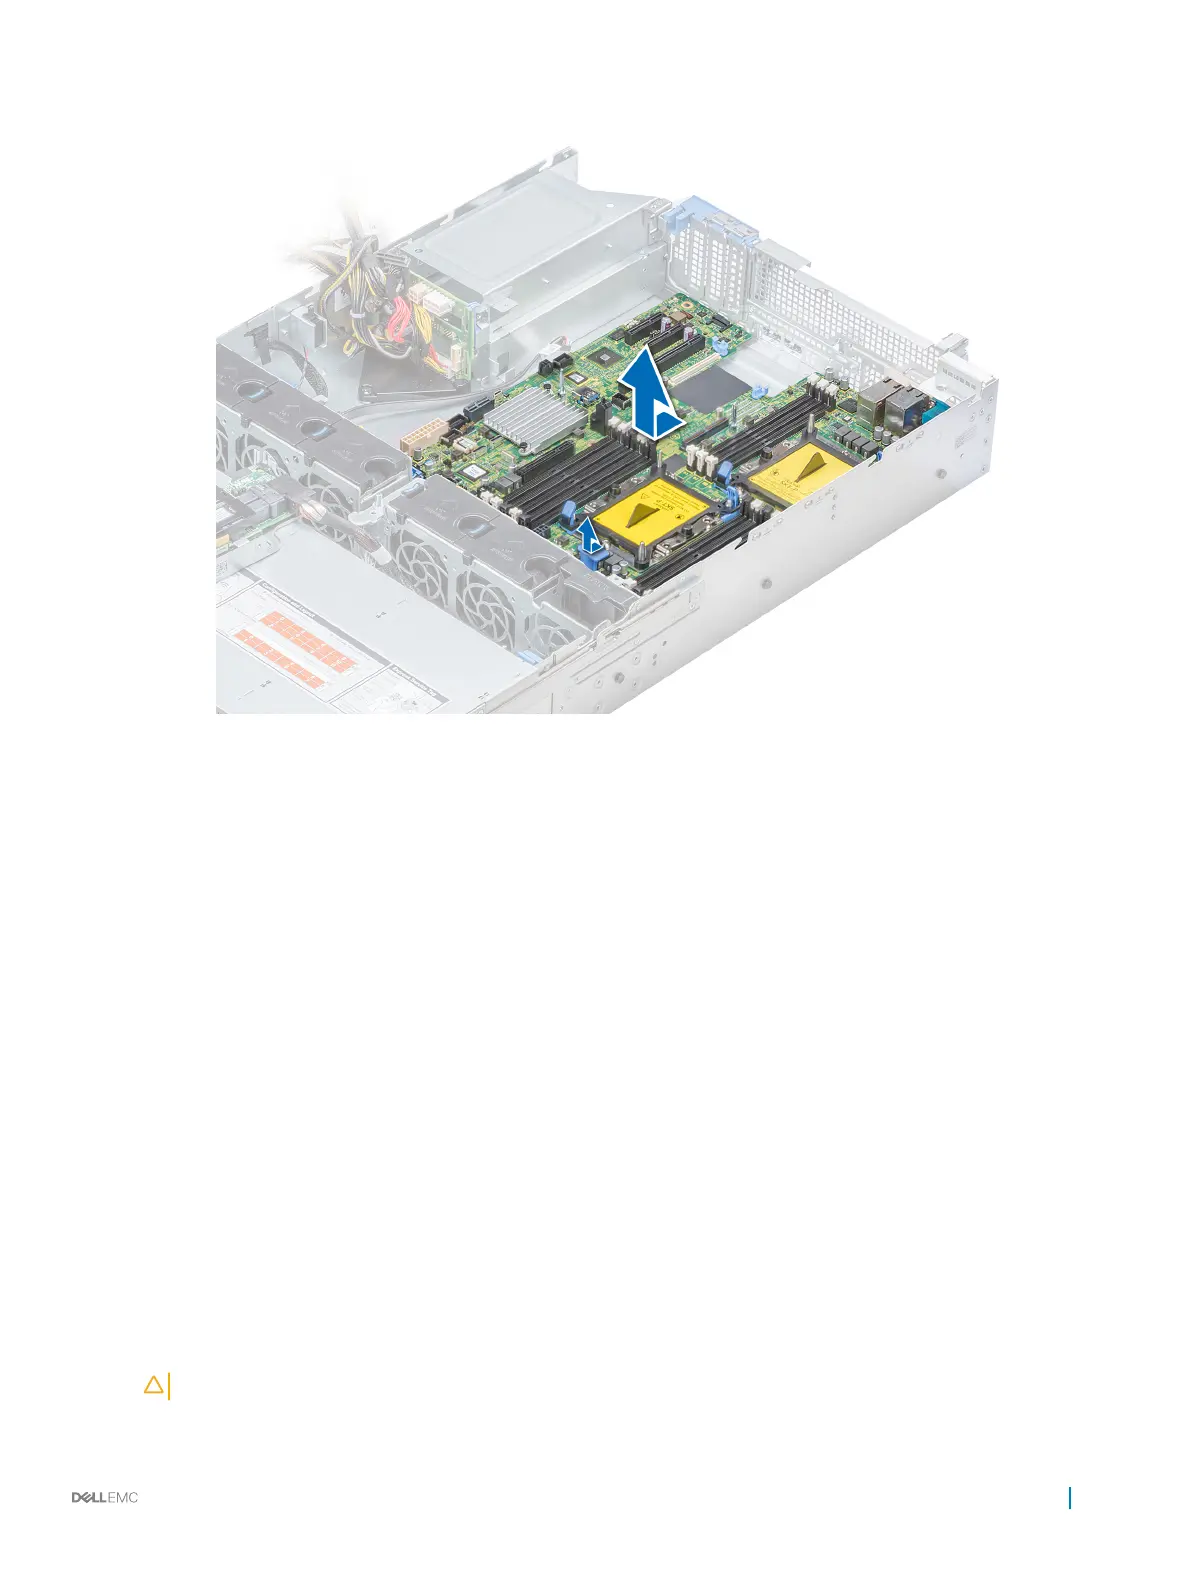
4 Lift the system board out of the chassis.
Figure 119. Removing the system board
Next step
Install the system board.
Related link
Removing the air shroud
Removing expansion card from the system board
Removing an expansion card riser
Removing internal PERC riser
Removing the MicroSD card
Removing the optional IDSDM or vFlash card
Removing a processor and heat sink module
Removing a memory module
Removing the LOM riser card
Removing the rear drive cage
Installing the system board
Installing the system board
Prerequisite
Follow the safety guidelines listed in Safety instructions.
Steps
1 Unpack the new system board assembly.
CAUTION
: Do not lift the system board by holding a memory module, processor, or other components.
Installing and removing system components 165

 Loading...


