After working inside your system
Prerequisites
Follow the safety guidelines listed in Safety instructions.
Steps
Reconnect the peripherals and connect the system to the electrical outlet, and then power on the system.
Recommended tools
You may need some or all of the following tools to perform the removal and installation procedures:
● Phillips 1 screwdriver
● Phillips 2 screwdriver
● Torx T30 screwdriver
● 5 mm hex nut screwdriver
● Plastic scribe
● 1/4-inch flat blade screwdriver
● Wrist grounding strap connected to the ground
● ESD mat
● Needle-nose pliers
You need the following tools to assemble the cables for a DC power supply unit:
● AMP 90871-1 hand-crimping tool or equivalent
● Tyco Electronics 58433-3 or equivalent
● Wire-stripper pliers to remove insulation from size 10 AWG solid or stranded, insulated copper wire
NOTE: Use alpha wire part number 3080 or equivalent (65/30 stranding).
C6620 sled
Sled installation guidelines
CAUTION:
Ensure that the chassis does not have a mixed architecture of PowerEdge C6420, PowerEdge C6525
and PowerEdge C6620 sled configurations.
Mixing of sleds are not supported. When chassis or sled mismatch is detected, follow the procedures below:
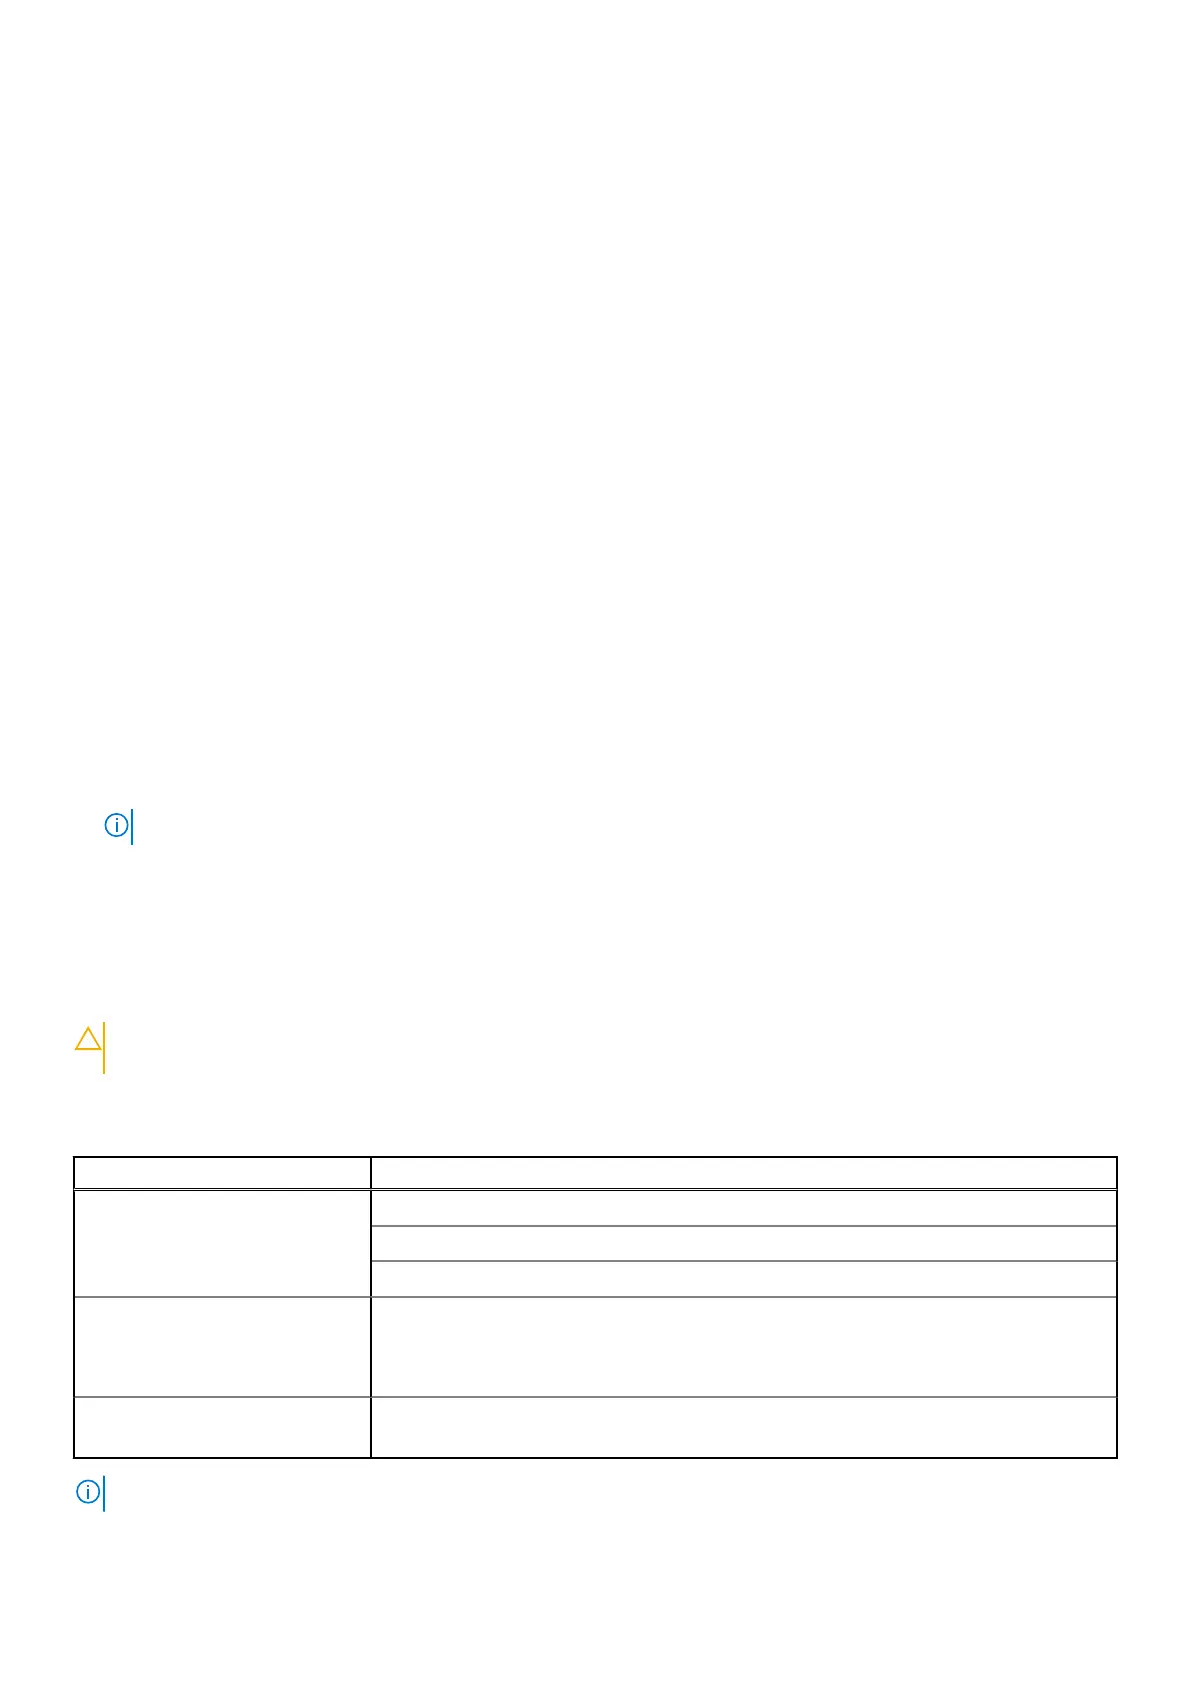
Table 49. Actions taken when chassis or sled mismatch is detected
Indicators and solution Description
Common indications of chassis or
sled mismatch
Status LED Blinking Amber (Status ID LEDs on chassis ears & SLED rear I/O).
System generate SEL log in the mismatched Sled in iDRAC.
Chassis fan runs full speed to maintain sleds operation.
Common indications of chassis or
sled mismatch in BIOS
BIOS blocks booting and shows warning message - "Unable to boot because a mismatch
is detected in node <Node Number> installed in the chassis. The installed node is
<Installed Sled>, but this <Chassis Model> chassis is configured to support 1-4 Nodes
of type <Supported Sled>."
Solution 1. Install same type sleds to the chassis.
2. Set up the correct Sticky Bit in Chassis Manager.
NOTE: Ensure to install a sled blank in all the empty slots. Operating the enclosure without a blank results in overheating.
Installing and removing system components 53