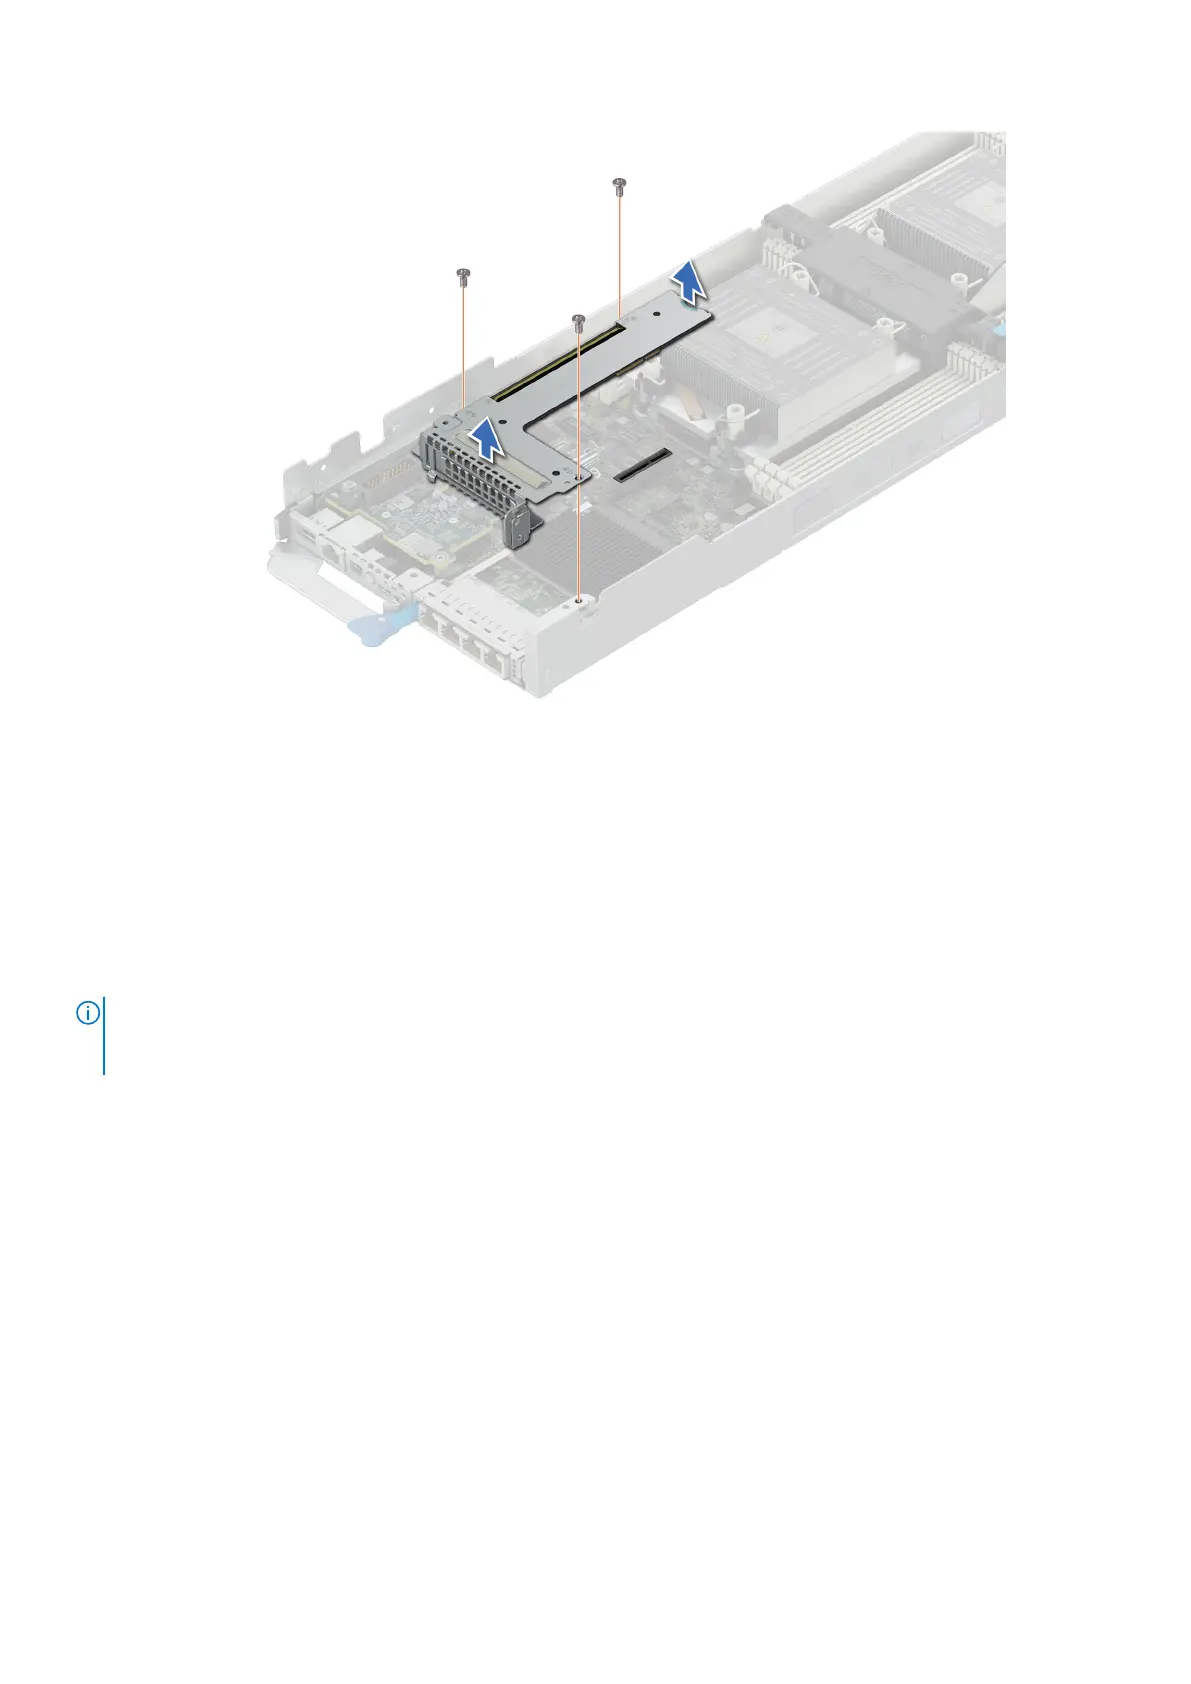
Figure 33. Removing the expansion card riser 2
Next steps
Replace the expansion card riser 2.
Installing the expansion card riser 2
Prerequisites
NOTE:
You must install an expansion card filler bracket over an empty expansion slot to maintain Federal Communications
Commission (FCC) certification of the system. The brackets also keep dust and dirt out of the system and aid in proper
cooling and airflow inside the system.
1. Follow the safety guidelines listed in Safety instructions.
2. Follow the procedure listed in Before working inside your system.
Steps
1. Align the screw holes on the riser with the screw holes on the chassis.
2. Lower the riser card firmly until the riser card is fully seated in the slot.
3. Using a Phillips 1 screwdriver, tighten the screws that secure the expansion card riser 2 on to the system board.
64
Installing and removing system components