28
CHANGING THE SAW BLADE
1. MAKECERTAIN THEMACHINE IS DISCONNECTED FROMTHEPOWERSOURCE.
2. NOTE: Two 7/8†wrenches are supplied with the saw for changing the saw blade: a box end
wrench (A) Fig. 69, and open end wrench (B). Use only 10† saw blades with 5/8† arbor holes and
rated for 3000 RPM or higher.
3. Remove table insert (C) Fig. 69, and raise saw blade to it s maximum height.
4. Place the open end wrench (B) Fig. 70, on the flat s of the saw arbor to keep the arbor from
turning, and using wrench (A), turn the arbor nut toward the front of the saw. Remove arbor nut,
blade flange, and saw blade.
5. Assemble the new blade, making certain the teeth point down at the front of the saw table,
and assemble outside blade flange and arbor nut. W ith wrench (B) Fig. 70, on the flat s of the arbor
to keep it from turning, tighten arbor nut by turning wrench (A) counterclockwise.
6. Replace table insert.
Fig. 87
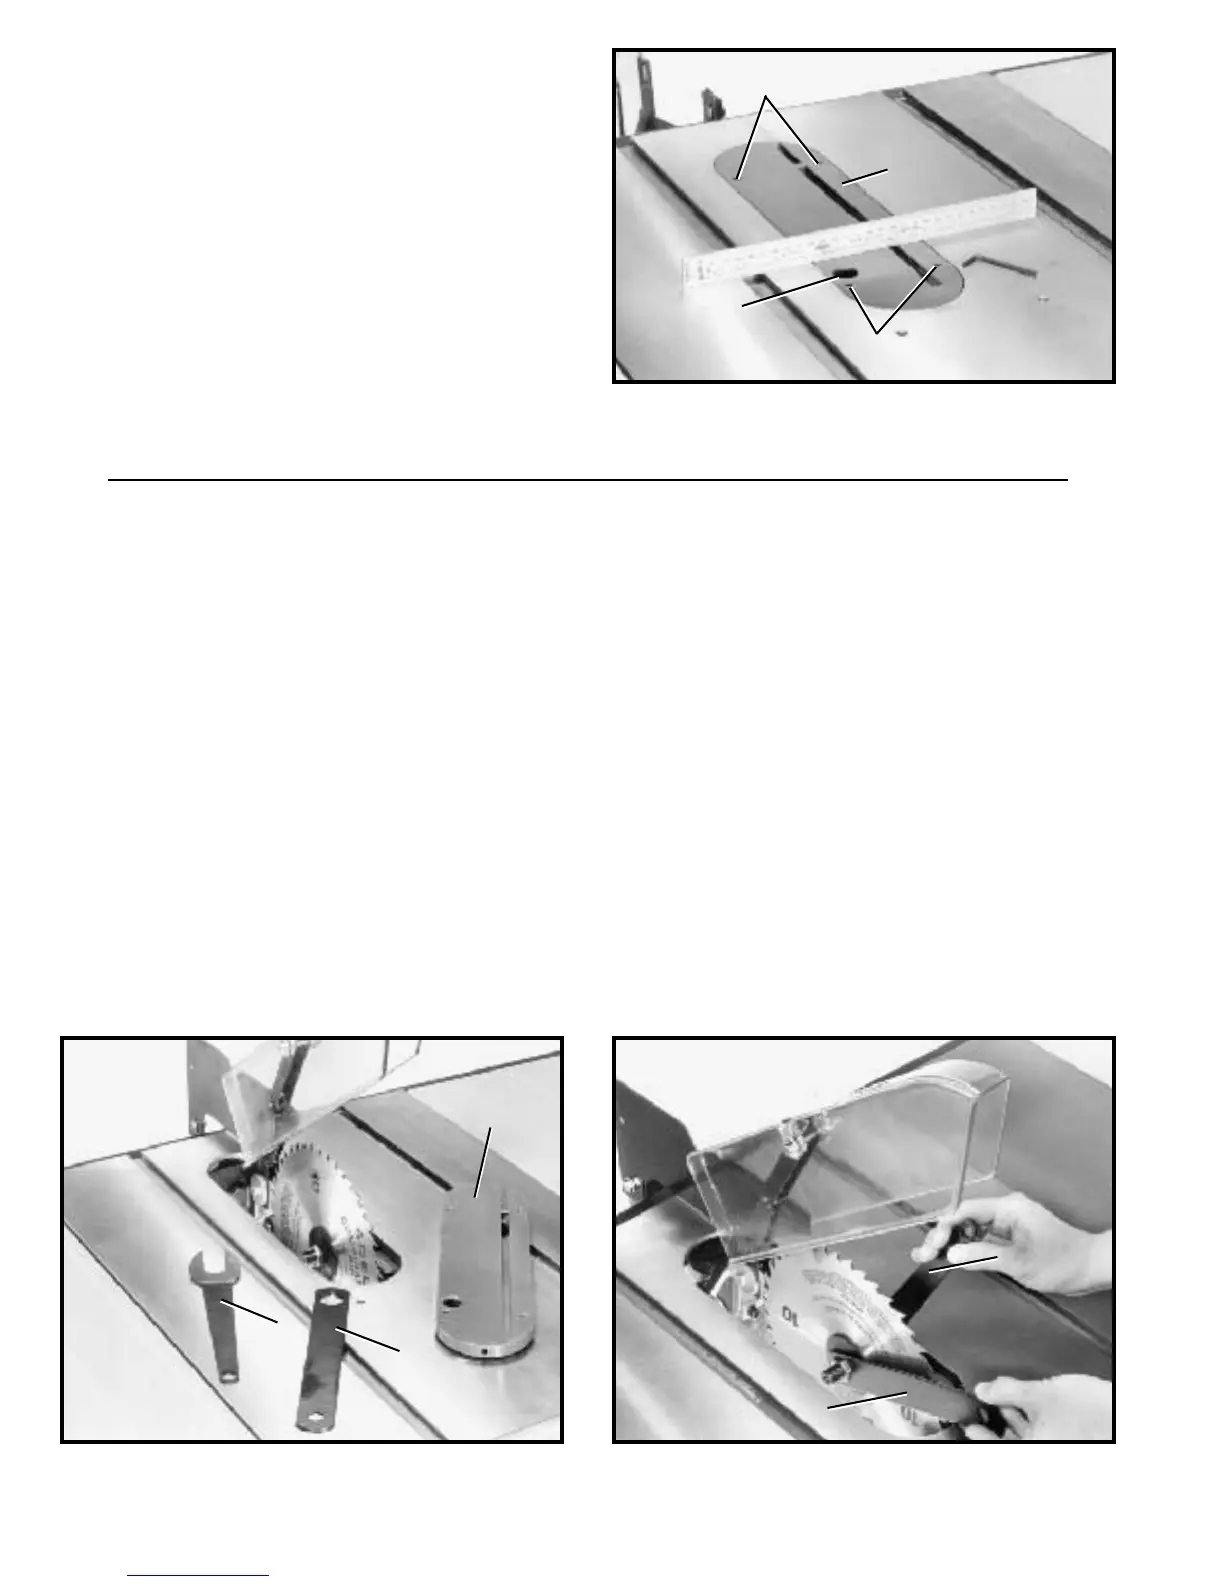
ADJUSTING TABLE INSERT
MAKECERTAIN THE MACHINE IS DISCONNECTED
FROMTHEPOWERSOURCE.
Place a straight edge across the table at both ends of the
table insert as shown in Fig. 87. The table insert (A)
should always be level with the t able. If an adjustment is
necessary, turn the adjusting screws (B), as needed.
Four adjusting screws (B) are supplied in the t able insert.
The t able insert is equipped with a convenient finger hole
(C) for easy removal.
B
A
C
B
Fig. 88 Fig. 89
C
A
B
B
A