11
Easy Setup and Operation Easy Setup and Operation
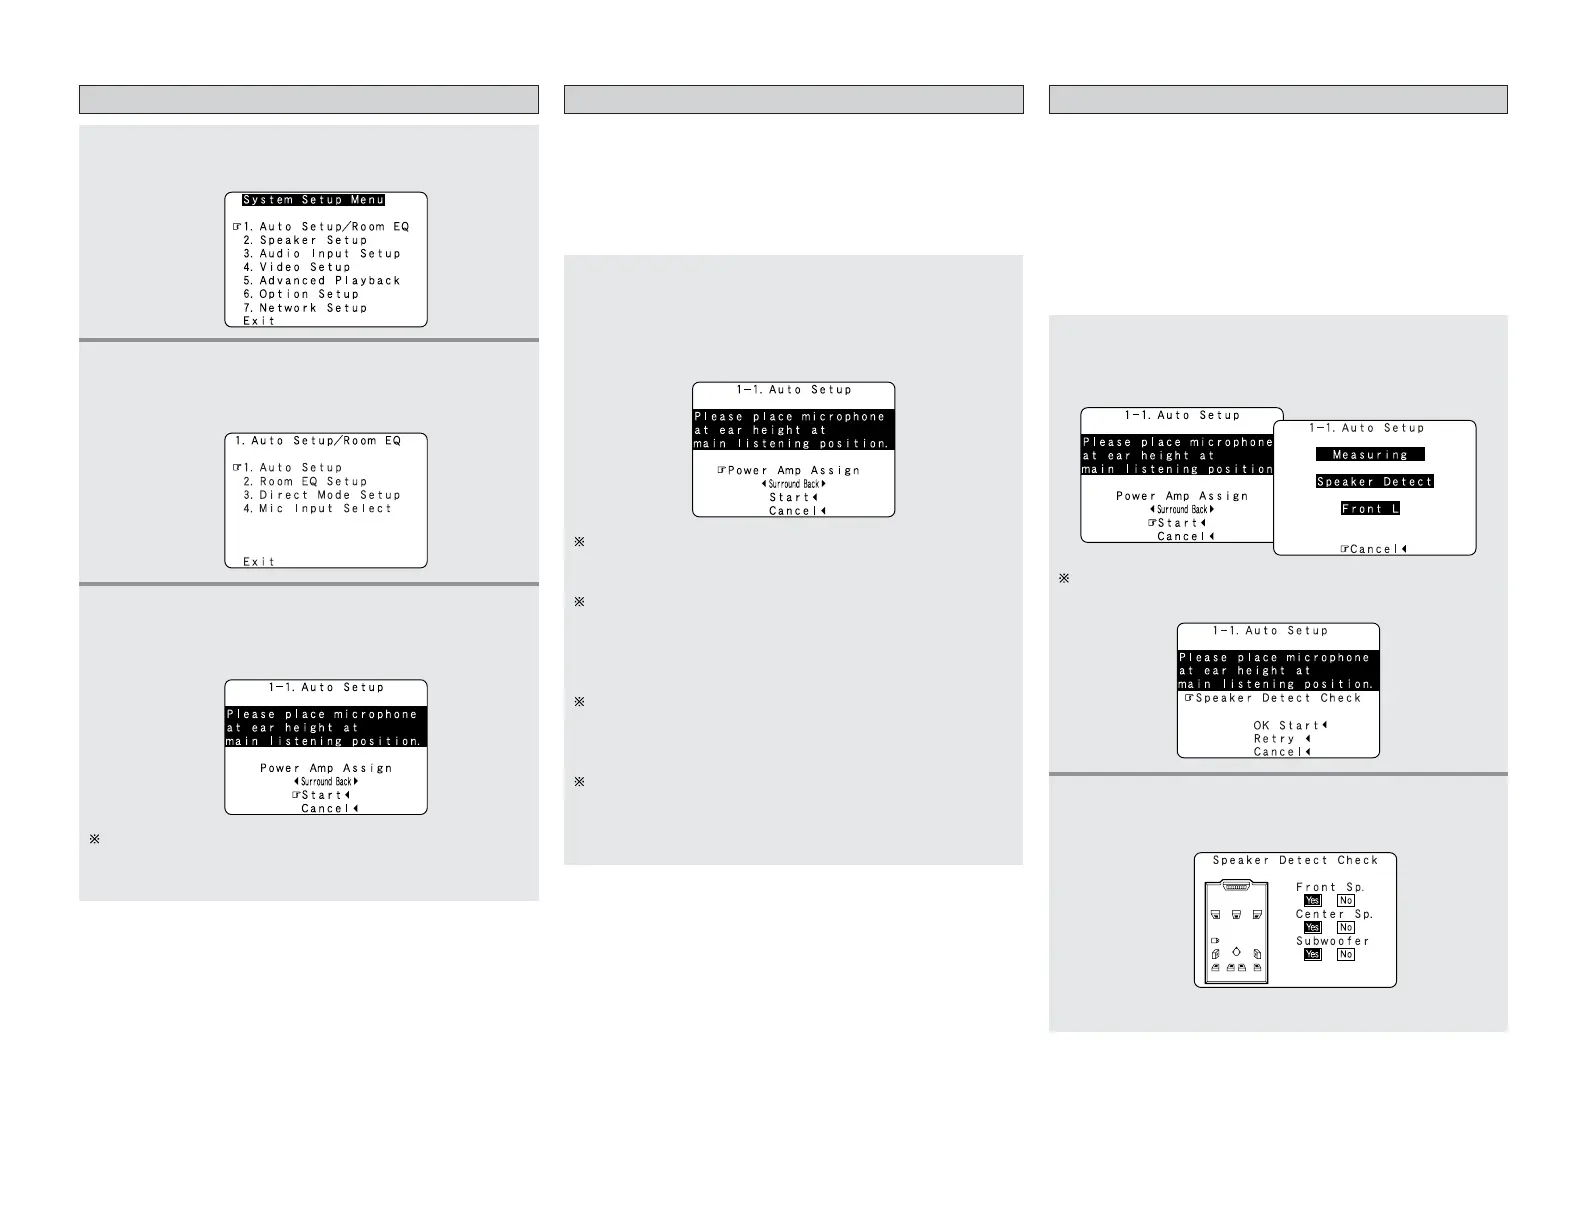
Starting Auto Setup Power Amp Assign
2
Press the CURSOR
DD
or
HH
button to select “Auto
Setup / Room EQ”, then press the ENTER button.
• The “Auto Setup / Room EQ” menu screen appears.
Press the CURSOR
DD
or
HH
button to select “Power
Amp Assign”, then press the CURSOR
FF
or
GG
button
to select “Surround Back”, “Front”, “Front B”,
“ZONE2” or “ZONE3”.
1
Press the SYSTEM SETUP button.
• The “System Setup Menu” appears.
The AVR-4306 has available surround back amplifier channel. If
no surround back speakers are used in the main room, their
amplifier channels can be assigned for multi-zone use or the front
speaker‘s Bi-Amp connection. If this functionality is not needed,
skip this “Power Amp Assign” procedure and proceed to
“Preliminary Measurements”.
The message “Connect Microphone” is displayed if no
microphone is connected. If so, connect the auto setup
microphone.
3
Press the CURSOR
DD
or
HH
button to select “Auto
Setup”, then press the ENTER button.
• The “Auto Setup” screen appears.
When “Surround Back” is selected, the surround back
channel‘s test tone during Auto Setup will be output from
surround back speakers.
When “Front” is selected, change the setting to a Bi-Amp
mode for the front speakers.
The front channel‘s test tone during Auto Setup will be
output from the front speakers and the surround back
speakers.
When “Front B” is selected, change the setting to a second
stereo output mode.
The test tone during Auto Setup will not be output from the
surround back speakers.
When “ZONE2” or “ZONE3” is selected, change the
setting to “ZONE2” or “ZONE3”.
The test tone during Auto Setup it will not be output to
“ZONE2” or “ZONE3” (Another room).
Preliminary measurements
• This procedure is used to automatically determine the
background noise, whether or not speakers are connected, and
the polarities of the connected speakers.
•To avoid affecting the measurements, turn off the air-
conditioner or any other device that makes noise and take the
measurements with the room as quiet as possible.
• The set measures the background noise even when in the
silent state with no test tones being output, so keep as quiet as
possible until the measurements are completed.
2
Press the ENTER button.
•The “Speaker Detect Check” screen appears.
[ First screen ]
1
Press the CURSOR
DD
or
HH
button to select
“Start”, then press the CURSOR
FF
button.
•The preliminary measurements start.
The screen shown at the below appears once the
preliminary measurements are completed.
 Loading...