SERVICE MANUAL
Installation
(Rev. 0) RTG PLUS (120V)
6-7
6.2
6.26.2
6.2
Panoramic version
Panoramic version Panoramic version
Panoramic version -
--
- wall mounted (no legs)
wall mounted (no legs) wall mounted (no legs)
wall mounted (no legs)
After having unpacked the components proceed to assemble in the
following order:
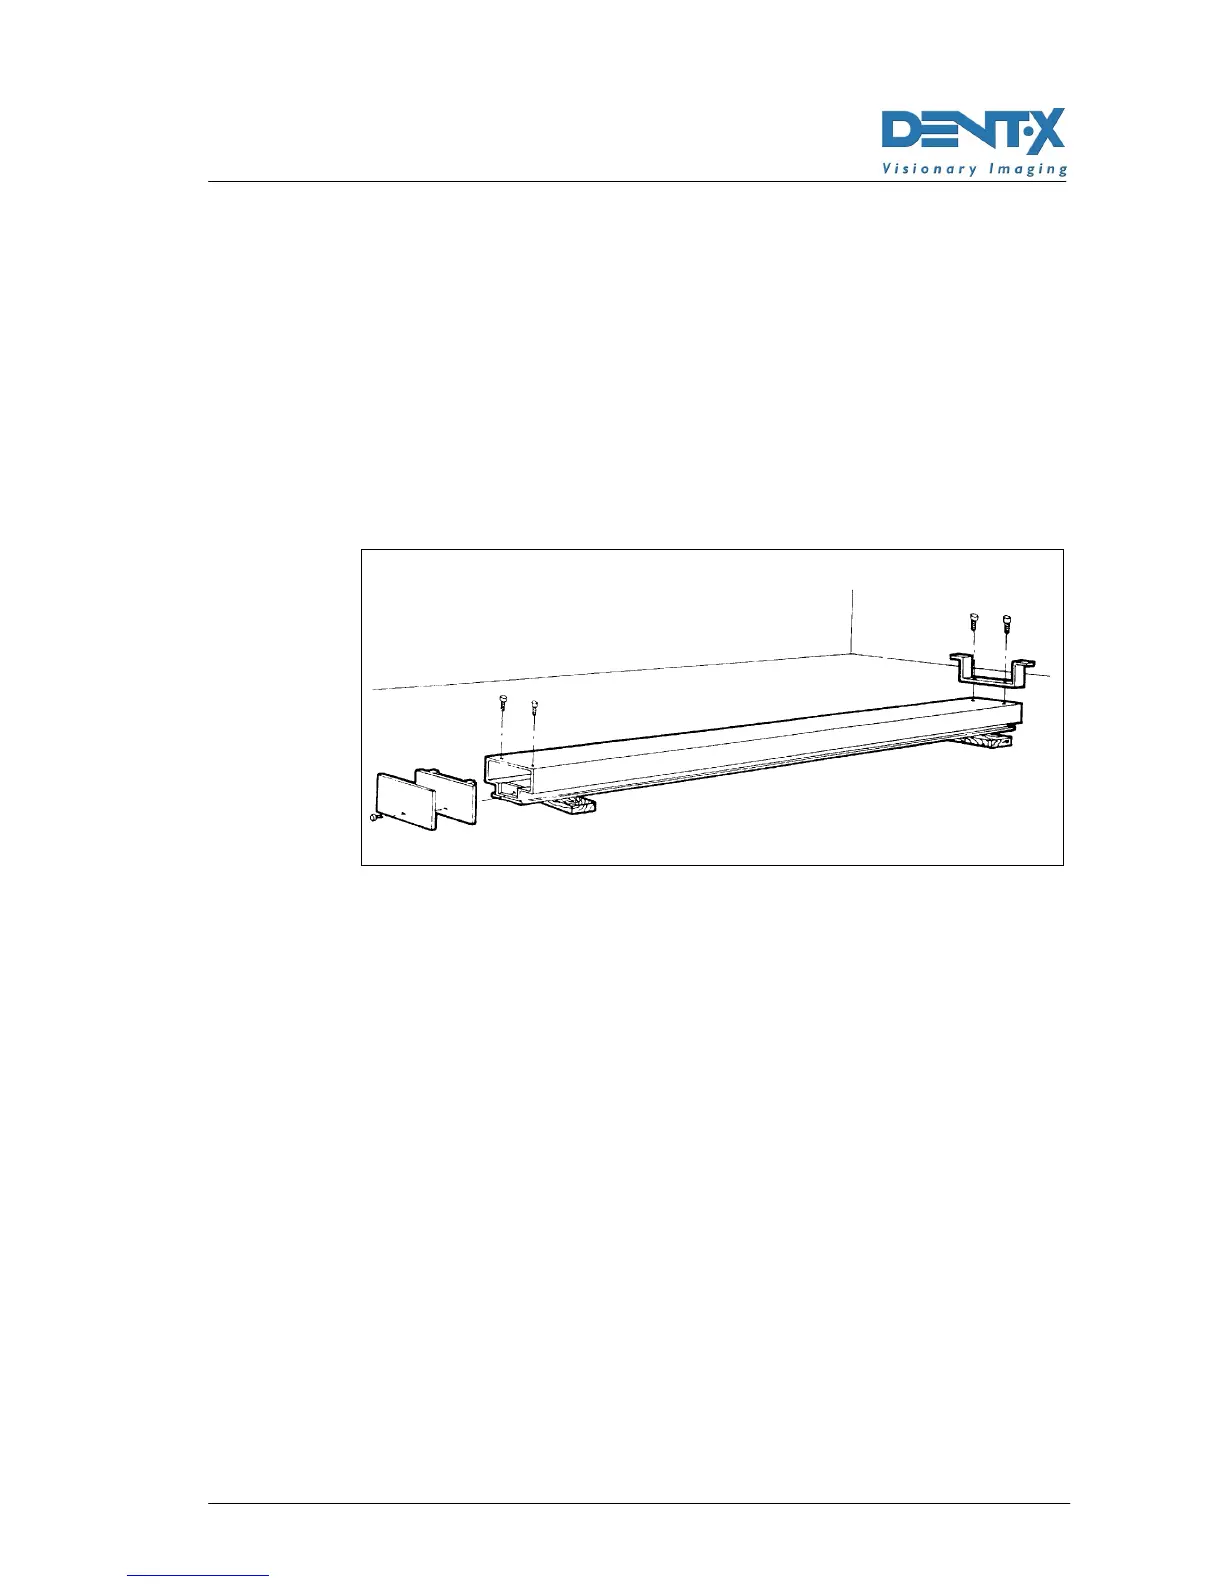
1. Support the column on two wooden blocks with the guide turned
downwards.
2. Assemble the base plate and wall bracket with the appropriate
fastening screws.
Figure 6-10
3. Raise the column, position it in the desired spot, taking the total
overall dimensions into account, and align it by means of a bubble
level.
4. On the wall and floor mark the position of the fastening holes
corresponding to the base plate and wall bracket.