SERVICE MANUAL
Installation
RTG PLUS (120V) (Rev. 0)
6-12
6.4
6.46.4
6.4
Converting from “CEPH” configuration to
Converting from “CEPH” configuration to Converting from “CEPH” configuration to
Converting from “CEPH” configuration to
“Prepared
“Prepared “Prepared
“Prepared for CEPH”
for CEPH”for CEPH”
for CEPH”
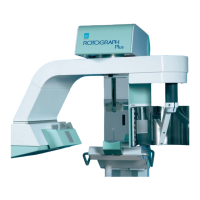
In case you have a ROTOGRAPH PLUS in the “CEPH” configuration, it is
possible to return to the “prepared for CEPH” configuration (without
Ceph arm) by following the next procedure:
NOTE:
Ask for “kit ROTOGRAPH PLUS prepared” cod. 66088425.
1. Disassemble the CEPH arm with its skull-holder and nose-rest
device and the cassette holder support group unscrewing the 4
screws 70 of M8x25 (see previous Figure 6-13).
2. Disconnect the cable coming out of the slip-knot from the ones
coming out of the CEPH arm.
3. Connect the bridge connector provided with the Kit to the one of the
slip-knot.
4. Access the set-up program by pressing the keys 37-34-29 in
succession and change the status of S6 to OFF (refer to paragraph
7.2 for further information on the last step).
NOTE:
The white (3) and green (4) wires carry the signal of switch S14, used to
disengage the brake.
Switch S14, located on the Ceph arm, is serially connected to switch S13
located on the chin rest (). Therefore these wires must be connected in
order to normally and properly operate the unit.
5. The adhesive plate must be glued onto the round cover using the
band to stop the wires coming out of the slip-knot from falling inside
of it.
6. Position the circular plastics protection on the appropriate site.
NOTE:
To change from “prepared for CEPH” to “CEPH” version, follow the
procedure described in paragraph 6.3.
*
*
*