SERVICE MANUAL
Checkout and adjustments
(Rev. 0) RTG PLUS (120V)
7-37
5. If the symmetry verification is not met, before proceeding to the
regulation described here below, verify with the user the symmetry of
the last real panoramic images obtained on the unit and check also
with the user their acceptability.
If the lack of symmetry is considered unacceptable, proceed as
follow.
NOTE:
The following procedure is critical and it is advised to implement it only
when symmetry is very poor.
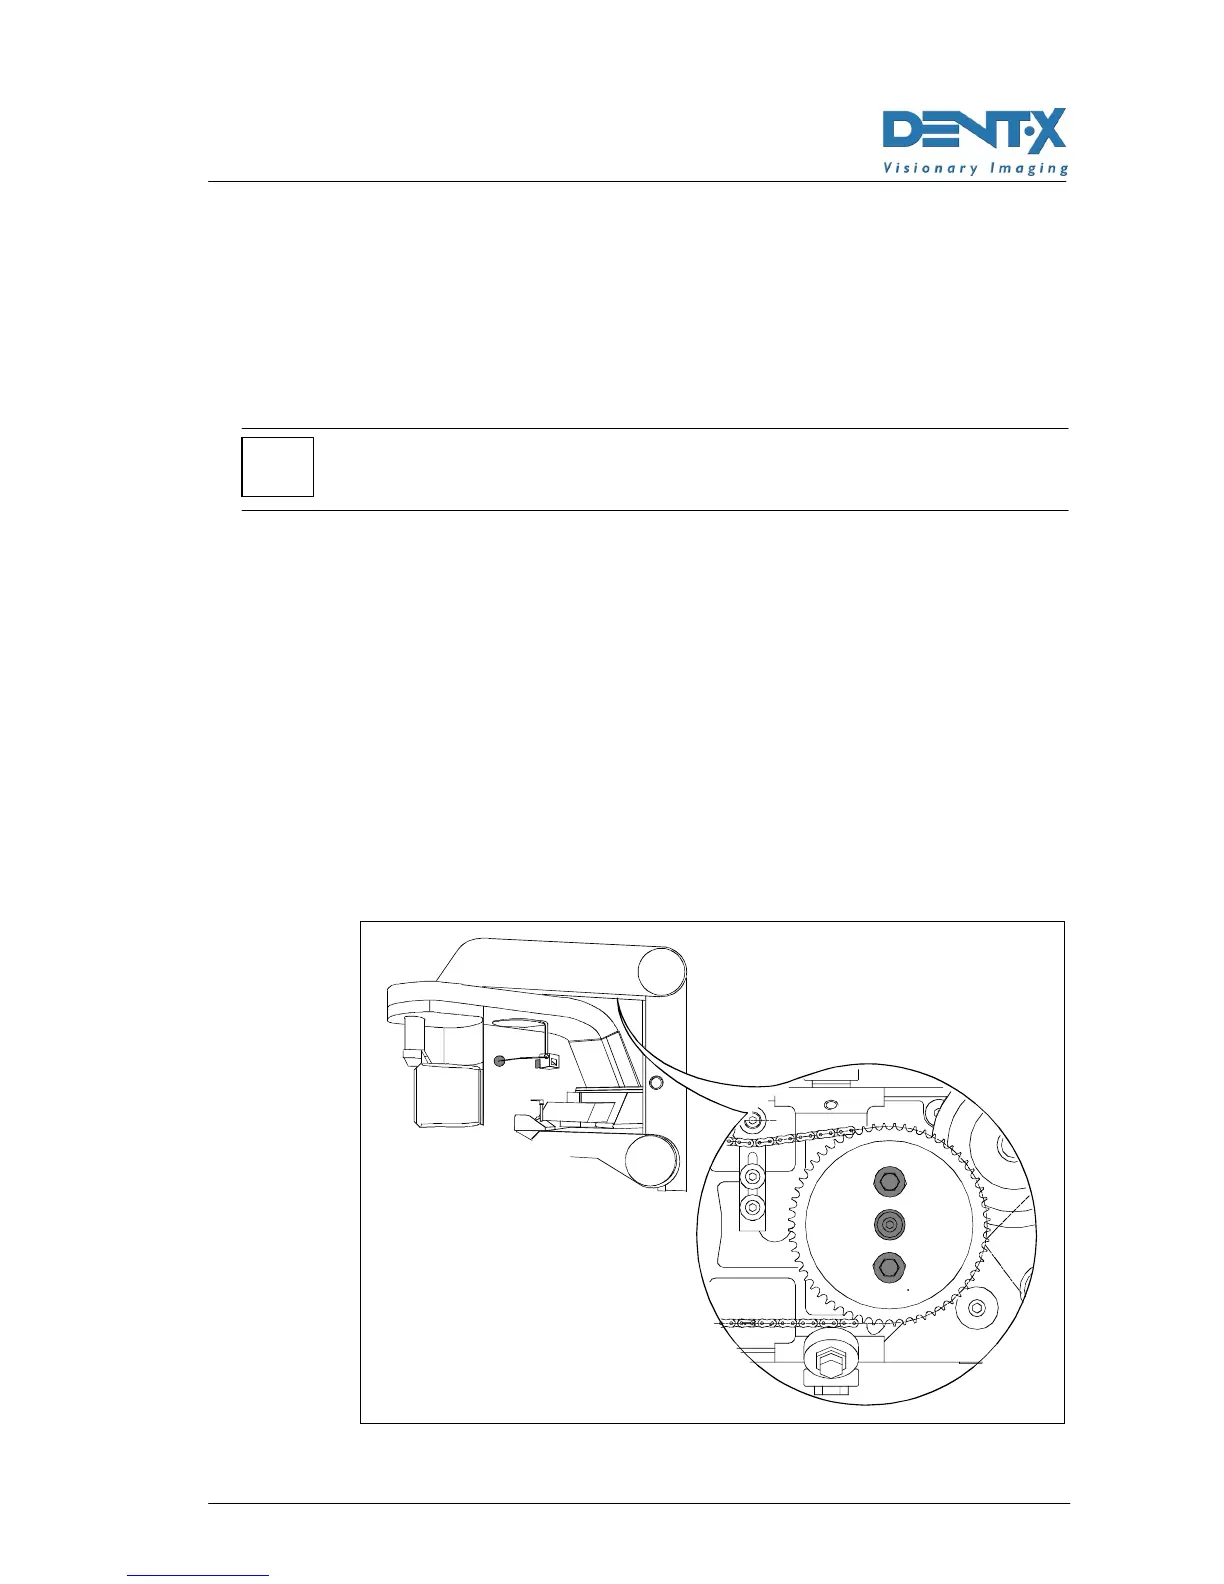
5.1 Remove the lower cover of horizontal arm.
5.2 A toothed gear carrying the chain becomes visible from the low
side of the arm. On the gear there is a central nut and two
nuts placed a 180° at mid radius.
5.3 Release the central nut a little bit; release the other two nuts
and rotate the gear a little bit, taking advantage of the
mechanical play available.
5.4 Tighten the tree nuts and make a new exposure on the
centering tool.
5.5 Compare images to determine if the gear has been rotated in
the right direction and if the amount of rotation is correct.
5.6 This procedure is a trial and error process: repeat steps from
5.3 to 5.5 until the results is optimized.
Figure 7-11
*