Document No. CO 004844K
52
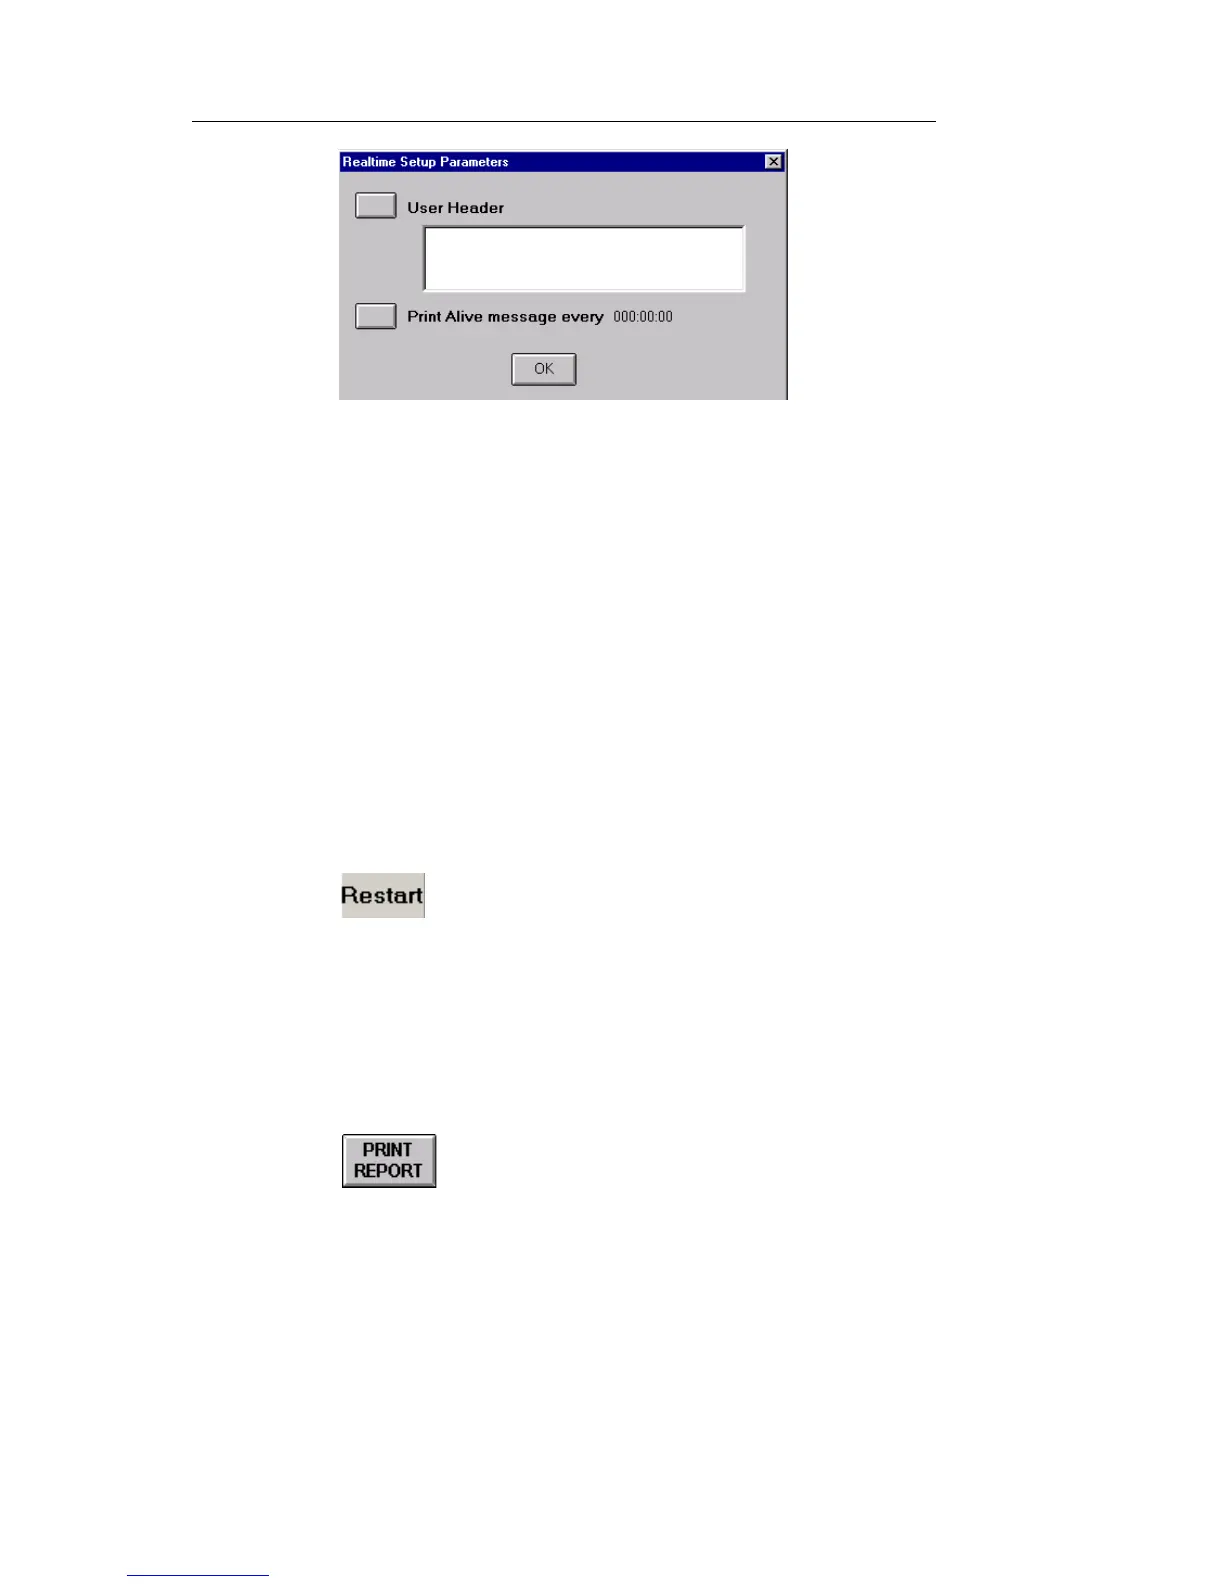
6. Select User Header to enter a user-defined header. The header,
which can be up to 64-bytes in length, serves as a brief description
of the test. After entering a header using the keypad, select Enter.
7. Select Print Alive message. The Enter Duration window appears.
8. Set the time parameter, which determines if and when a Print
Alive message is generated. A value of 0 disables the messaging
function.
9. Select OK. The header name and duration setting appear on the
Realtime Setup Parameters window.
10. Select OK to close the Realtime Setup Parameters window.
11. Select Duration. The Select Duration of Test window appears.
12. Enter how long the test will run.
13. Select to start the real-time test. The Elapsed Time
counter, located in the top right corner, resets to 0.
Printing and Saving Reports
The Print Report button allows you to Print and Save test reports.
1. Select from the Common Function Buttons row at the
bottom of the screen. The Report Setup dialog box appears.
 Loading...