Digital Projection
E-VISION LASER 5000 SERIES USER MANUAL REV A JANUARY 2018
22
ON-SCREEN DISPLAY (OSD) MENU SETTINGS
OSD Menu Controls
The projector has an OSD that lets you make image adjustments and change various settings.
Navigating the OSD
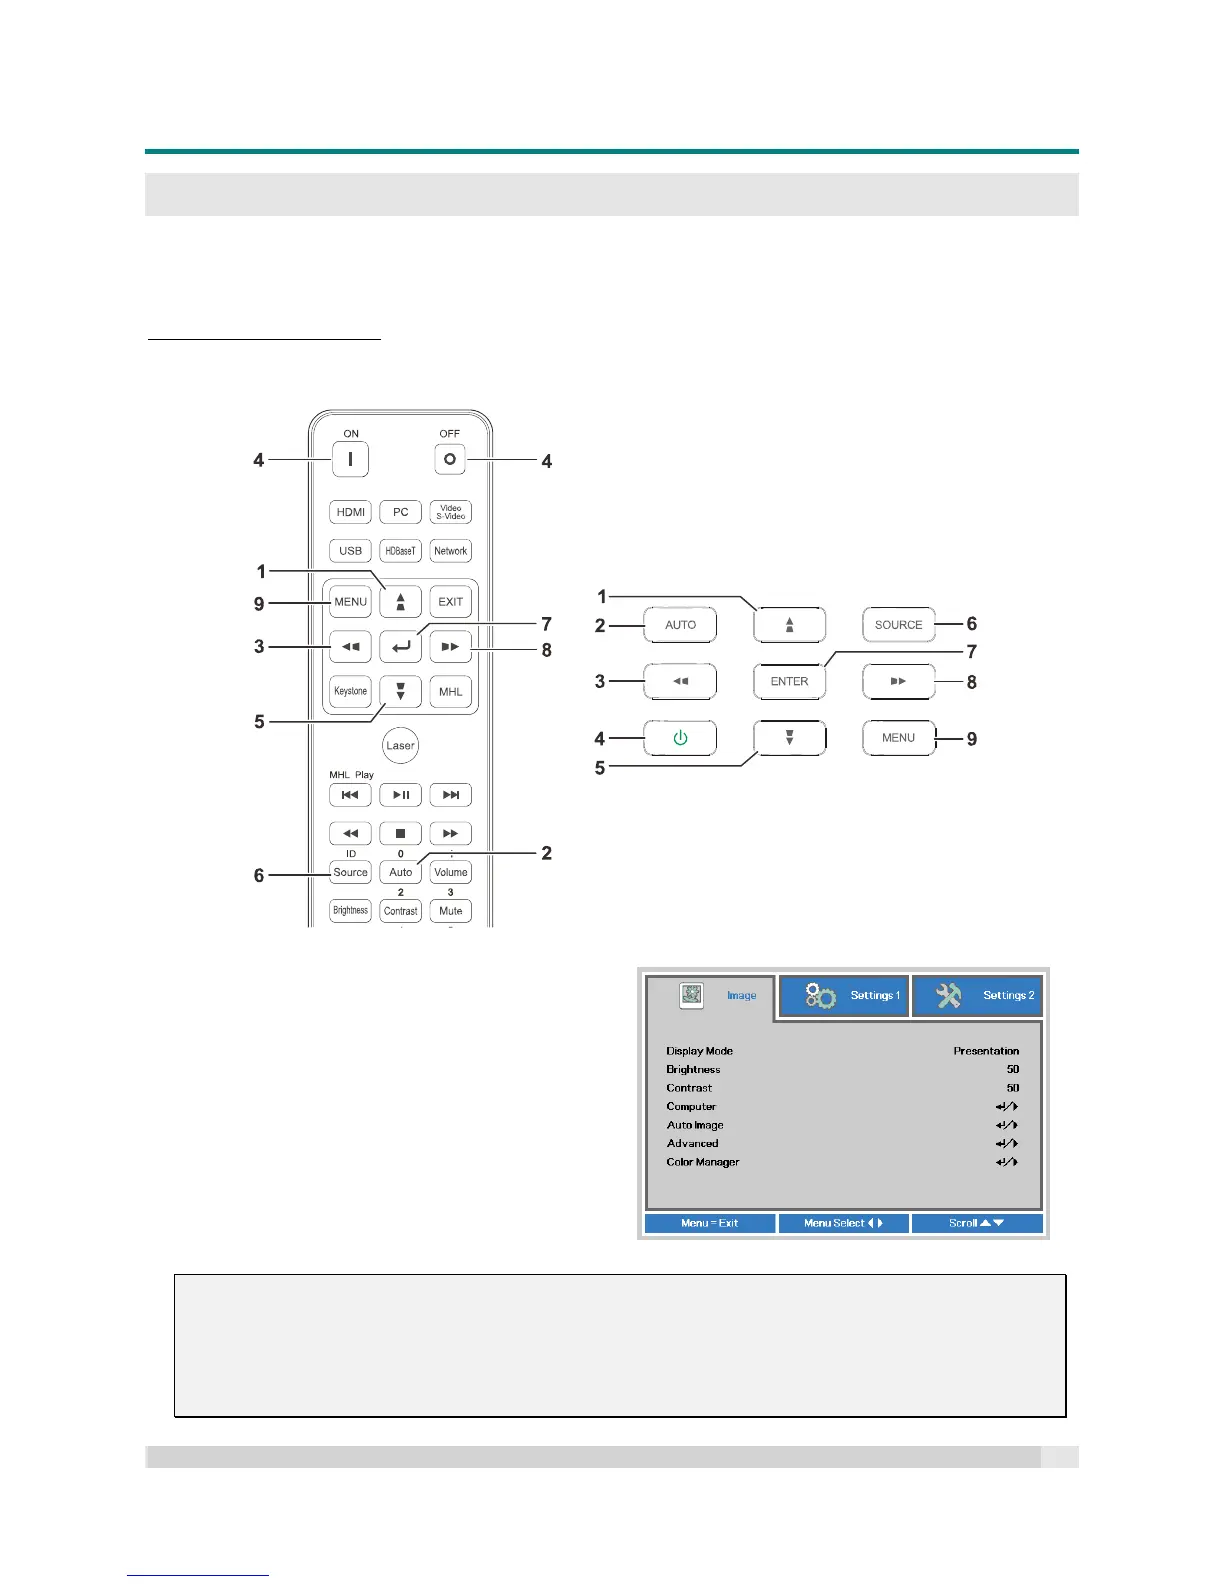
You can use the remote control cursor buttons or the buttons on the projector to navigate and make
changes to the OSD. The following illustration shows the corresponding buttons on the projector.
1. To enter the OSD, press the MENU button.
2. There are three menus. Press the cursor /
buttons to move through the menus.
3. Press the cursor / buttons to move up
and down in a menu.
4. Press the cursor / buttons to change
values for settings.
5. Press the MENU button to close the OSD or
leave a submenu. Press the EXIT button to
return to the previous menu.
Note:
Depending on the video source, not all items in the OSD will be available.
For example, the Horizontal/Vertical Position items in the Computer menu can only be modified
when connected to a PC.
Items that are not available are grayed out and cannot be accessed.

 Loading...


