Digital Projection
E-VISION LASER 5000 SERIES USER MANUAL REV A JANUARY 2018
27
Image Menu
Attention !
Any Display Mode parameters when changed will be saved to user mode.
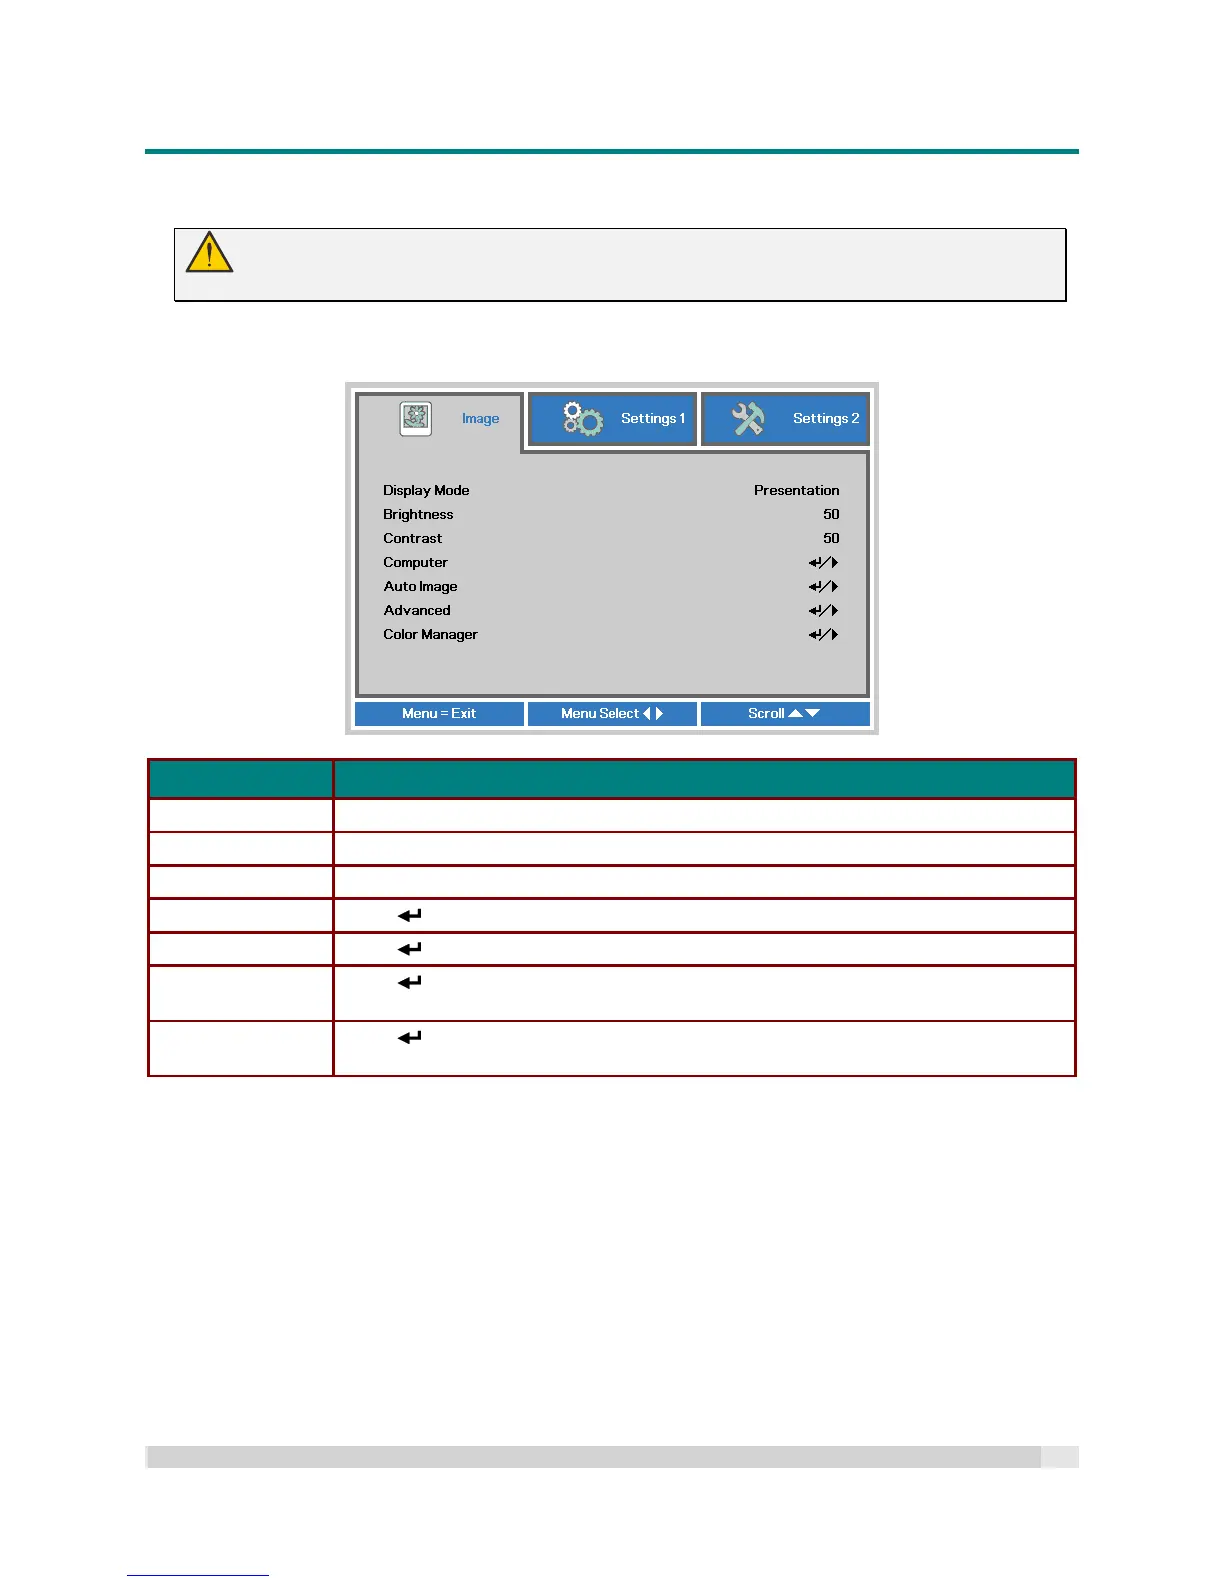
Press the MENU button to open the OSD menu. Press the cursor button to move to the Image Menu.
Press the cursor button to move up and down in the Image menu. Press to enter and change
values for settings.
ITEM DESCRIPTION
Display Mode Press the cursor button to enter and set the Display Mode.
Brightness Press the cursor button to enter and adjust the display brightness.
Contrast Press the cursor button to enter and adjust the display contrast.
Computer Press (Enter) / to enter the Computer menu. See Computer Menu on page 28.
Auto Image Press (Enter) / to automatically adjust for phase, tracking, size and position.
Advanced
Press (Enter) / to enter the Advanced menu. See Advanced Feature on page
29.
Color Manager
Press (Enter) / to enter the Color Manager menu. See page 31 for more
information on Color Manager

 Loading...


