5
EVENT
MESSAGES
SYSTEM AREA
EVENT MESSAGES
Event messages are two custom messages programmed by the installer. These messages will be
displayed on the keypad when the user fails to arm or an alarm occurs while the system was
armed.
A cursor will appear under the first character of the label. The cursor can be moved to left or right
using the [<][>] keys. The letters of the alphabet have been divided up among the 1-9 number
keys on the keypad.
[1] = A, B, C, 1 [2] = D, E, F, 2 [3] = G, H, I, 3 [4] = J, K, L, 4 [5] = M, N, O, 5
[6] = P, Q, R, 6 [7] = S, T, U, 7 [8] = V, W, X, 8 [9] = Y, Z, 9, 0 [0] = Space
For example, if you press the [4] key, the letter ‘J’ will appear above the cursor on the display.
Press the [4] key again, the letter ‘K’ will appear above the cursor. Press the [4] key a third time
and the letter ‘L’ will appear above the cursor. Press it again and the number ‘4’ will appear on
the display. If a different key is pressed, for example the [6] key, the cursor will automatically
move to the right one space, and the letter ‘P’ will be displayed. To erase a character, move the
cursor under the character using the [<][>] keys, and press the [0] key.
While programming the zone label, press the [Q] key to call up an options menu. To select an
option, either press the corresponding number key, or toggle through the options using the [<][>]
keys and press the [Q] key to select.
[0] Clear Display [1] Clear to End [2] Change Case [3] ASCII Entry (See appendix A)
[4] Save
[0] Clear Display will clear the entire zone label.
[1] Clear to End will clear the display from the character where the cursor was located to the end of
the display.
[2] Change Case will toggle the letter entry between upper case letters (ABC...) and lower case
letters (abc...).
[3] ASCII Entry is for entering uncommon characters. There are 255 characters, but 000 to 031
are not used. Use the [<] [>] keys to toggle through the characters or enter a 3 digit number from
032 to 255. Press the [Q] key to enter the character into the zone label (see Appendix A for the
ASCII characters chart).
[4] Save the label programmed and return to the previous menu.
See [Q][6][Master Code][6] User Functions in the System Manual for enabling these messages
on each partition.
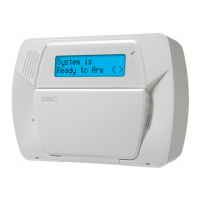
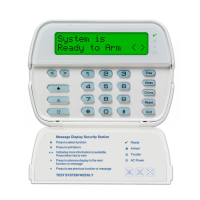
The “System Has Failed To Arm” message will appear on every keypad on a partition when a
valid code is entered but the system is unable to arm because a zone is not secure.
The message will clear after 5 seconds.
This message can be used to remind the user to check all zones and make sure they are secure
before attempting to arm the system.
The “Alarm Occurred While Armed” message appears when a partition is disarmed after an alarm
has occurred. The message will be displayed on all keypads on the partition being disarmed. The
message will clear after 5 seconds and display the zone(s) that went into alarm.
This message can be used to remind the users of what to do in their situation.
The third message is “Fire Alarm !!! 2 Wire Smoke”, this message will only be displayed if the 2
wire smoke detector on the PC4700 fire module goes into alarm.
The fourth message is “Fire Alarm !!! Waterflow Sensor”, this message will be displayed if the
waterflow detector on the PC4700 fire module goes into alarm.
Note: If there is more than one of these fire messages to be displayed at once the messages
will scroll one every three seconds to the next message. Once any fire alarm has been
silenced a message “Fire Bell Has Been Silenced” will be displayed on the partition and
global keypads until the partition is armed.
EVENT MESSAGES
(01)
FAIL TO ARM
(0)
ALARM WHEN ARMED
(1)
SMOKE DETECTOR
(2)
WATERFLOW ZONE
(3)