27
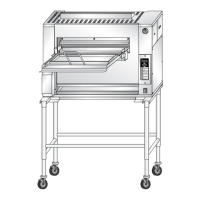
Service Manual for Flexible Batch Broiler Units
TROUBLESHOOTING
The following troubleshooting information includes
checking procedures for various electrical
components in order to help identify faulty
components. The troubleshooting guide below is
designed to identify various symptoms and provide
the suggested remedy.
COMPONENT CHECK PROCEDURES
Checking the Power Switch
The Power Switch has a built-in LED that lights
red when the switch is in the on position. Check
the following before replacing the switch.
• Make sure the power cord is plugged into the
correct receptacle. The broiler operates on
208/240 VAC 60 Hz line current.
• Check the circuit breaker assigned to the
broiler.
• Try a different receptacle before replacing the
switch.
• It’s possible for the LED in the switch to fail.
Turn the switch on and check the Control
Board display. If the display is active, the LED
is burned out, replace the switch.
Checking the Control Board
Under normal conditions, the Control Board
displays the current status of the broiler. It can
be used as a diagnostic tool, when it is working
properly.
Try the following before replacing the Control
Board.
• Cycle the broiler off and on; observe the Control
Board.
• Try running the Control Board through a couple
of different cook cycles.
NOTE: If the Control Board is still not performing
properly, try these procedures:
1. Turn the broiler off.
2. Remove the Control Board.
3. Check each connection on the back of
the Control Board. Make sure they are all
connected correctly.
4. Loosely attach the Control Board, turn the
broiler on. Observe the display and product
key LEDs.
5. Turn the power off and reattach the Control
Board if the problem is solved.
Testing the Temperature Probe
1. Turn the broiler OFF.
2. Remove two screws which secure the Control
Board Bezel, and remove the Control Board.
3. Disconnect the Temperature Probe connector
at the bottom of the Control Board.
4. Use an Ohmmeter to check resistance on
the Temperature Probe. An open or shorted
measurement would indicate a fault.
Checking the Conveyor Drive Motor
The Conveyor Drive Motor is located on the front
of the broiler on the lower discharge side. Before
replacing it, check the Conveyor for jammed meat
product. Next, try turning the Conveyor discharge
shaft with the Multipurpose Broiler Tool. If the
Conveyor does not turn, check the following items:
• Check the Discharge Chute.
• Check the Loader Ramp.
• Check the Ash Scraper.
• Check the Cook Chain (Conveyor).
• Check the Flame Arrestor.