DuraLabel.com | 800.788.5572
8.2 Installing a Driver for the Ethernet Port | 37
&RQÀJXULQJ(WKHUQHW&DUG
The internal Ethernet card can be configured using the front display panel buttons and
LCD on the DuraLabel 9000.
The Menu button on the front display panel will provide access to the printer menu. Use
the UP and DOWN buttons to navigate through the menu. To enter data, use the UP
button to increment the highlighted digit by 1. The DOWN button will shift one over and
highlight the next digit. Pressing SELECT will accept the selection. Pressing MENU will
take you to the previous screen.
8.1 Setting an Ethernet Port using the Diagnostic Tool
Use the following steps to set a port with the diagnostic tool:
A. Open My Computer, then right-click on the DuraLabel 9000 disk icon and select
Open.
B. Double-click on the DiagTool_128.exe to run the tool.
C. Click on Ethernet Setup from the Printer Function buttons on the left side.
D. On the Ethernet Setup window, select DHCP or set a specific Static IP, Subnet
Mask and Gateway. Click Set IP. The printer will restart with the new settings.
8.2 Installing a Driver for the Ethernet Port
Follow these steps to install a driver for use with the Ethernet port:
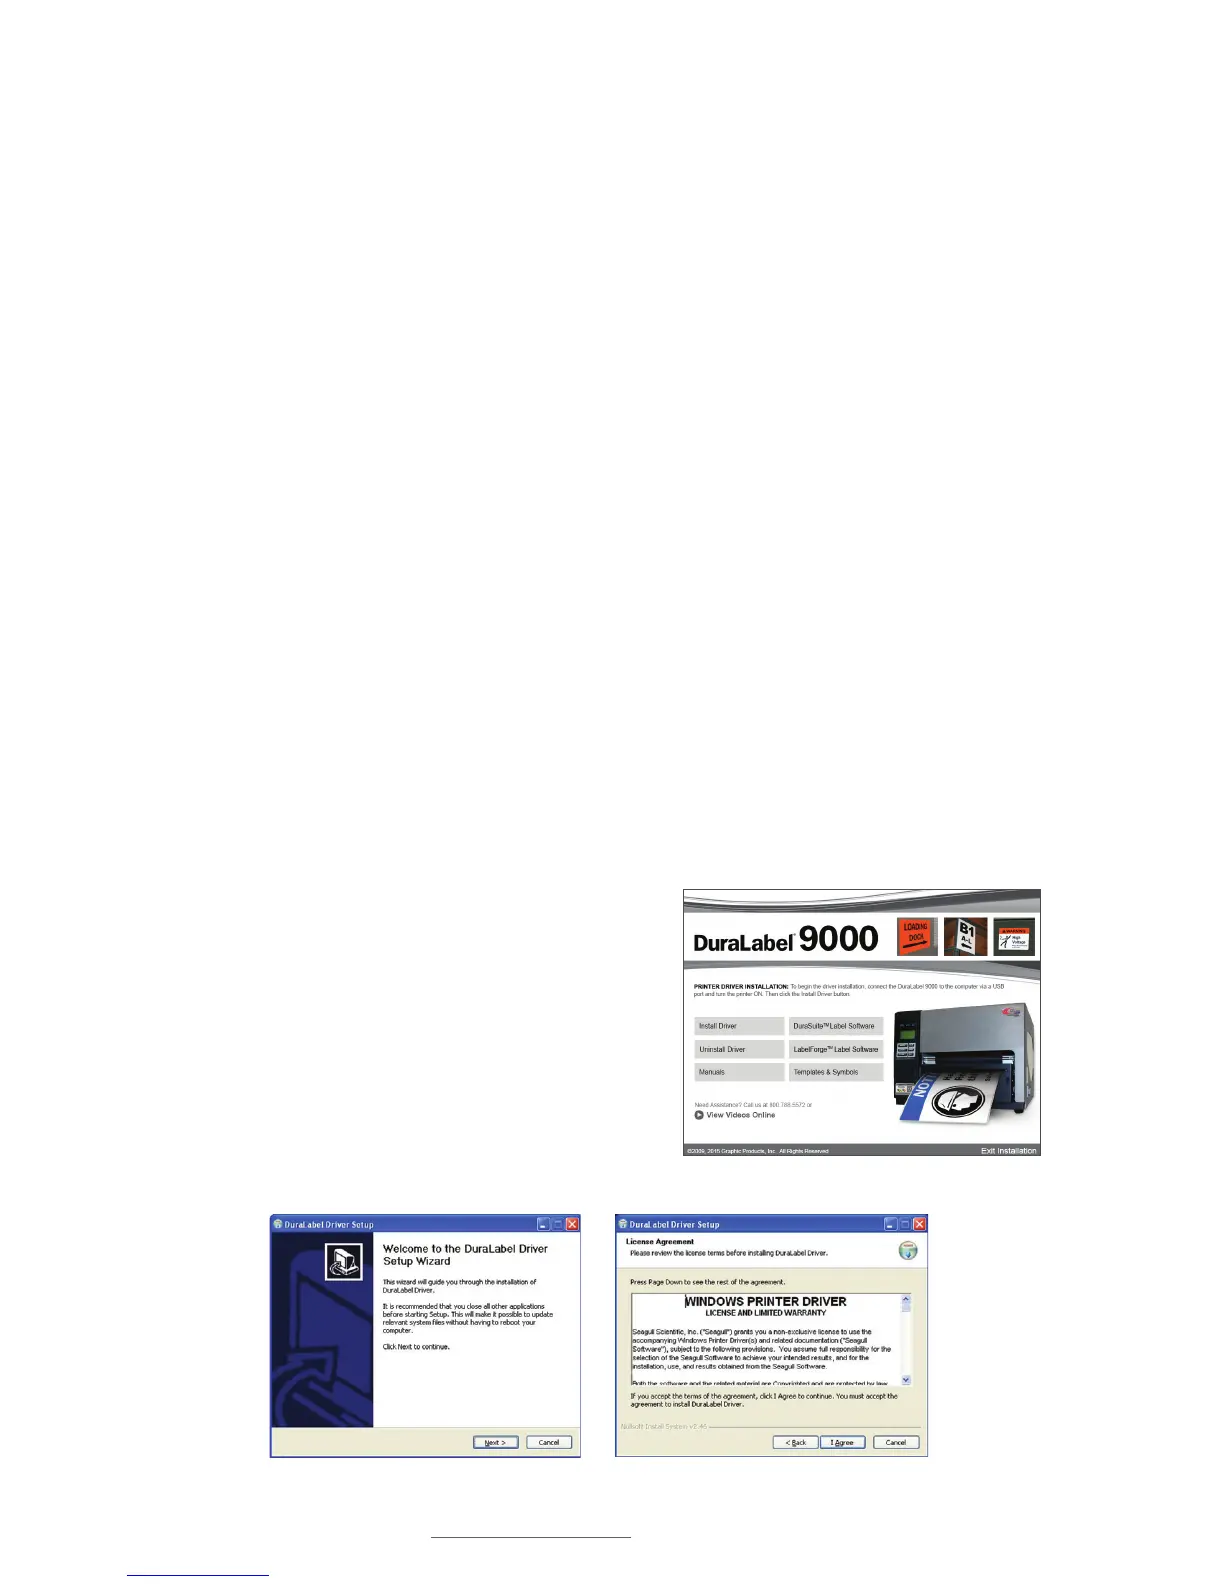
A. Insert the DuraLabel 9000 Installation CD
in your computer’s disk drive. A DuraLabel
9000 startup screen appears.
B. Click on Driver Wizard, then click Next
on the Driver Setup Wizard window that
appears.
C. Click I Agree on the Windows Printer Driver
License Agreement window that appears.
DuraLabel 9000 Startup Screen
Windows Printer Driver License Agreement
DuraLabel Driver Setup Wizard